xTiles

Productivity Planner

Productivity Planner Template

Is productivity something you can plan? Certainly! A productivity plan will help you schedule your work, tasks, meetings, and other activities and keep you motivated throughout a day, week, or month to keep moving forward and put ticks near every point of your plan.

Today, digital planners slowly but steadily win the fight,  and analog ones become rudiments. Productivity planner apps and online productivity planners don’t take up space in your bag, are always with you wherever you go, and are easy to edit and customize. They ensure that important commitments are not overlooked in a more convenient way and allow people to stay informed about their colleagues’ plans and schedules without messaging or conversation.

xTiles Productivity Planner Template will help you stay productive without draining you out. Having a flexible and easy-to-customize productivity planner ensures you can adapt to any changes and unexpected challenges as quickly as possible.

What are Productivity Planners?

Productivity planners are tools or systems designed to help individuals manage their productivity and stay organized while feeling comfortable. They provide a structured way to track schedules, tasks, projects, and goals, allowing users to prioritize and manage their time effectively. 

The productivity planner was invented by Gustav Grossmann in the 1930s. Grossmann claimed that following his instructions for using the planner could lead to increased productivity and a more “logical” lifestyle, and he wasn’t wrong, even though people still continue experimenting with planners and approaches.

Daily productivity planners became a huge thing in the 1980s when ring-binder files with calendars, contacts, task lists, and note pages gained popularity. Since then, the landscape has evolved, and numerous software tools and mobile applications now replicate the functionalities of traditional analog planners, keeping teams and projects synchronized.

In today’s fast-paced and uncertain times, productivity planners have gained significance as they offer a centralized location to consolidate various priorities and responsibilities. With the prevalence of remote work and dispersed teams, keeping track of project progress and meeting schedules can be challenging. Productivity planners provide a solution by enabling individuals and teams to stay organized, focused, and on track.

Why Should You Use a Productivity Planner?

Using a productivity planner, whether we speak about a digital one or an analog one, offers several benefits that may significantly improve your effectiveness and have an overall impact on your well-being. Some of them might not come overnight, which is perfectly okay because productivity planners are supposed to work in the long run.

Here are some compelling reasons to incorporate a productivity planner into your routine:

  1. Effective schedule management: 

A productivity planner allows you to manage your usual schedule more efficiently. It also allows you to adapt to changes quickly and with less resistance. It shortens the amount of time and effort you have to invest in managing it on your own, relying solely on your memory. You can organize and prioritize your appointments, tasks, and deadlines, ensuring you won’t forget any of them.

By having a clear overview of your commitments for the following week or month, you can optimize your time and use each day better. 

  1. Increased Productivity: 

A planner helps you become more productive in performing your usual tasks by providing structure and accountability. And when you manage your everyday tasks better, you get extra space for something you’ve been thinking or dreaming about for a long time. You can stay focused and motivated easier by setting clear goals, breaking them down into actionable tasks, and tracking your progress. 

  1. Sustained Motivation: 

Utilizing a planner helps you establish objectives and stay motivated to achieve them. By visualizing your goals and mapping out the necessary steps, you create a roadmap for success. Additionally, you can employ a rewards system where you treat yourself to something you desire once you reach a milestone or accomplish a significant task.

  1. Better Organization and Memory: 

A productivity planner serves as a central hub for all your important information. You can jot down reminders, capture fleeting thoughts, and record vital notes. This improves your organization and ensures that important details are not forgotten. With everything in one place, you can access information quickly and efficiently.

  1. Reduced Stress and Overwhelm: 

Planning helps alleviate stress and overwhelm. Many people feel pressed because they can’t clearly see what is waiting for them or what they need to do. And if you’re a person who’s too shy to ask for the second time, a thorough productivity plan may be your best support. 

A clear plan of action can mitigate the anxiety caused by uncertainty and chaos. When you know what needs to be done and have a roadmap to follow, you can approach your tasks with greater ease and confidence. When we speak about working on a team, a clear productivity plan allows people, especially newcomers, to be more independent within their new team.

How to Make a Productivity Planner?

Incorporating a productivity planner into your daily routine can unlock your full potential, achieve your goals, and lead a more fulfilling life. However, it’s important to remember that a productivity planner is a tool that works best when tailored to your specific needs and preferences. In other words, an incredible, best-in-the-world productivity plan that helped your colleague or friend to achieve their goals might turn out to be totally useless in your situation. 

That’s why it’s crucial to experiment with different planning techniques at the beginning to find what resonates with you and adapt your planner to suit your unique style.

The xTiles Productivity Plan Template offers a framework for planning your next five weeks. However, you can easily customize it depending on the needed period of time and your visual preferences by adding content and/or embeds. 

Here are a few important details to keep in mind if you want to create the best for your productivity plan:

Set Goals

Goal-setting helps to reflect upon your ideal life. They are the base to build your productivity planner on.

Make your goals or goal an integral part of your productivity planner, and let them guide you toward a more purposeful and productive life. They are waiting for you at the finish line of your productivity planner.

Setting and envisioning your goals is crucial for effective prioritization and achieving a sense of fulfillment. While we may desire to do everything all at once because there’s no time and we need the results yesterday, it’s essential to recognize the importance of prioritizing and dedicating time to the most significant aspects of our lives.

To set your goals successfully and efficiently for your productivity planner, consider including the following steps to guide you through the process of turning your goals into reality:

  1. Establish the importance: 

Clearly articulate why a particular goal is essential to you. Be honest with yourself in answering this question. Understanding the significance behind your goals provides the motivation and drive needed to pursue them with enthusiasm and determination.

  1. Visualize the endpoint: 

Think about what achieving your goal will look and feel like, what outcome it will bring you. Probably, like you’re on the top of the world. Many people believe that visualizing the victory makes our brain think that it has finished and there’s no need to do something anymore, while in reality, it motivates and helps us plan. 

Paint a vivid picture in your mind of the desired outcome. This visualization helps clarify your objective and serves as a constant reminder of what you’re working toward.

  1. Break it down: 

Define actionable and manageable steps that will lead you to accomplish your objective. Once again, be honest with yourself about your abilities and capacities at the moment. Otherwise, you might risk leading yourself to failure and despair because your plan doesn’t work, while it couldn’t work in the first place because it’s too far from the real picture.

Breaking down your goal into smaller, bite-sized tasks makes it more attainable and less overwhelming. Each step completed, even the tiniest one, brings you closer to your desired result.

  1. Identify resources and challenges: 

Determine the resources you’ll need along the way. Compare them with the resources you have and/or can get. By acknowledging potential roadblocks in advance, you can ensure a smoother journey toward your goal.

You may consider using the quadrant view, such as the Eisenhower quadrant or SMART technique, to help you determine and prioritize your goals. They allow you to categorize your goals based on their importance and urgency, enabling you to focus on the most critical tasks first.

Embrace Flexibility

A productivity planner must be flexible to function as you require and help you adapt to changes quickly and effortlessly. On some days, you may only need a weekly overview to be productive, while on others, you may have to manage a million things going on non-stop and at the same moment. In this case, a daily layout to write them all down will be an intelligent solution to rescue you from chaos. If you’re stuck in this situation, you require a weekly and daily layout each week, while the monthly layout serves as a backlog to help you not miss something.

No two days are the sameThe last few years have taught everyone that things may shift quickly and dramatically overnight. Therefore, you require a planner to adapt to your changing needs to maximize productivity and save you from making everything from scratch once you need to edit your schedule.

You can find different categories of planners according to your needs in the xTiles Templates Gallery. It has daily, weekly, and monthly planners that have different features. You may combine a daily planner with a weekly planner to boost your performance, achieve creativity and reduce your stress level. Or you may combine them within one xTiles Productivity Planner Template.

Don’t Overwhelm Yourself

Tracking your time for a week is undeniably the easiest and most effective way to enhance your productivity. Without a clear understanding of how you spend your time, it’s challenging to accurately estimate task durations (which are often longer than anticipated).

Once you have tracked your time, the next step is time blocking, a powerful technique for planning and managing your time effectively. Time blocking involves dividing your day into specific blocks of time and allocating tasks or activities to each block. To begin, determine the optimal duration for your time blocks based on your ability to stay focused.

Once you have established the duration, decide what you will accomplish during each block. By tracking your time, you gain a realistic perspective on what can be achieved within each time block. This approach helps you maintain motivation and focus without becoming overwhelmed. You may highlight your blocks with different colors so it will be easier to recognize them. 

Remember, tracking your time provides invaluable insights into your productivity and allows you to make more informed decisions about allocating your time effectively. When combined with time blocking, it becomes a powerful strategy for optimizing your productivity and achieving your goals.

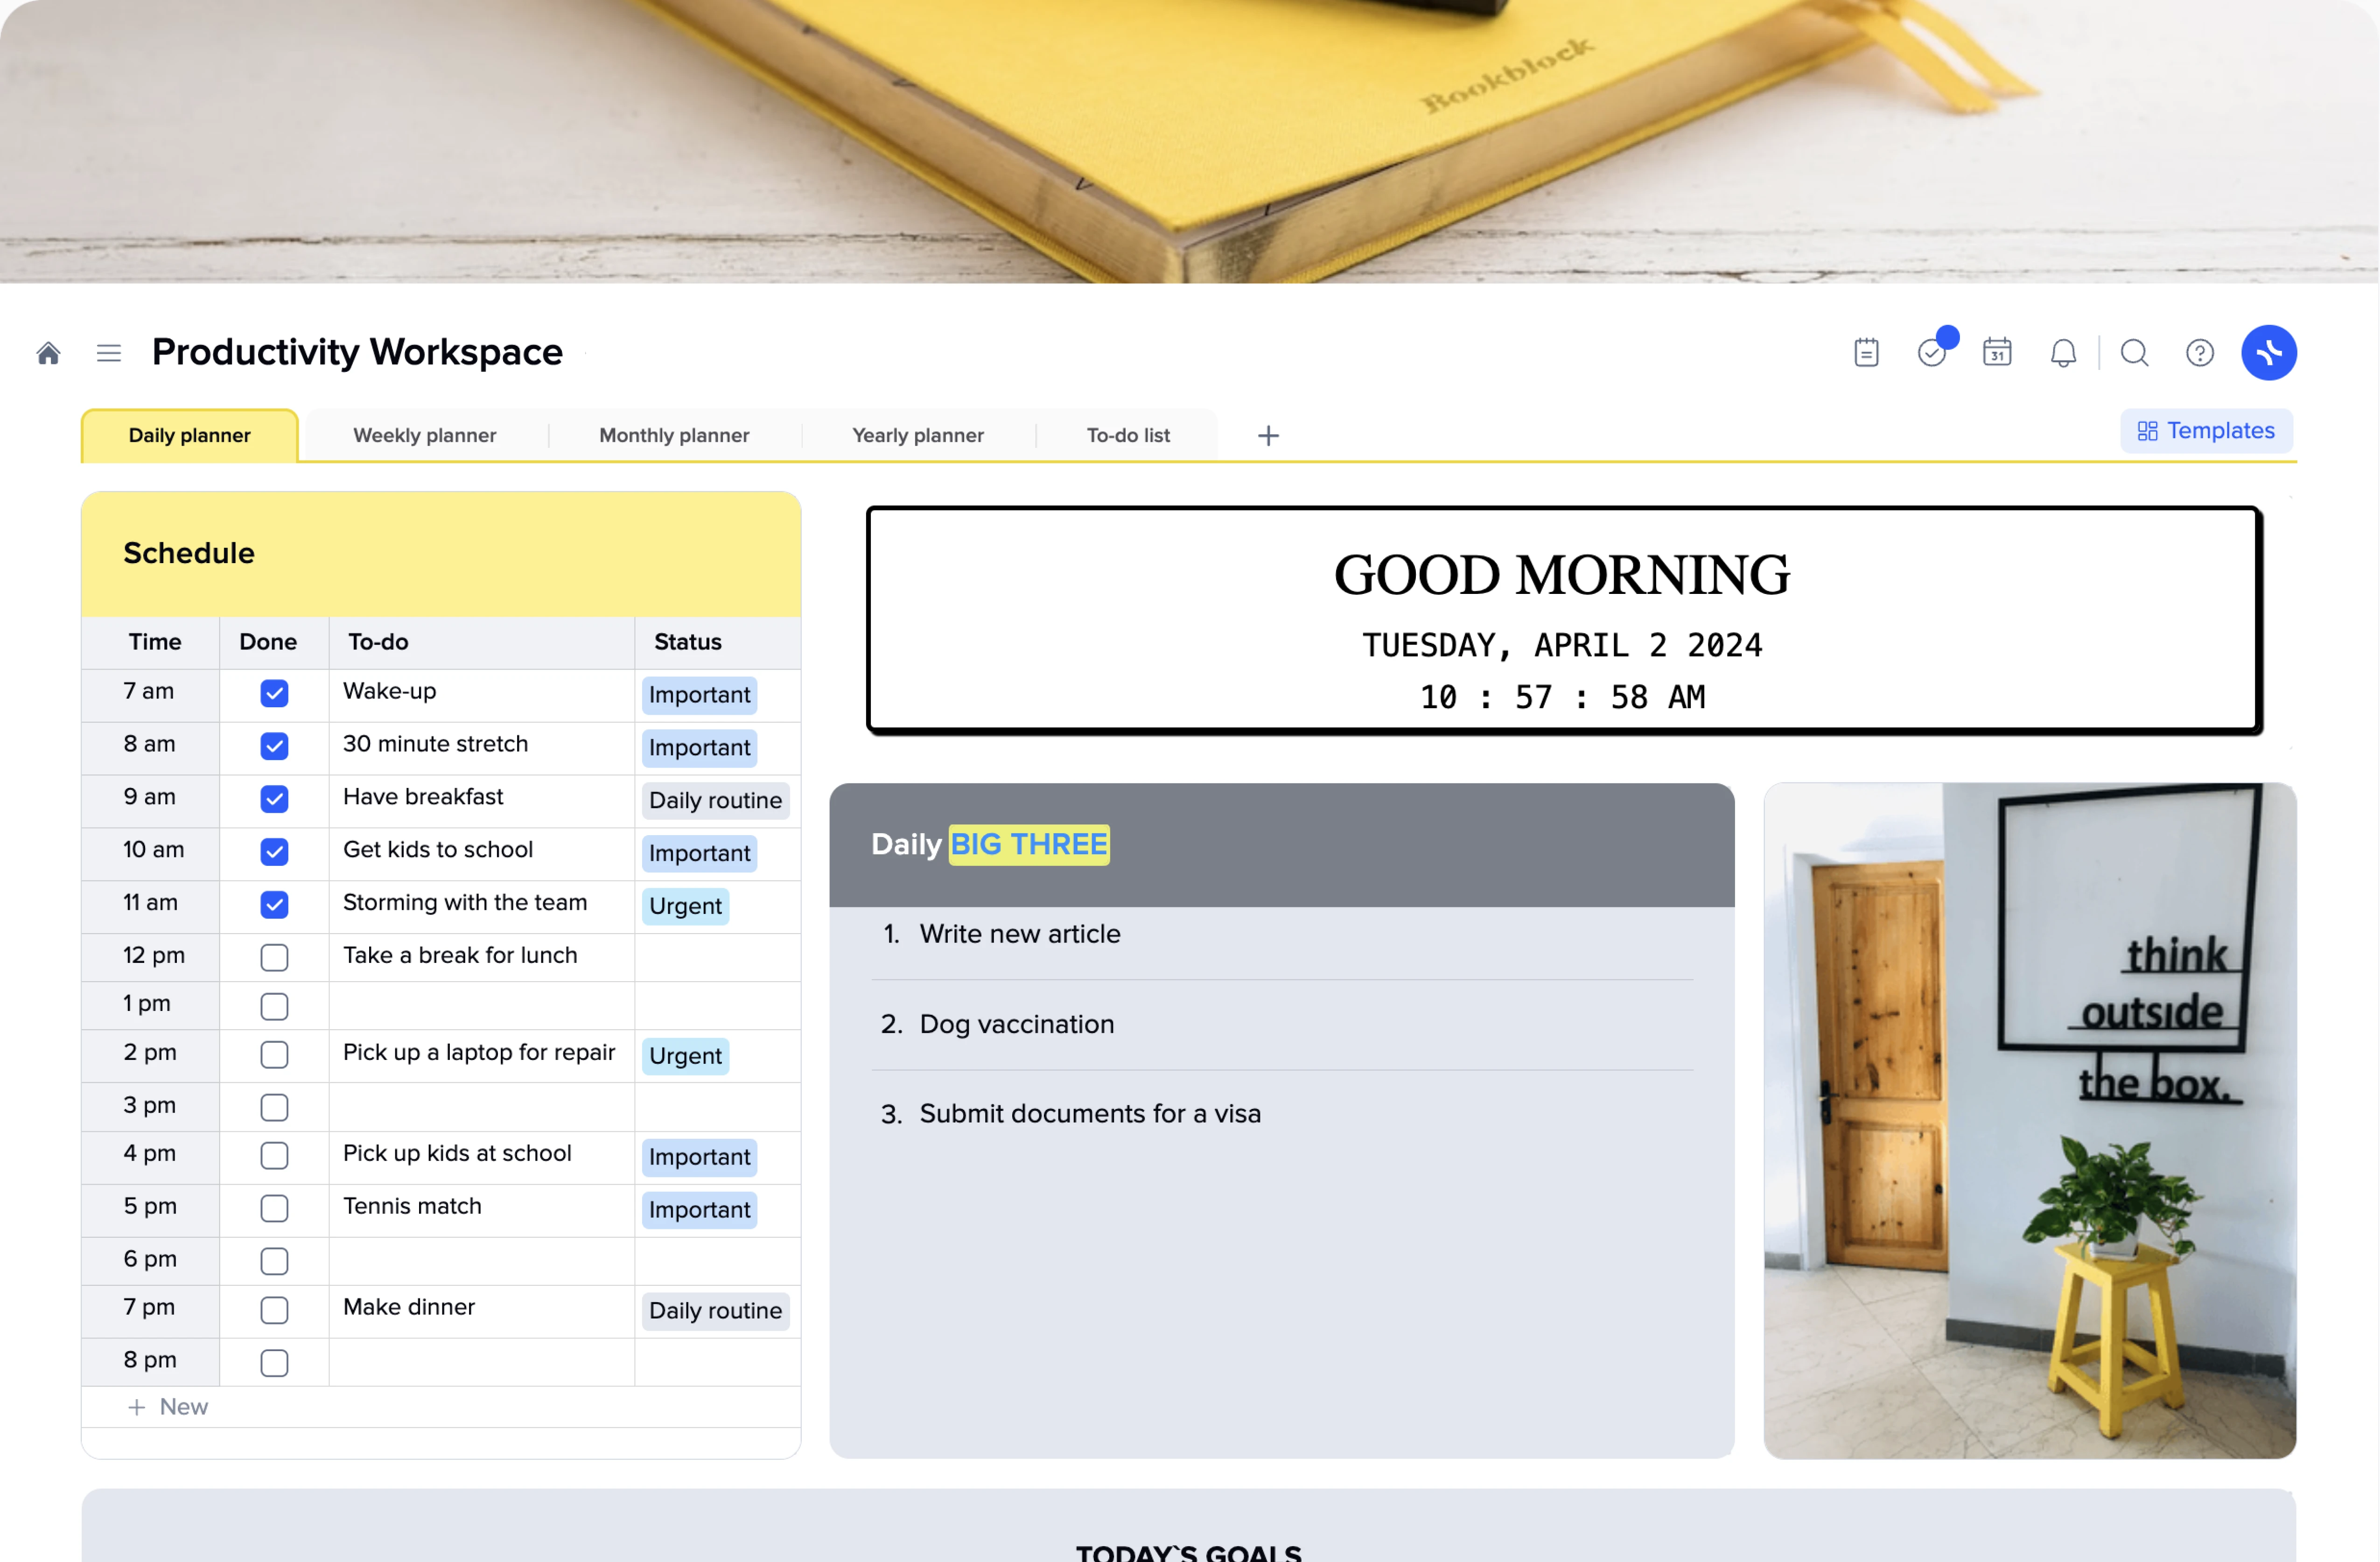
Productivity Workspace

Productivity plan template

Being productive means a lot in today’s world. However, staying continuously productive is more valuable. How can one maintain productivity through a week without heading straight to burnout? A productivity plan can help!

If you start great on Monday and keep showing good results on Tuesday, but after lunch on Wednesday, you barely can understand what you’re doing, then you may need a productivity plan to maintain the same level of productivity throughout weeks, months, and years and grow at the same time.

The xTiles Productivity Plan Template is a convenient and easy framework to help you to create an effective productivity plan and put your knowledge into action. Additionally, it’s easily customizable, so you won’t experience troubles due to specification of your job or goals.

What is a productivity plan?

In simple terms, a productivity plan is a personalized strategy that enhances your efficiency and effectiveness and ensures your productivity improvement. It involves scheduling your priority tasks in an optimal manner while also allowing room for unexpected urgent tasks because we can’t plan everything no matter how hard we try and what planning tools and methods we apply.

If you know the basic principles of how to make a plan, then you can manage a productivity plan too. However, the xTiles Productivity Plan Template will ease the process and shorten the time you need to fill in the data. The Template will be especially useful if you need your productivity plan to cure yourself of burnout and inability to concentrate on your tasks.

Now, what benefits will an individual get from creating a productivity plan? Why it’s crucial to have one for being productive on a stable base, not only from time to time when you have an impulse to do something. Let’s explore the reasons:

  1. Organize your assignments: 

A productivity plan helps users to structure and organize their tasks. And when one has a clear overview of what needs to be done, one can avoid confusion and ensure nothing slips through the cracks.

  1. Distinguish between significant and non-significant tasks: 

A productivity plan helps differentiate between important tasks that contribute to your goals and less important ones, which enables you to prioritize your efforts and allocate your time and energy wisely.

  1. Improve decision-making: 

When you have a productivity plan, you have a base for your decisions. You already know the answer because there is a framework to guide your decision-making process, even though it’s always burdened you. Just analyze your task in alignment with your goals, dreams, and long-term objectives, and you will easily distinguish tasks to focus on and tasks to delegate or postpone.

  1. Align long-term and short-term goals: 

A productivity plan allows you to bridge the gap between your long-term aspirations and your daily activities. By incorporating your overarching goals into your plan, you can ensure that your daily actions are aligned with your larger objectives. This alignment brings clarity and purpose to your work.

How to create a productivity plan using the xTiles Productivity Plan Template?

Now that we discussed the benefits of productivity planning let’s dive into the process of creating a plan that will work for you. We already told you that if you have basic planning skills and have gone somewhere further than creating a shopping list, you will manage this task quite easily.

  1. List all your tasks and obligations:

Begin by creating an action list of all your tasks and obligations. Being the all. It’s not yet time to separate important tasks from time-wasters. It’s very important to write them down because relying solely on memory is rather an untrustworthy approach that usually leads to forgetting things or feeling overwhelmed. 

  1. Identify obstacles and challenges:

Now that you have them all together, you can take a closer look at each task and identify potential obstacles or challenges you might encounter on your way. When we acknowledge these challenges in advance, we can develop strategies to overcome them at all or possible solutions once we are there. 

  1. Track your time:

Making a productivity plan may take some time. The more time you can invest in learning your current habits and routine and how you spend your time, the better you will understand yourself and your natural inclinations. However, avoid the temptation to spend weeks and months on your research because that’s the opposite of productivity, and we don’t need that.

Track your time for at least a week and keep a record of essential tasks you complete each day, including both work and personal activities. You may also track time-wasting activities like social media usage.

Then, review the information you got. Examine how much time you spend on each task and how it’s distributed throughout the day. 

  1. Develop a strategy:

Based on your productivity patterns and preferences, develop a strategy to enhance your productivity. There are various methods and techniques you can employ, such as focusing on one task at a time, utilizing time management techniques, or using project management tools. 

  1. Experiment and revise:

Give yourself time and be patient, as finding the perfect strategy may require trial and error. Experiment until you discover a method that maximizes your efficiency.

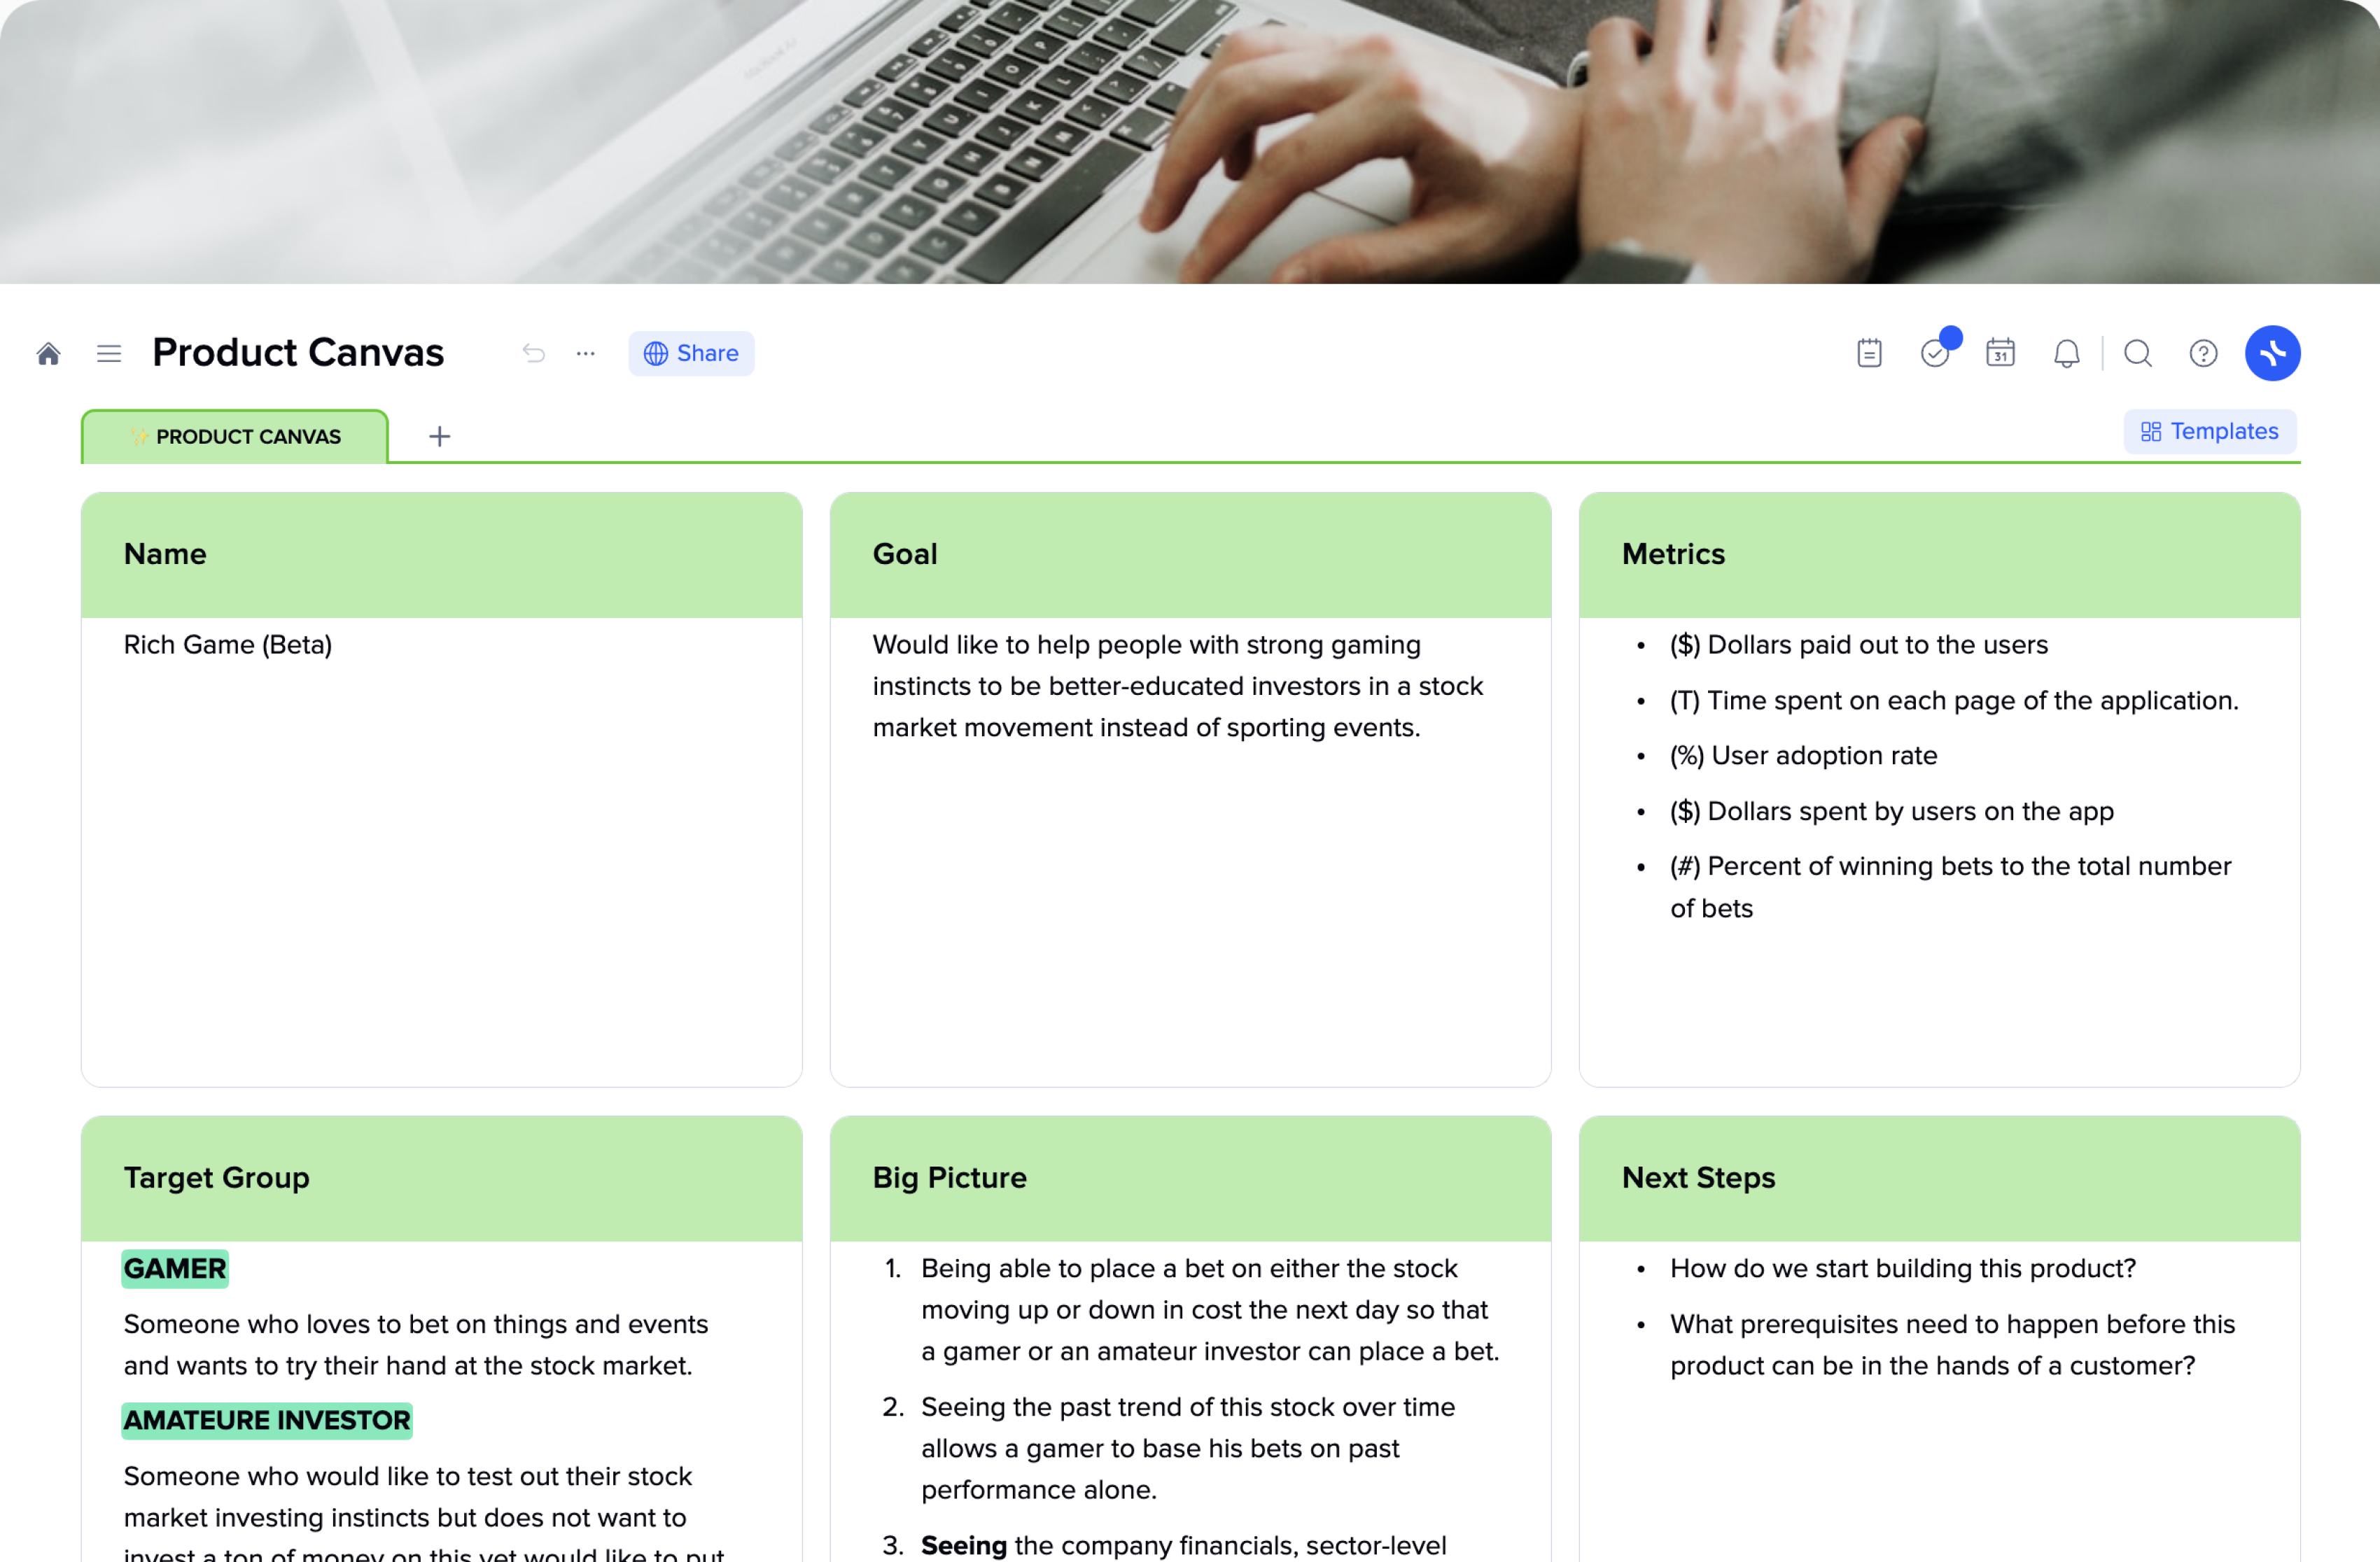
Product Canvas

Product Canvas Template

What is the most important thing for teams working on complicated tasks? Skills? Ideas? Budget? Well, all those are definitely important and define the final result. But they are not as important as healthy communication and understanding that you all are on the same page.

Product Canvas is a tool that helps teams to collaboratively determine and communicate the product vision and strategy they are about to pursue. Comprehensive Product Canvas also helps to communicate with your client or stakeholders.

Bringing together various aspects of a product, Product Canvas serves as a very specific knowledge base for a certain project where everyone may seek quick answers whenever they are in doubt.

A Product Canvas was developed to ease your team’s job. Structuring, gathering info, and determining the main points may take a lot of time. Imagine how far you will go using a Product Canvas template. It shortens the process significantly, leaving you responsible only for filling in all your data and reviewing it occasionally.

xTiles offers you a ready-to-use and free Product Canvas template that you can freely share with your colleagues and everyone who needs or wants to see it. We made it flexible and adaptive to the specific needs of different products and teams.

What is a Product Canvas?

A Product Canvas is well-known to be a first-step tool in defining a future project. Combining conciseness and informativeness, it defines what your project is, what it will/may become, and what strategy you need to develop and implement to succeed.

Product managers use Product Canvas to start the process that will lead to creating a product with incredible user experience and useful features. If we measure this tool from a management perspective, it unites Agile and UX by combining user stories with UX artifacts such as design sketches, scenarios, personas, etc.

A Product Canvas allows you to sell your future product to clients and investors with a single image, a single document. It also serves as a tool for communicating within big organizations or teams. 

When do I need a Product Canvas?

As a rule, a Product Canvas template is usually used during product development’s early stages to align team members and facilitate discussions with stakeholders. However, we don’t always follow the rules, and the impulse to start may be so powerful that you rush into action without mapping out what needs to be done.

That’s why a Product Canvas will be useful at various stages of your product development: from the initial idea to the launch and beyond.

  1. You may use the Product Canvas template for idea generation.

When you have a raw idea, don’t exactly know what you want to create, and are unsure what results you want to get, give a go to the Product Canvas Template. It will help you organize your thoughts and communicate your vision to others.

  1. You may use the Product Canvas template for planning.

When your idea is polished and well-defined, you start planning. There will be a lot of decisions at this stage and a lot of discussions. You need a plan that will work and keep a team aligned and motivated to do their best work. 

That’s why, when planning your product development, you may get many benefits from using Product Canvas. It will help to determine the key features, your target audience, your value proposition, and the metrics you will need to measure your success.

  1. You may use the Product Canvas template to align everyone involved around a shared vision.

When you work on a product, there are many sides interested in the successful outcome. Everyone may have a different purpose for participating in a project, but everyone involved must be united around a shared vision.

A Product Canvas template will help you ensure that everyone understands the product’s purpose, goals, and deliverables.

  1. You may use the Product Canvas template to prioritize tasks.

Prioritizing is one of the key secrets of successful and on-time product delivery. You can’t manage everything at once, and even if it seems that this incredibly harsh race will lead you to a perfectly finished product, you’re likely to discover new points to work on after its completion and launch. But everyone might be too devastated to go on.

A Product Canvas template will help you define what is the most important, what is less important, and what only seems to be important regarding your product goals and purpose.

  1. You may use the Product Canvas template to communicate.

It is said that we can’t understand someone until we’ve walked a mile in their shoes. Sharing and discussing Product Canvas with your team will work even better. 

Suppose there are no words to express your ideas or concepts. You may use pictures, memes, or songs to give your team the needed vibe and information. Online templates give you more space to be inventive in communicating your ideas and visions.

As you can see, Product Canvas serves many purposes for starting a project, processing it, finishing it, and reviewing it for further improvements.

How to create a Product Canvas?

Creating a Product Canvas is much easier than fixing a mess after you’ve started doing something without a clearly defined and discussed idea. We have a quick guide for creating your own document so that you can start working on your product development asap.

Remember that the xTiles Product Canvas Template is flexible and adaptable to your product’s or your vision of the product’s specific needs and features. You’re free to add or remove sections in order to adjust the template document.

Create a Product Canvas for your project using the xTiles template and the next steps:

  1. What is your product name? Do you have one already? Will it have some hidden meaning? Will it refer to the problem your product solves? Naming is very important for the rest of your product’s cohesiveness. 

It should be easy to remember, maybe a bit “sticky” so that people keep repeating that word or collocation in their minds without realizing it. That is one of the basic rules for naming a product.

You may have the name when you start making your Product Canvas. However, if you still haven’t come up with something nice and suitable, try brainstorming with your team.

  1. Now you need to define the business goals of your product. What key goals should it achieve? It may be revenue growth, market share, customer retention, etc. If you already have a product roadmap, this step won’t take more than a minute.

While defining your main goals, remember that every product is unique, so copying your competitors’ goals is sometimes not the best option, as it might lead you in the wrong direction.

  1. Next, you will need to set the key metrics. These metrics will help you understand whether you’ve reached your goal or not. It may be metrics such as user engagement, conversion rates, revenue, etc.

It’s crucial to make them realistic. Many teams prefer to challenge themselves by setting metric numbers that are too high or impossible to reach with the current level of their skills, budget, etc. However, such an approach rather leads to losing all motivation.

  1. The next step is identifying your product’s target audience. For whom do you work? Who do you want to help or satisfy?

Defining what problem your product is about to resolve is the first stage of knowing your target customers. Usually, it’s an ongoing process that needs continuous research to stay up-to-date with the changing market trends and user behaviors.

  1. We’re almost done. Now, you need to plan what your finished product will look like and what it will bring you in the long term. It will help to check the data you’ve just written down.

All points of your Product Canvas should be aligned with each other. Otherwise, your team might be misled with no defined plan of where to move.

  1. Finally, you will need to define the next steps you will take to start implementing everything you’ve just discussed and identified. That point will evolve into your action plan, keeping the connection with the Product Canvas.

Once you have created your Product Canvas, share it with everyone involved to get feedback. It may happen that after their review, you will need to refine it or change some parts of it. When the document is validated, use it to your advantage. Let it not lie somewhere forgotten.

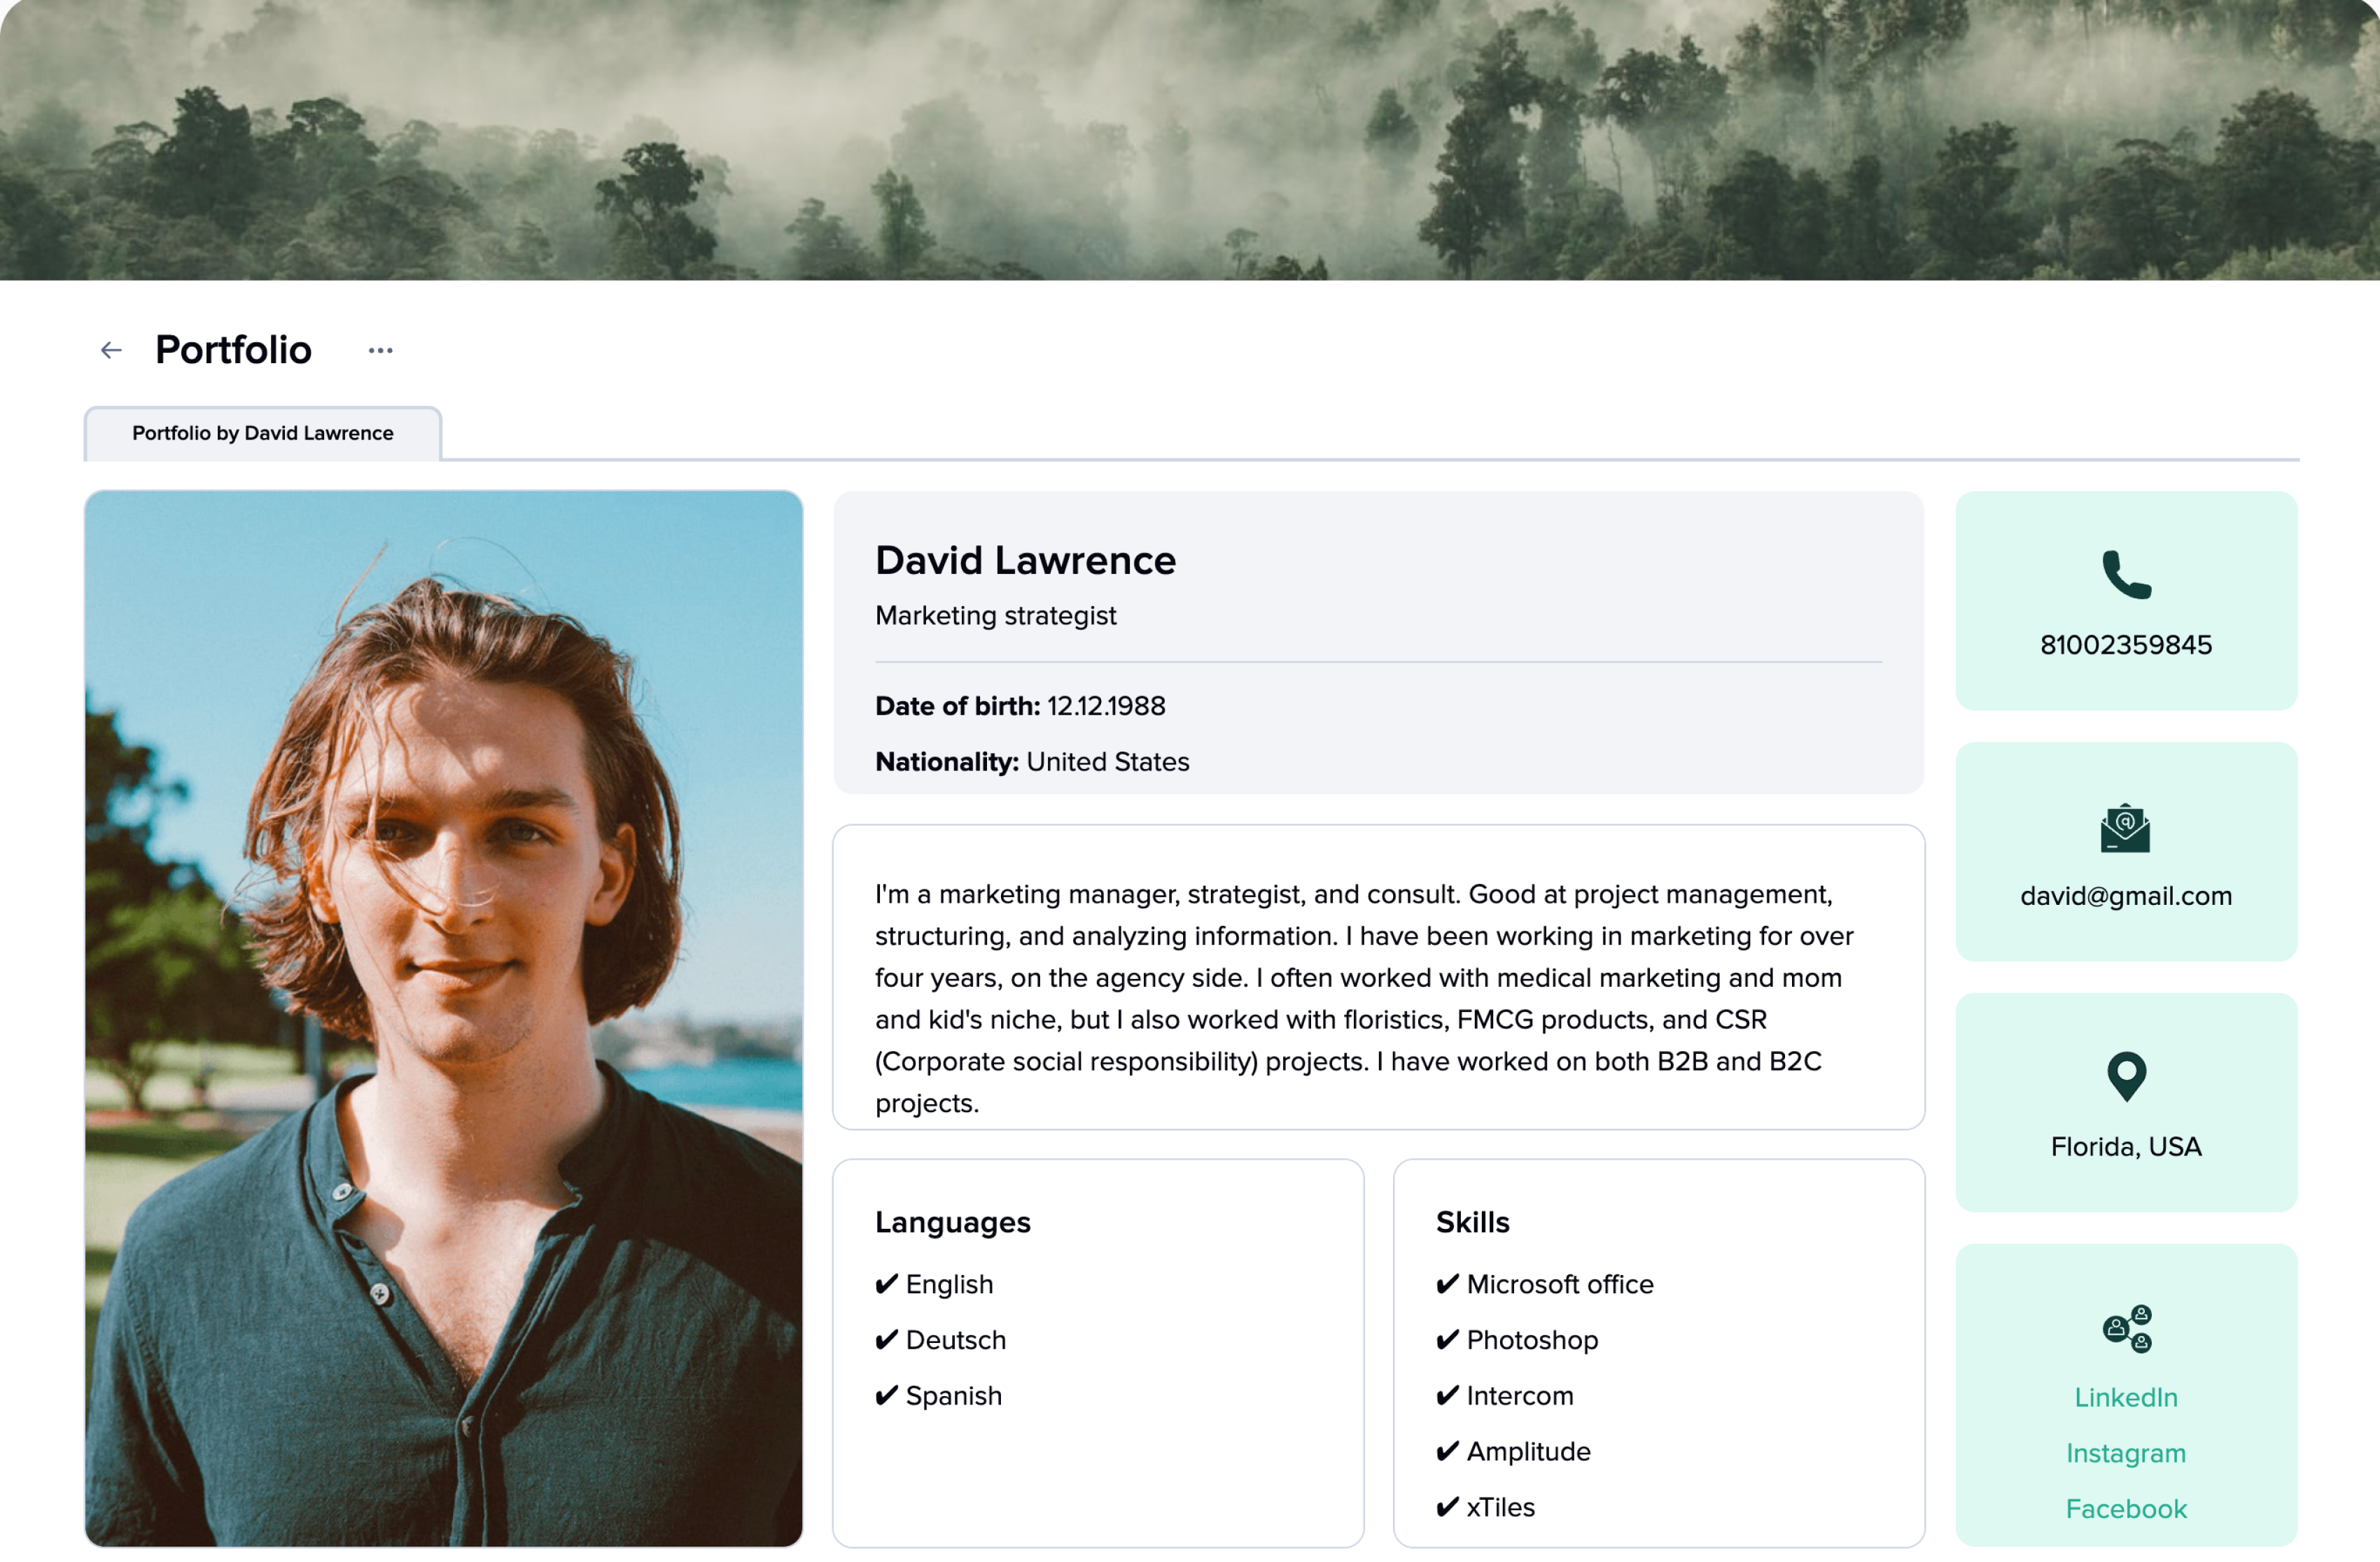
Portfolio layout

Portfolio layout template

A portfolio template may help you create a more effective and visually appealing portfolio that eloquently showcases your work, accomplishments, skills, and experiences.

Finding a new job may be no easy task. However, an efficient portfolio will be the first step toward your goal, making you stand out from the crowd of other applicants. Since the first impression depends greatly on it, using a portfolio layout that fully represents you and your talent is better, quicker, and less stressful.

For many job positions, portfolios are the most important identifying tool. For example, if you’re a designer, your portfolio will be a presentation and proof of your knowledge and skills.

Your portfolio is supposed to sum up everything you’ve achieved till now and present you in the best light possible. This is a tremendous task for a small document – so you may need a portfolio template layout to help you summarize and structure everything correctly in a visually appealing way, raising interest in you and your talent.

Who may benefit from using the xTiles portfolio layout template?

Generally speaking, any person seeking a new job would benefit from using a free portfolio layout. Here are some cases where ready-to-go templates are especially handy:

  • Those who haven’t upgraded their portfolios in years but don’t want to waste a great offer right now by responding slowly.
  • Those who need to create their first portfolio but don’t know where to start.
  • Those who have little or no skills in graphic editing tools but want something stylish and well-structured.
  • Those who value their time highly and prefer to use it for something other than creating portfolio structure and style.

Sometimes people are convinced that their case is so specific that there can’t be a pre-made portfolio layout template for them, so they won’t even bother to google. It’s not necessarily true, but some kinds are harder to find.

You may not get what you need when looking for something specific, like an architecture portfolio layout or an interior design portfolio page layout. That’s why basic flexible portfolio templates are the best.

The portfolio layout template we offer is suitable for a wide variety of jobs and positions, including graphic design.

xTiles portfolio layout template advantages

Using the xTiles portfolio template may bring you several benefits, including:

  1. Consistency: Maintaining a consistent layout and format throughout the document will be easier. A portfolio with unified fonts, sizes, and alignment is easier to read and represents its creator as a person who pays attention to details.
  2. Time-saving: You save time on actual projects using a ready-to-go pre-designed template. Many designers fall into the trap of spending days designing a unique portfolio that is supposed to work like one of their projects. However, your previous experience and projects can tell potential clients or employers that you’re a professional.
  3. If you’re a freelance designer, your portfolio changes and grows constantly. A ready-to-use template will help you maintain it up-to-date at a low price.
  4. Accessibility: Creating it once, you can save it and share it with anyone on the internet whenever you need and want.
  5. Flexibility: You can adjust our template using various customization options to match your personal needs or company branding.

How to create a graphic designer portfolio using the xTiles Portfolio layout template

When creating an effective portfolio, you need to remember many details and use all the available options to reach your goal. Here are some tips and tricks to hasten and ease the process, especially if it’s your first time.

1) Decide for whom you’re creating your portfolio.

Surely, you do it for yourself in the first place. However, you need to keep in mind that you and the people who will check it have slightly different goals. So, are you looking for an employer or clients? What type of work do you want to get?

Understanding who you are creating it for will help you tailor your portfolio to their needs and show you and your skills from the needed angle.

You may even make a few different portfolios depending on the kind of job or project you’re hoping to get and use them according to available positions and offers.

For example, if you work in the fashion industry, you may have a fashion design portfolio layout and a costume design portfolio layout based on your previous experiences. That will help show your potential client or employer that you match their needs perfectly.

2) Provide them with some information about yourself.

A basic portfolio page layout should start with your name, phone number, email, position you are applying for, skills, etc. Don’t overwhelm a recruiter or your potential client with your previous work.

Sometimes, people in charge of hiring new personnel may lack design knowledge. That’s why you need to attract them with structured and easy-to-grasp information about yourself. In other words, start with what everyone understands to make them go to see what you can.

We already prepared these sections. All you need to do is to add your data and your photo.

3) Choose your best work.

Sometimes people choose to show everything they have in chronological order, which is bad, especially if you have a couple of years of experience. People might not go over everything simply because they don’t have enough time.

Start with something powerful. Let the work you believe to be your magnum opus so far be the first thing your potential client sees. However, leave something great for the end too. You need to show your expertise, creativity, and versatility as a designer.

It’s important to remember that people who are looking for an employee don’t need to see your growth as an artist. That’s rather a topic for your personal blog or discussions with your fellow designers. But if it’s very important for you, you may talk about it in the interview. However, you need to get one first.

4) Don’t be afraid to add self-initiated work.

Many people consider their self-initiated work only a hobby that may not interest their potential clients or employer. However, how you implement your own creative impulses is important for better understanding you as an artist. You may create your own vision of some popular art concept of advertisement just to represent your individual voice.

Many employers don’t add this requirement to a job advertisement, yet it doesn’t mean they don’t want to see your self-initiated work. Just remember tip #3 and choose your best work.

5) Don’t put all of your cards on the table in your portfolio.

Your portfolio should convince people to have a meeting with you to discuss your previous projects in detail. Make them want more, and leave for yourself a couple of aces up in your sleeve.

You need to find a perfect combo between what you want to show people and what you would like to save to discuss during the interview.

6) Don’t forget about context.

When presenting your previous works and achievements, don’t forget about adding some context so that people who see your portfolio can understand what was going on in the pieces you chose to showcase. That will help people to understand your design process and how you work.

Information about your previous works is also important for checking whether it was a real project with some recognition and success or a self-initiated work.

Remember that images should talk louder than the text is important. Use images of great quality to present your designs in the best possible light allowing people to see even the tiniest details. Using the xTiles portfolio layout template, you can upload files up to 500 Mb, even in a free version.

When adding descriptions to your units in the template, you may create small blocks near each piece and group them to show their connection.

7) Make it easy to navigate.

If there’s a lot you want to share, don’t turn it into a pile of pieces that are more of a riddle than a representation of what a great worker you are. Organize your work into sections or categories. Add headings if you need to put more clearance. Using the xTiles portfolio layout template, you can create different documents for each of your projects or for separating your previous projects from self-initiated work.

8) Keep it up to date.

Add your new projects to your portfolio regularly, so you won’t need to do it hastily whenever you see a great job ad or get an offer. Also, it may be important to remove something that doesn’t represent you and your style anymore. Maybe you outgrow your first attempts in graphic design, so say “goodbye” to them and replace them with newer work.

Also, ensure your contact information is up to date, so your potential clients or employers can easily contact you.

9) Don’t be afraid to talk about your work.

If the pieces you included in your portfolio are those you’re exceptionally proud of, then talking about them won’t be much of a bother to you.

However, sometimes people believe that their portfolio speaks for themselves, so they choose to remain mostly silent during an interview. It may be a humble decision to let others decide whether their work is worth it or not. However, your portfolio might need help to do the job. If you’re truly passionate about what you do, don’t be afraid to show it.

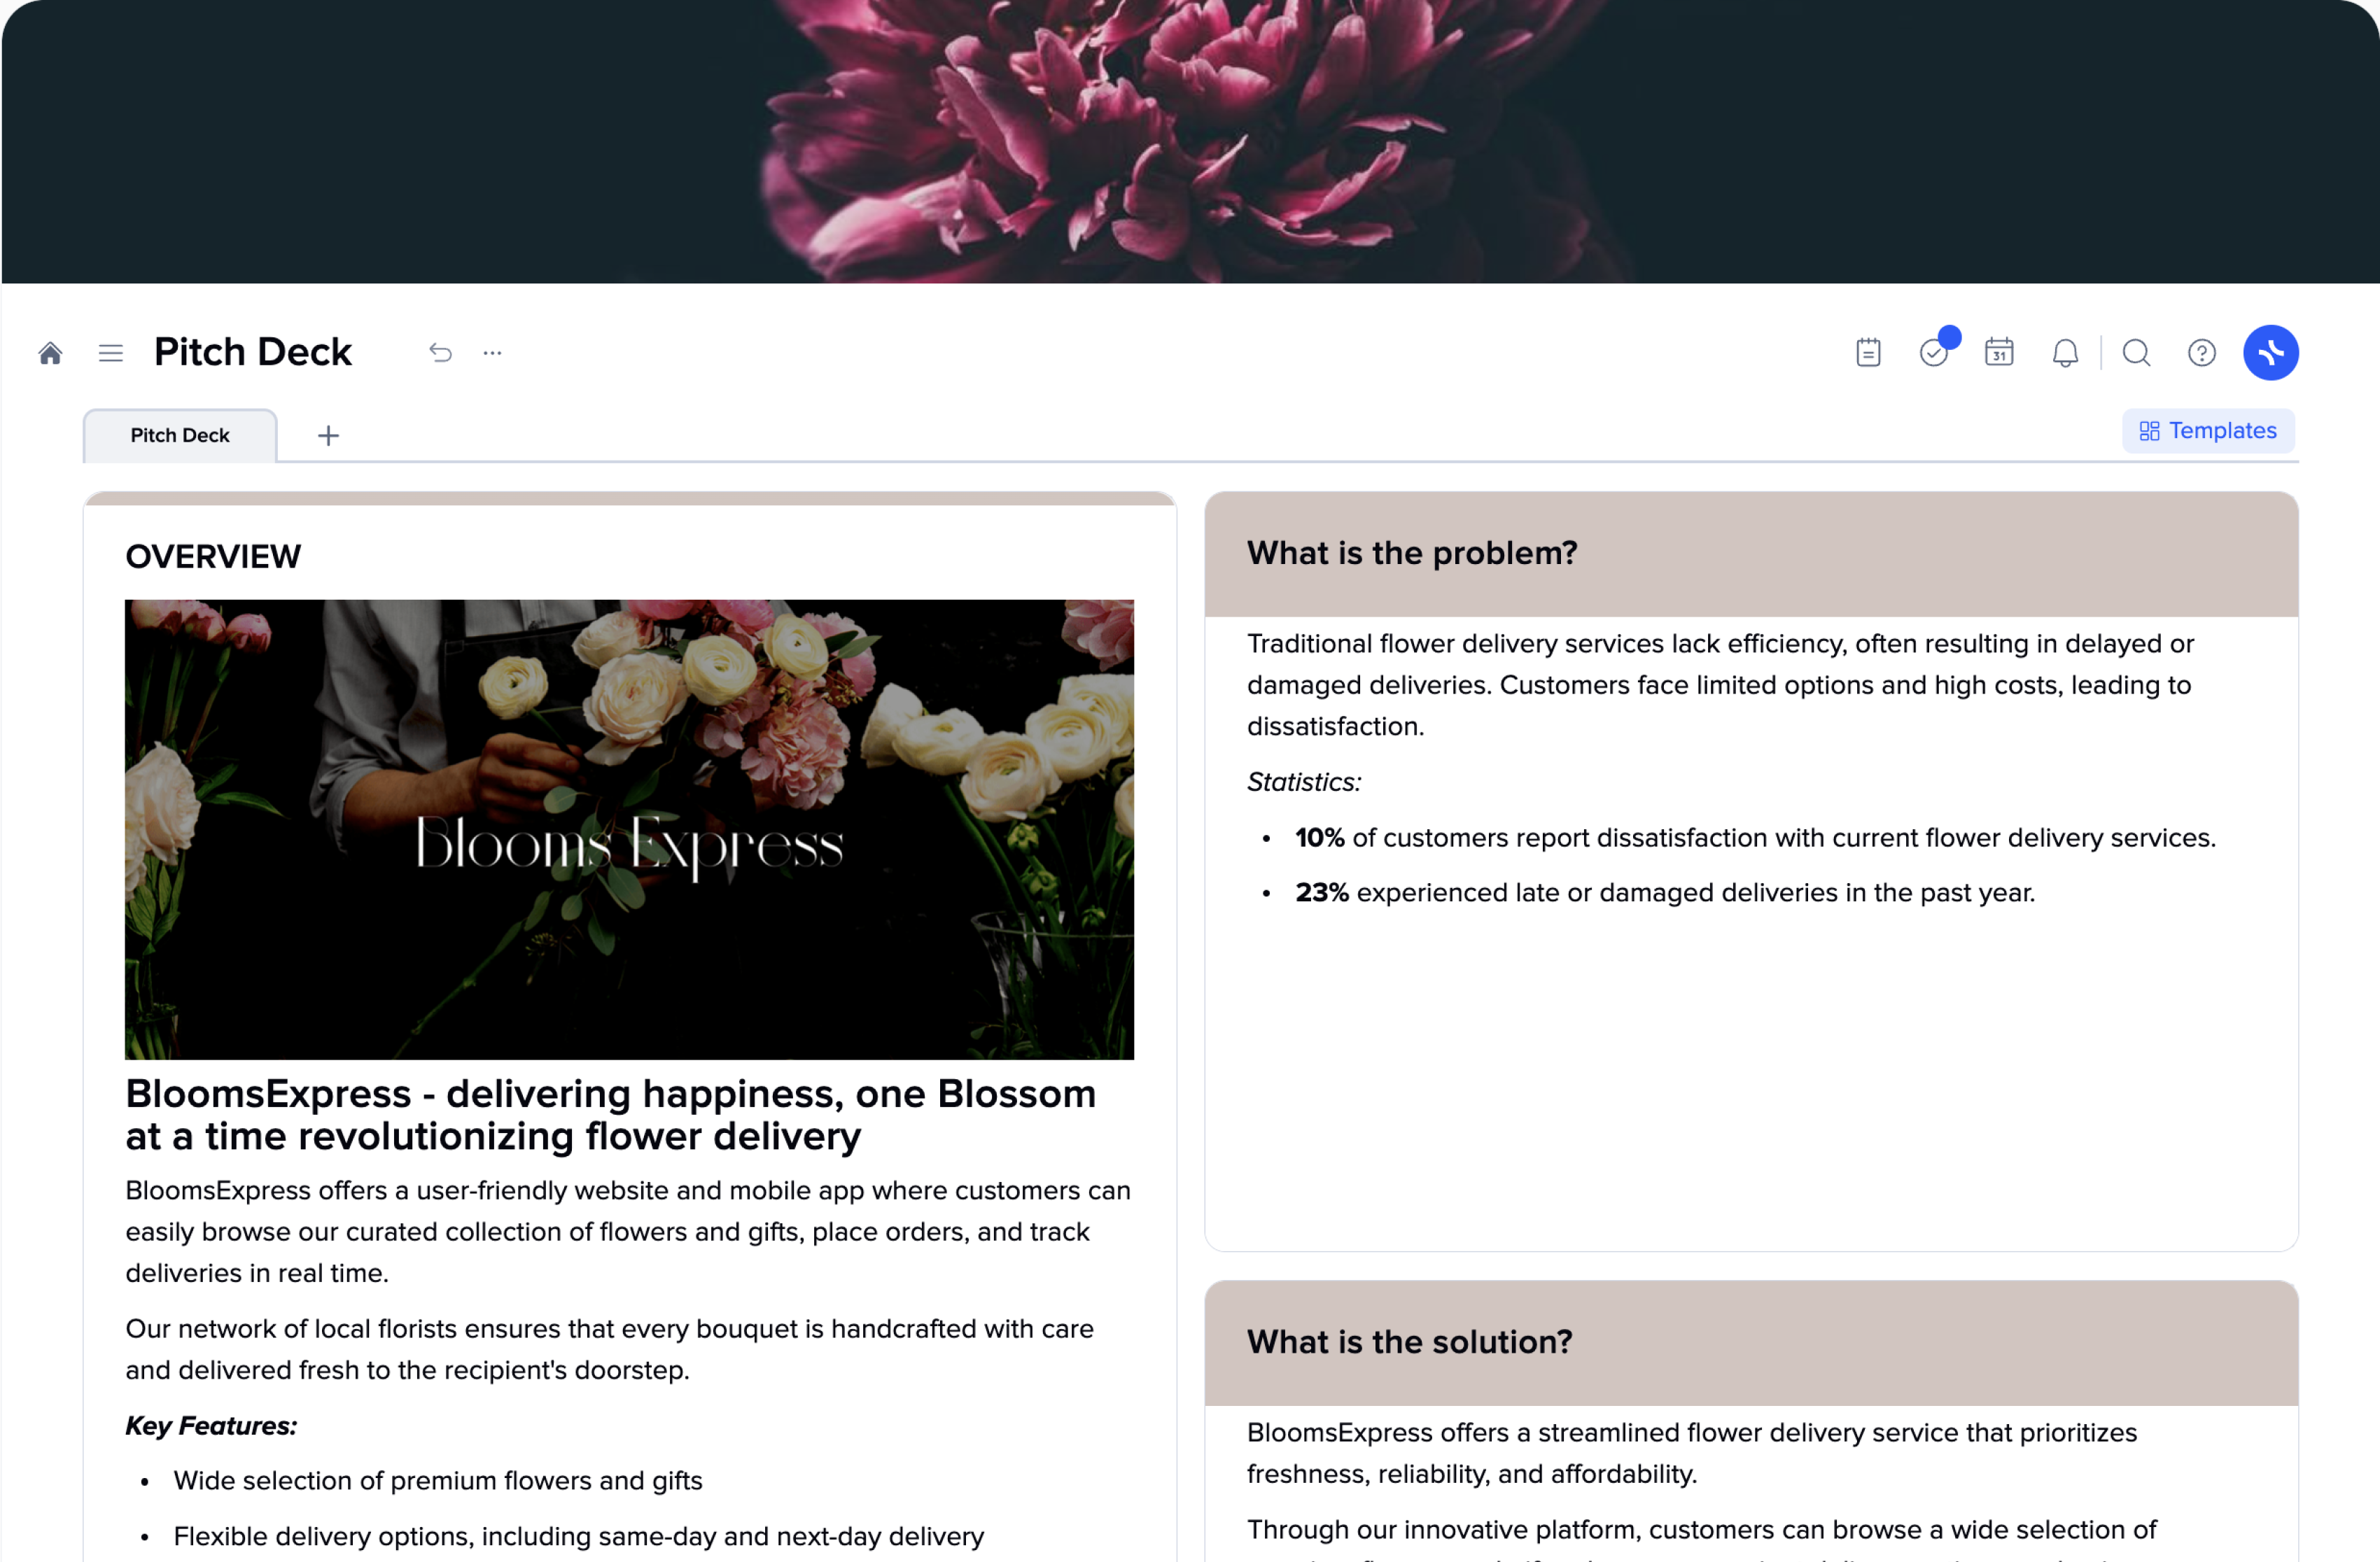
Pitch Deck

Personal, projects and tasks

xTiles Personal Projects and Tasks Template

Many people keep their work projects and tasks organized and neat while their personal affairs remain chaotic. Maybe we believe that different task management apps won’t suit our personal tasks, or maybe some of them are so boring and complicated that we can’t stand another 5 minutes there, not to mention the fact that our own business doesn’t have to be placed in such a tool.

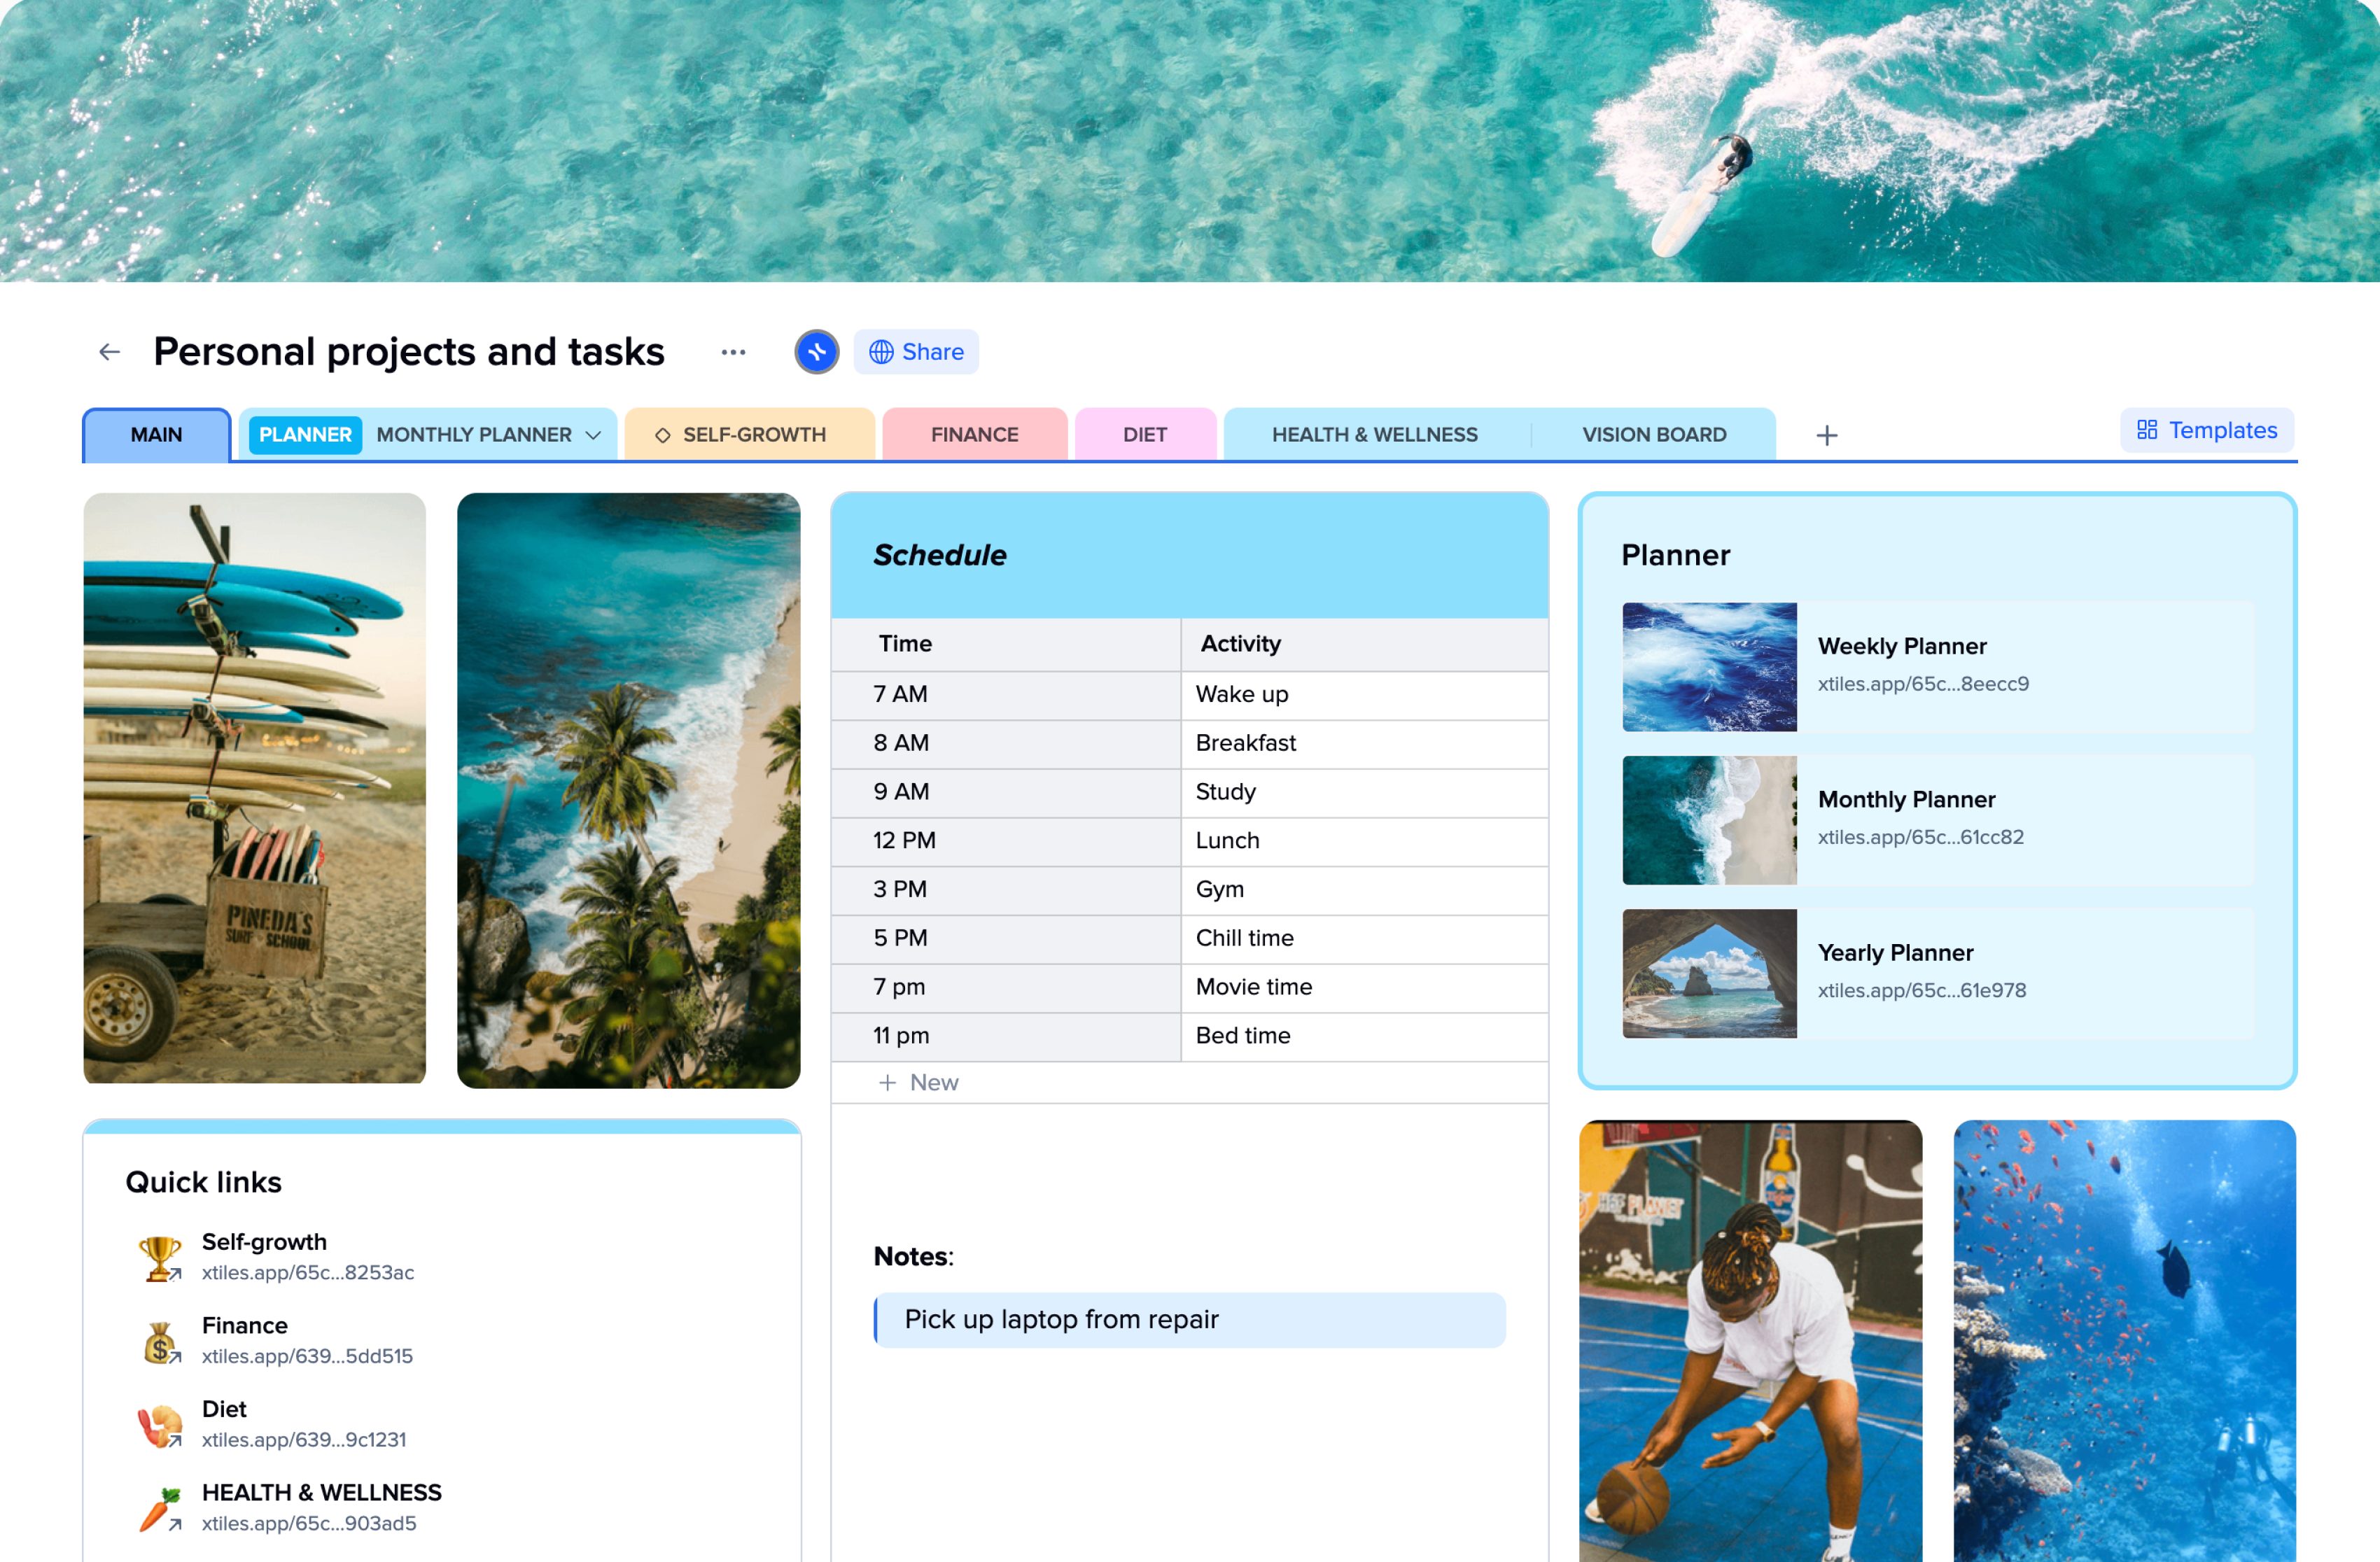
However, there’s an easy solution – the xTiles Personal Projects and Tasks template. You will get an easy-to-manage and customized space for your tasks. This template can significantly enhance personal productivity by providing a structured and efficient way to handle personal tasks.

Benefits of the Personal Projects and Tasks Template

Managing tasks is not always easy, whether you’re super busy or not. Yet still, many people prefer to avoid task management software tools because dealing with them is always harder than dealing with a pile of unorganized tasks.

We at xTiles believe that personal task management doesn’t have to be complicated. On the contrary, it should be easy and inspirational. That’s why we designed a template where people can manage personal tasks quickly and effortlessly. A template that can contain data of all kinds to be truly suitable for your projects and replace task management tools that might be expensive and with a steep learning curve. Additionally, the template helps with task prioritization, making it easier to focus on important tasks.

Many people know how to use task management software tools, but they simply don’t need an app that was developed for big teams to manage their tasks. Too many features they don’t need or can’t use for their benefit might seriously spoil the process and willingness to manage personal tasks.

A task manager is a deeply personal tool that has to respond to one’s needs and preferences. If, while in the office, we have to put up with a task management system we might not like, in our personal lives, we deserve something that resonates with us and how we organize tasks, how we track task progress, etc.

Why the xTiles Personal Projects and Tasks Template Will Help You Manage Tasks

Project management tools can be of different kinds for different devices, etc. Looking for one that suits our requirements might take time. That’s why xTiles offers you a template that can be easily customized according to your projects and personal preference.

xTiles is an all-in-one app, that’s why this template combines features of basic to-do list apps and distinguished project management software, giving you a tool that is flexible and multi-faceted and, at the same time, intuitive and easy to use. A user-friendly interface that can be customized to match your ideas about personal productivity will help create projects that don’t make you dizzy every time you have to do something there. The template includes features for task scheduling, helping users to allocate time efficiently.

Recurring tasks, task notes, and Google Calendar integration can replace other apps you normally have to switch between to deal with your task lists. You also can prioritize tasks using different approaches, from colorful banners to properties and reactions with emojis.

Task organization can be done in a few ways. You can use tiles (a basic element of design to build your projects) to add all the tasks that need to be done and then when they are completed, move them to another tile. Another option is to use checkbox to-do lists to mark your tasks when they are done.

How to start using the xTiles Personal Projects and Tasks template?

Start with the main page. It provides a quick overview of your schedule, quick links to other parts of your planner, etc. Additionally, the main page helps in task tracking, providing a clear overview of task progress.

Planner

The template has a page for planning. It contains three sub-pages for weekly, monthly, and yearly planning, allowing you to choose the needed format easily and switch between them when you need. Having all types of planners at hand will streamline the process and help you keep your weekly, yearly, and monthly planning united around the same objectives.

Open your weekly planner and fill in all the to-do lists throughout the week. You may leave these tasks just as a point on a least, or you may assign tasks to yourself. Task assignment is very easy; just choose the correct option from the menu and add the needed details.

Moreover, when you create tasks, you will have all of them conveniently gathered and accessible via one click. That will help you track progress and remember due dates. The template also allows users to manage task dependencies, ensuring a smooth workflow.

Self-growth

This task management app template from xTiles also offers a designated space for your reading log. It is built in the form of a board with columns to organize your books depending on their status and your progress. For this page, we used xTiles Collections, a special kind of page for storing and organizing the content of different kinds. You can easily switch from a board to a table to get a full list of your books. The template includes task reminders, helping users stay on top of their reading log and other self-growth activities.

Finance planner

Our project and task management tool would be incomplete without a finance tracker. You can use this page for your personal budget or for your business settings. It is designed as a table, much like Google Sheets, but with an easy-to-use interface that makes it simple to compile your income, expenses, and savings. Additionally, the template supports task automation, making it easier to manage recurring financial tasks.

Meal planner

Now that you have organized your schedule, self-growth, and finances, it’s time to take a look at other important tasks – your meals. To have the energy to do everything you plan, you need to keep your diet healthy and nutritious. The planner will help you collect recipes and ideas and plan the whole week of tasty meals. Additionally, the template allows for task delegation, making it easier to share meal-planning responsibilities.

Fitness planner and tracker

The next page of our personal task management template is for health and wellness. You can add here video of your favorite exercises and mark your progress. Moreover, videos will work from xTiles. No need to switch between tabs if you have a training program that consists of a few different videos. The template supports task collaboration, allowing users to share fitness plans and track progress together.

Vision board

Your personal task management space needs a place where you can store your raw ideas and insights that need to be shaped to migrate to your planners. The Vision board page will help you capture and organize these embryonic thoughts. It serves as a digital sandbox where you can freely brainstorm, collect inspiration, and visualize your goals without the constraints of immediate action items.

Additionally, the vision board supports task visualization, helping users to see their ideas and goals clearly. This creative space allows your ideas to evolve naturally before you transform them into concrete tasks and projects.

Benefits of upgrading your xTiles plan

The xTiles Personal Projects and Tasks Template is free and helps you organize your personal life in detail without stress. If you want more ways to organize and manage your projects, you can pay for extra features:

Enhanced Visual Organization: Use more colors to sort your work. This makes it easier to see different parts of your work.

Timeline view: See your projects and due dates online. This helps with long tasks.

Priority support: Get answers to your questions more quickly. This is good when you need help with how to use something.

Linked pages: Connect different pages in your workspace. This lets you move between related files without opening new tabs. It’s useful for organizing information for school papers.

Task integration: The upgraded plan offers task integration, allowing users to connect tasks across various tools and platforms.

Premium templates: You will get access to a variety of templates for different tasks and situations to manage them with ease.

These extra features make it easier to keep track of your tasks and projects.

FAQ

Can I track my personal tasks and projects in one place?

Yes, you can track your personal tasks and projects in one place using the xTiles Personal Projects and Tasks Template. This template provides a customizable space that combines features of basic to-do lists and project management software, allowing you to manage different aspects of your life, such as weekly planning, finances, meal planning, and fitness tracking, all within a single tool.

How to Set Up Your Personal Task Management System?

To set up your personal task management system using xTiles, start with the main page for a quick overview of your schedule. Then, use the planner pages for weekly, monthly, and yearly planning. Fill in your to-do lists, assign tasks to yourself, and utilize other sections like the reading log, finance planner, and vision board as needed.

Why Do I Need Personal Task Management in the First Place?

Personal task management helps you organize your life, reduce stress, and increase productivity. It allows you to keep track of your various responsibilities, goals, and projects in one place, making it easier to prioritize tasks, meet deadlines, and maintain a balance between different areas of your life.

How does the xTiles Personal Projects and Tasks Template differ from other task management tools?

The xTiles template is designed to be more flexible and user-friendly than typical task management apps. It combines the simplicity of basic to-do lists with the power of project management software, allowing users to customize their workspace to fit their personal needs.

Unlike tools made for large teams, xTiles focuses on individual use, offering features like vision boarding and meal planning alongside traditional task tracking. This all-in-one approach means you can manage various aspects of your life in one place without dealing with overly complex features you don’t need.

Packing List

Vacation is always a great time we all are waiting for. However, unorganized packing might spoil it. Well-organized packing based on your destination and trip duration is essential because it saves time, reduces stress, maximizes space, ensures you have everything you need, makes unpacking easier, and helps prevent damage to your items.

A packing list is a tool to ensure that you put everything you need into your suitcases and put aside everything you don’t need. It helps find a balance between these two so that your trip won’t turn into a nightmare.

A packing list template minimizes the time you need to create such a list and becomes a great tool for checking your packing progress. The template allows you to change your mind as often as needed without turning the list into a mess for its customization and editing options.

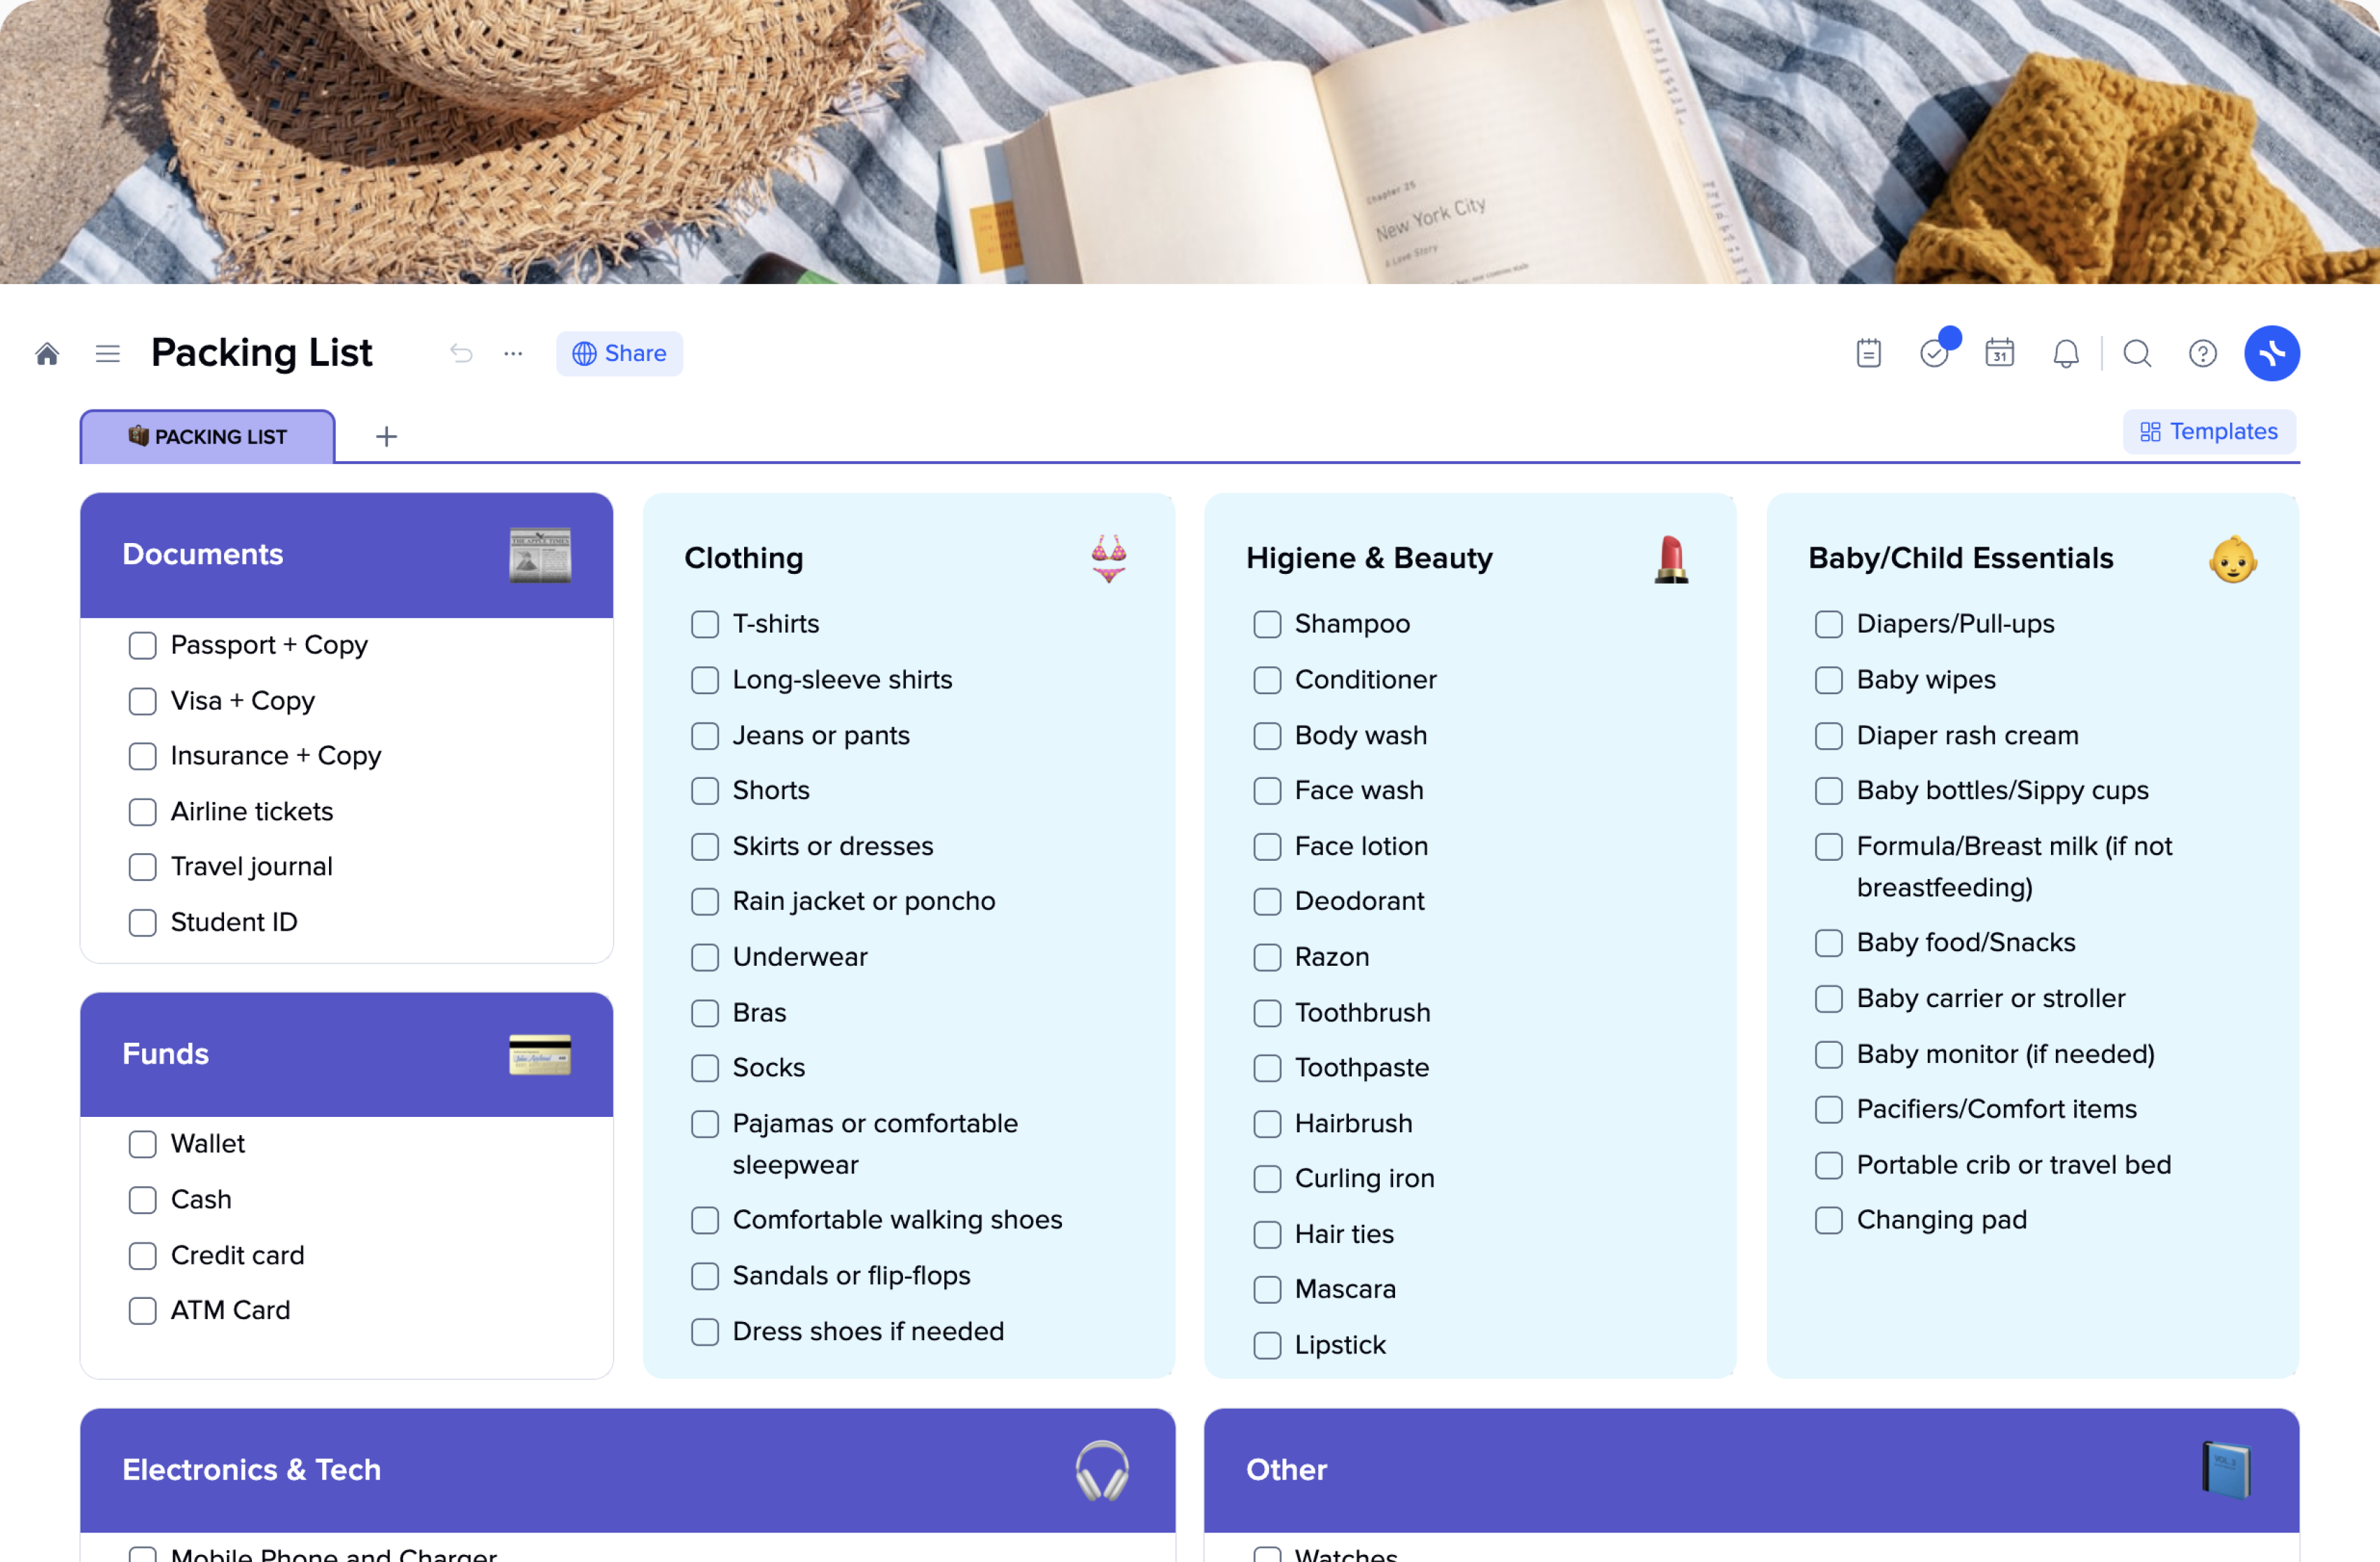
The xTiles Packing List template is suitable for a vast majority of trips and cases. Whether you’re looking for a cruise packing list, a packing list for vacation, or something specific like a Hawaii packing list or Disney packing list, it will help pack your suitcases or backpacks in the most convenient way and stress-free.

Additionally, we offer you an example of a travel packing list and a detailed guide on how to create your own.

A packing list template

A packing list template is a pre-designed document where you gather and group items that you need to pack for your trip. It typically includes essential items you should consider bringing, such as clothing, toiletries, medications, and travel documents.

A packing list template can be in digital or printable format, and it can be customized based on your needs and preferences.

You can organize and streamline the packing process by using a packing list template. The template helps you ensure that you don’t forget any essential items and that you don’t bring unneeded items, which saves you time and sometimes money.

Packing list templates can be easily customized to different types of trips. Campings, beach vacations, business trips, etc., will be more enjoyable with a relevant packing list.

Packing list templates come in various formats, including printable checklists, spreadsheets, or digital apps. Some templates are more detailed than others, so it won’t be troublesome to find one that fits your needs. 

Also, there are many ready lists for different kinds of trips. If you have no idea what to put into your backpack when going skiing, just check for other people’s ski trip packing lists. If you aren’t sure whether you will need some specific items going to unusual or exotic places, you may check for a Costa Rica packing list or an Alaska packing list.

Why does one need a packing list?

The time has come. You’re going on vacation soon, and it will be the most beautiful time ever. However, if you don’t want anything to ruin it, start with a packing list to ensure you take everything you need and don’t take up space with the stuff you won’t need.

Organized packing before going somewhere is highly important for several reasons:

  1. It saves time and reduces stress: When you pack in an organized manner, you can quickly find what you need without rummaging through your luggage. That can save you time and reduce stress, particularly if you’re in a rush or traveling with others.
  2. It maximizes space: organized packing can help you maximize the available space in your luggage. That may help you avoid overpacking, reduce the weight of your luggage, and save you from having to pay for excess baggage fees. Also, if you’re traveling with hand luggage only, you need to use every square inch of your suitcase effectively.
  3. It ensures you have everything you need: when you pack in an organized manner, you’re less likely to forget important items. That can include things like your passport, tickets, or essential medications. As a result, you won’t need to buy the stuff you accidentally left at home after arrival, and then you won’t try putting it into your already overstuffed suitcase before going back.
  4. It makes unpacking easier: when you arrive at your destination, unpacking can be a breeze if you pack in an organized manner. You can easily find what you need and start enjoying your trip without wasting time searching for items. Sometimes, your stuff stays in your suitcase for the whole vacation if there’s not enough space for it in your hostel room. That’s why it’s crucial to have everything organized for easy access.
  5. It prevents damage to items: Packing items in an organized manner can help prevent damage to delicate items. That may include packing clothes in packing cubes or wrapping breakable items in clothing. For example, if you’re taking some medications or self-care treatments in glass bottles, you need to put them in the center so they will be protected from all sides.

In summary, you make your vacation or trip more enjoyable with organized packing, saving time, reducing stress, maximizing space, and ensuring you have everything you need.

Do I need a different packing list for every trip?

It may be a wise idea to create a new packing list for every trip you take, even if it’s a trip to the destination you’ve been to before or if you’re traveling for the same purpose. 

Each trip is unique, and your packing list should reflect that. Also, you’re never the same person after every trip, so you may need more or less stuff depending on your newly obtained experience.

For example, the time of the year hugely affects what you may need. While visiting Venice in early fall, you won’t need anything special, but when returning there in winter, you will need to take care of disposable rubber boots.

If you’re traveling to a beach destination, you’ll need to pack swimwear, sunscreen, and beach towels, which might not be necessary for a business trip.

However, your previous packing lists may be a great starting point for creating a new one. You’ve already tested it, so the next one will be much better.

If it’s your first trip and you have no idea what you will need, and you’re too anxious to analyze that, you may use a list of a person you trust. It may be your friends who travel regularly or at least more often than you, or it may be a travel blogger who inspired you to set on a trip.

That will help you remember essential items you need to pack, making the process more efficient. 

When using other people’s lists, you’re always free to modify the list to suit your current trip’s needs and add or remove items as necessary, even if the person who created them guarantees that everything is calculated to the tiniest detail.

How to create a perfect packing list for my trip using the xTiles Packing List Template?

Which packing list can be claimed as a perfect one? The one that balances your trip specification and your personal needs. A good packing list in some way foresees what you will need on your trip. How can one create a packing list just like that?

There are many details to consider and many steps to take before your suitcase content matches your trip and your expectations.

You may go with the packing list you can find in a demo doc on this page. It was made upon travelers’ recommendations and the personal experiences of our team.

However, if you want to try to make it by yourself or you think it won’t match your trip specification, let’s do it together using the xTiles Packing List Template.

Luggage

Many people start their preparation by choosing their suitcases. However, it’s advisable to decide on all the items you need to pack before selecting your travel gear, as every trip has different requirements, and a suitcase suitable for one type of trip may not be suitable for another.

For example, if your trip is going to last some time, and you plan to go from one city to another, a backpack may be a better choice than a suitcase. Another situation when a backpack will be a win-win situation is destinations with limited wheel accessibility. 

In case you’re going to, suppose, Paris and staying in a 5-star hotel, your only planned activity is museums and cafes, you need to bring your outfits safely, then the suitcase is your option.

Except for your backpack or suitcase, you will need to take a travel purse to carry your essentials everywhere you go safely.

Also, before packing, it is crucial to learn more about the regulations regarding checked and cabin luggage. The rules concerning carry-on baggage may vary even among different airlines. In case airport security finds something restricted in your luggage, you will need to get rid of it.

If you can’t find specific regulations your airlines use, you may depend on general rules. It’s forbidden to bring: 

  1. sharp objects (including razor blades, scissors, and knives)
  2. objects that may be used as weapons (such as hammers, cricket bats, and golf clubs)
  3. flammable materials (like aerosol cans and lighters)
  4. more than 100 milliliters (3.4 ounces) of liquid
  5. certain food and drink items in your carry-on luggage.

However, if you can, please verify with your airline for a complete list of what you can and can’t take onboard. Usually, this information can be found on their websites.

Your valuables belong to your carry-on luggage

Except for the luggage regulations your airline uses, there is another important rule. Always pack your valuables in carry-on luggage. This way, you ensure that everything is safe.

Additionally, some travel insurance policies don’t cover the cost of damaged or missed valuables if they were in checked luggage.

So, what do you need to take with you on board? All high-value items you bring on your trip, like electronics and jewelry. If you bring something that has sentimental value for you and doesn’t violate airline luggage regulations, you may take it too.

Documents

Creating a packing list for your trip is challenging because every part of it differs for many reasons. The documents you will need to have are probably the most stable part and won’t change much from trip to trip.

Here are essential documents that you should always carry with you when going on a trip:

  1. A passport is your must-have for international travel. Without it, you have zero chance of leaving the country. Ensure it is valid and will stay valid during the whole trip.
  2. Visa if you need one to enter the country of destination. Some countries can grant visas after arrival right in the airports. However, some require application well in advance before your departure.
  3. Boarding Pass or Tickets to enter the plane, bus, or train. Many airlines already permit online board passes, so you can skip printing and save some paper for environmental sake.
  4. Itinerary and travel documents should be stored in one place in case you have trouble finding your hotel.
  5. Driver’s License if you plan to rent a car. However, remember that sometimes a driver’s license might be invalid in other countries. So, check that question before you rent a car and get stopped by the police.
  6. Travel Insurance to ensure everything goes alright. Insurance can provide coverage for unexpected events such as medical emergencies, trip cancellations, and lost or stolen baggage.
  7. Credit Cards and Cash to cover your expenses during the trip. Always have some cash in the local currency for unexpected expenses and emergencies.

Toiletries

Choosing toiletries for your trip becomes a tough task for many, even experienced travelers because of airline luggage restrictions. However, you can’t go without them, so let’s create a list of the most important toiletries you will need on your trip, and you will have no problem bringing them with you on board.

  1. First of all, verify if your accommodation provides toiletries. If the hotel or vacation rental you’ve booked provides basic toiletries such as shampoo, soap, and towels, the list of what you need to pack shortens. 
  2. Consider the length of your trip. If it’s going to be a few days, you may pack travel-sized toiletries or decanter them into small containers. If you’re going for a long time, you may need to pack full-sized products into your checked luggage or consider buying the needed toiletries after arrival.
  3. Follow the TSA guidelines on liquids and gels to avoid trouble during the security check. You’re free to bring a quart-sized bag of liquids in your carry-on bag, but each item must be 3.4 ounces (100 milliliters) or less. 
  4. Bring multi-purpose products. For example, you may bring a moisturizer with SPF or a tinted moisturizer that can be used as a foundation for your makeup to save space.
  5. Don’t forget about your toothbrush, toothpaste, deodorant, and any medications you might need.

Clothes

Before stuffing your wardrobe into your suitcase, remember that you need clothes that are suitable for the climate and culture you’re about to visit. Let’s check what clothes you will need no matter where you’re going.

  1. Start with checking the weather forecast. 
  2. Research the cultural norms of the destination place. Some countries don’t welcome revealing or tight-fitting clothes. It may sound like something that restricts your personal space, yet being a traveler, you need to remember that when in Rome, do as the Romans do. You’re a guest, and sometimes it’s better to follow the rules of the place you’re visiting for your own safety and comfort.
  3. Consider the activities planned. If you’re going hiking, pack appropriate footwear and comfortable clothes. If you’re going to a formal event, pack appropriate attire, and so on.
  4. Try to pack versatile clothes. Thoroughly analyze your wardrobe and choose clothes that can fit different occasions and can be mixed and matched. That will help you maximize your outfit options if you’re limited with luggage yet planning to stay somewhere for a long time.
  5. Comfort is key. When your clothes start to annoy you, you can go and change, but not when you’re on a trip. That’s why choose only those outfits that make you feel comfortable. Items manufactured from natural materials are perfect for long walking or sitting on a plane or bus.

Health

The medication you will need to take on your trip and different items for your health depend on your health needs, your destination, and how long you will stay there. However, the basic kit is pretty similar for every trip.

  1. First of all, if you take any prescription medications, they are the top priority. You need to calculate how much you will need for your trip duration and add some extra just in case of delays or unexpected situations.
  2. Over-the-counter Medications for common ailments such as headaches, stomach issues, allergies, and motion sickness. If you don’t want to take blisters of medication that you might not need, check whether you need a prescription for them in the country of destination. If you can freely buy those medications at any drugstore, then you may save space for something else.

However, if you’re going hiking or camping far from civilization, it’s better to take everything that you may need.

  1. A First Aid Kit with basic supplies such as bandages, antiseptic wipes, and pain relievers is a must if you plan on participating in outdoor activities. Once packed, it may travel with you from place to place.
  2. Insurance and Medical Information about your allergies or chronic conditions to inform foreign doctors in case you feel unwell.
  3. Also, depending on where exactly you’re heading, you will need mosquito repellent, sunscreen, cold cream, etc. Sometimes, a lot of them. 

Tech

Spending time in airports or on buses may be quite boring if you have nothing to entertain yourself. Your electronic devices will make waiting a bit more pleasant, and time goes faster.

The list of devices you should take with you on a trip depends on your personal needs and your destination. Some of the most common are

  1. A smartphone may sometimes be enough as it serves multiple purposes, such as communication, navigation, photography, and entertainment.
  2. Laptop or Tablet if you will need to work while traveling. They also will provide entertainment during long flights or downtime at your destination.
  3. E-reader if you enjoy reading as a way to spend your time while waiting. It allows you to carry a whole library with you wherever you go while one paper book gives you limited options. What if you don’t like it? What if you finish it too soon?
  4. Camera if you want to take photos while on a trip. However, the latest smartphones’ cameras don’t concede to point-and-shoot cameras, so you can avoid packing another bulky item into your luggage. 
  5. Power Adapters and Chargers; otherwise, your devices turn useless pieces of plastic very soon.
  6. Portable powerbank for situations where you won’t have access to electrical outlets. 
  7. Headphones to enhance your travel experience, whether you want to listen to music, watch movies, or have a quiet environment for work or relaxation.

Other items

We’re almost done with creating a packing list for your trip. In the end, you need to pack stuff that you need on your trip to make it more comfortable, reduce stress, keep yourself busy while commuting, etc. 

You may add items that seem unnecessary yet you can’t imagine your trip without them like travel pillow or reusable water bottle.

When your list is done, review it and remove any items that are not essential or that you can purchase at your destination. The less luggage you take with you, the more mobile you will be on your trip.

Additionally, it’s advisable to leave some space for items you buy in your destination country.

Outfit planner

Outfit Planner Template

How much time do you normally need to choose what you will be wearing the whole day? Is this task easy for you? Is this task responsible for you because your outfit has a huge impact on how you feel during the day?

Whether we want it or not, how and what we wear affects our lives. And when the process is unestablished, it might affect it badly. An outfit planner is a great way to forget about standing in front of your closet, doubting every single piece of clothes. 

By finding your best outfit planner app and incorporating it into your planning routine, you save yourself time for an extra 5 or 10 minutes of sleep every morning. 

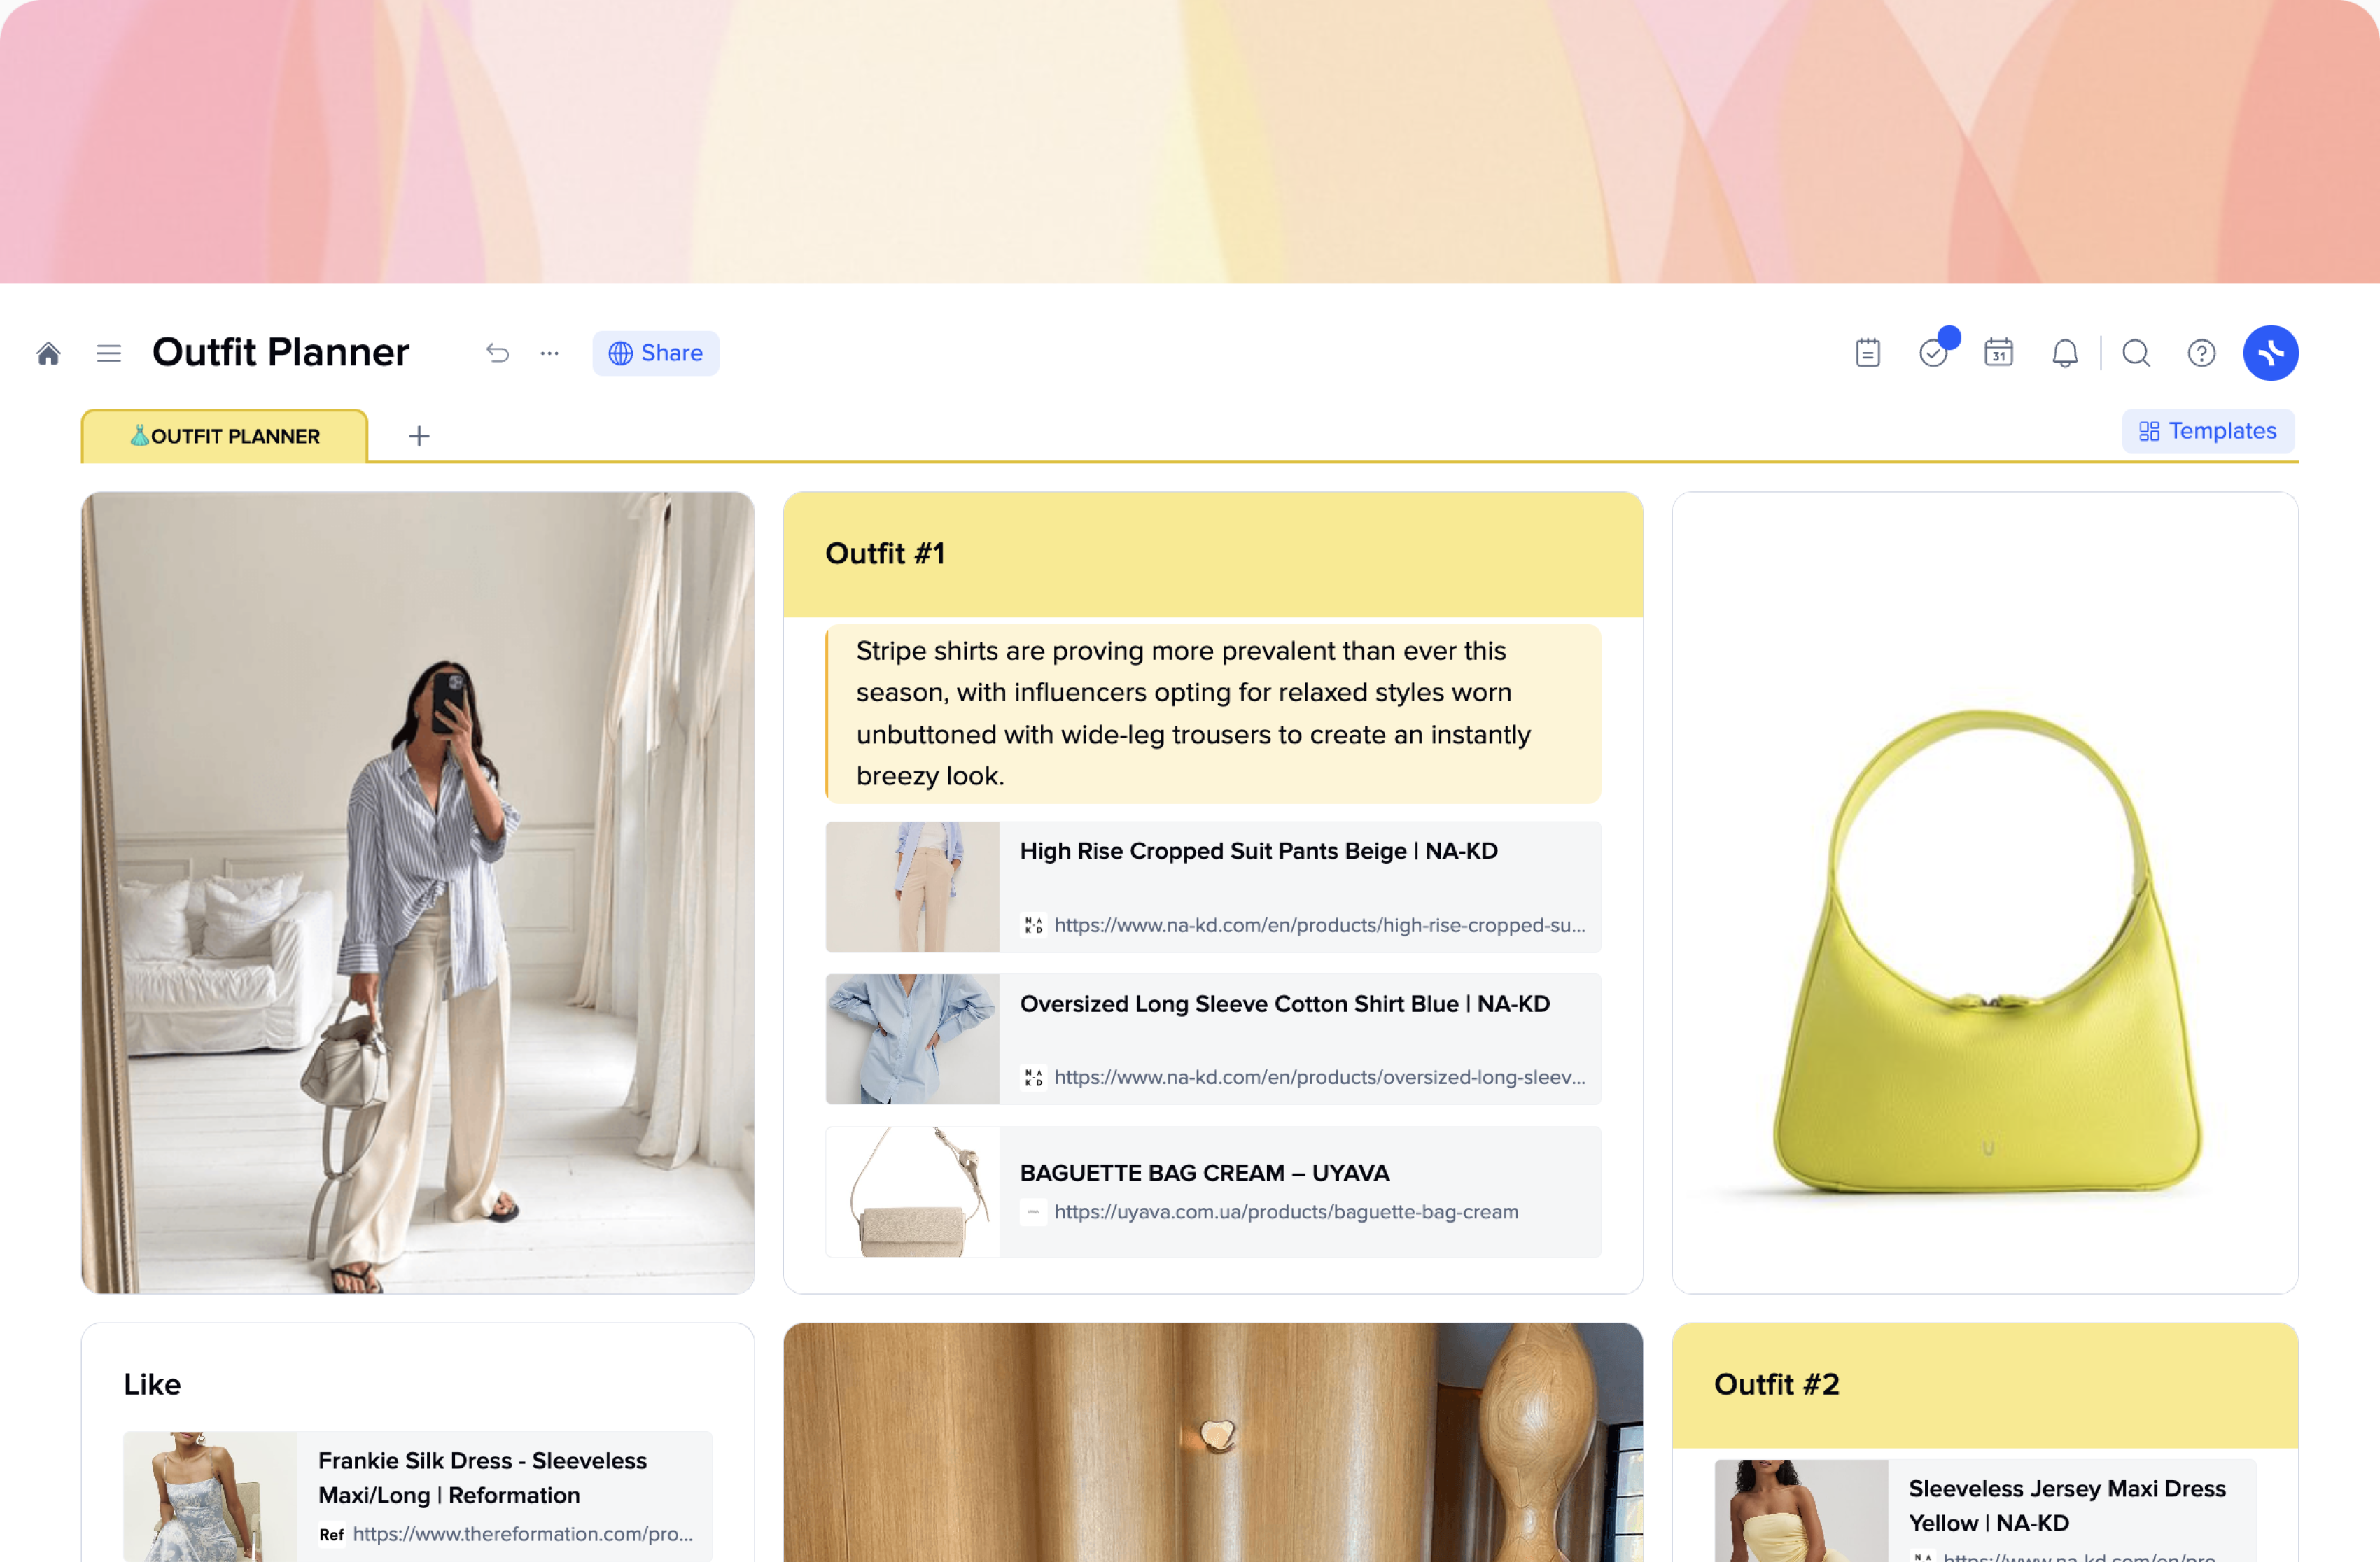
The xTiles Outfit Planner Template helps people find their unique style and build their wardrobes to express their individuality through their clothes. Combine it with the guide you will find below to reach the best results!

What is outfit planning?

Have you ever experienced that frustrating moment when you stand in front of your closet, wrapped in a towel, and nothing seems right? Have you ever felt like the friend who has the worst outfit at the party? Have you ever checked your outfit in every front store because you’re not sure you chose the right outfit?

The mornings filled with discarded clothing options scattered across the bed or resorting to wearing the same thing every day indicate the need for a change. If there’s a chair with your clothes in the corner of your room that grows every day because you can’t make up your mind when getting ready, you need a change. If you’re annoyed during the day because you feel uncomfortable in your outfit, you need a change.

By dedicating some time to outfit planning, you can transform your mornings and daily life.

The key is to plan your complete outfit at least the night before you need to get ready. However, when you dedicate a couple of hours (this time will shorten when you get to know your needs and how your wardrobe suits them) once a week, you have more time for other activities in the morning or can sleep 5 minutes more.

With a little advance preparation, you pave the way to becoming a stylish individual in a stress-free way. 

Benefits of planning your outfits regularly

Planning in any aspect of life provides a productivity boost on multiple fronts. Dedicate a day, like Sunday or Saturday, to prepare everything for the upcoming week, and experience a sense of accomplishment as you tick off each task on your to-do list. It’s an exhilarating and motivating experience!

Moreover, the days you benefit from your planning efforts will yield a productivity surge. Since you won’t have to rush as much, you’ll find yourself more productive simply because you’re in a better headspace at the start of the day. 

Alternatively, you might experience increased productivity because you’ll spend less time getting dressed and more time investing in yourself—whether through a workout, reading a book, or starting your work early!

One of the key advantages of wardrobe planning is the additional time you gain by preparing in advance. How much time do you usually have to complete your morning routine? We’re all humans, and hitting snooze in the morning usually seems to be a good idea, even though it never is. We get up abruptly and wear the closest pair of jeans we can find and a T-shirt from yesterday to make it to work on time. A day that starts like that cannot be a nice one.

Instead of getting up earlier to complete your morning routine before leaving the house or running in a rush to get ready, you can leisurely take your time on a weekend or a free weekday evening to curate the perfect outfits. No rush, no stress.

That allows your outfits to appear more polished and suitable for your busy days ahead. If you’ve been lacking the joy of assembling outfits recently, wardrobe planning offers an excellent opportunity to rekindle your love for fashion.

Regularly planning your outfits helps you save money and spend them wisely when shopping. Have you ever cleaned out your closet and discovered forgotten treasures hidden in the back? Well, when you plan your outfits, you can delve into the depths of your wardrobe and revive those long-forgotten pieces, giving them a new lease on life. Besides, fashion goes in circles, so maybe something that has collected dust in your wardrobe since 2012 is trendy again. 

Furthermore, preparing your outfits will prevent you from purchasing duplicate clothing items when you’ve completely forgotten that you already have something similar.

Another advantage planning your wardrobe may bring you is experiments with your style. If you feel that your clothes lack trendiness or a fashion-forward appeal, planning ahead is an excellent way to start exploring different styles! 

You’ll have more time to dive into Pinterest, fashion blogs, and Instagram profiles of your favorite fashion influencers to curate unique looks that inspire you.

Perhaps your usual tonal outfits will now burst with vibrant colors. Or maybe your cottage core aesthetic will take on an edgy twist. When you prepare your looks in advance, you have the opportunity to make your outfits truly stand out!

What is an outfit planner template?

An outfit planner template is a tool to help individuals organize and plan their outfits in advance to prevent hasty decisions in the morning and maintain consistency in their style during a certain period of time. It typically consists of sections for every day of the week or categories where you can note down details such as clothing items, accessories, shoes, and any other elements you want to incorporate into your outfit. 

An outfit planner template will be useful for people who want to turn their wardrobe into something that expresses their individuality and for professional stylists who create outfits for many clients at the same time. If you belong to the second category, an outfit planner will help you provide your clients with a workable framework to teach them to be stylish without your help, relying on their natural sense of beauty.

The template may also include space for notes, weather considerations, and occasions or activities for which the outfit is intended. They also may offer to collect pictures of others’ outfits you want to try yourself. Once again, if you’re a professional stylist, the ability to create such a mood board will help you guide your clients and show them possible options for composing their outfits on their own.

If you don’t like the idea of planning your outfits or rely on your spur-of-the-moment decision, you still may utilize an outfit planner template. Choosing outfits for work may not be a responsible task, and you can freely wear the same outfit you had yesterday—the same situation when you spend time with your friends. An oversized T-shirt won’t change their feelings for you. However, there are special days and occasions when we must look stunningly.

A wedding planning outfit is a useful tool not only for a bride or groom but for maids of honor, best men, and other guests as well. It helps decide on the best outfit or outfits (if you plan to change during the day) for the occasion.

A vacation outfit planner will help you prepare for your trip. It ensures you take with you items that are easy to combine, so you won’t need ten pieces of everything to look fantastic. Also, it will help you plan your vacation wardrobe depending on the place you’re going to visit. Let’s admit that we need two entirely different collections of clothes for spending time in Italy and in Norway.

Utilizing an outfit planner template offers you numerous benefits:

  1. Time-saving:

Your morning won’t start and end with deciding what to wear today.

  1. Stress reduction:

Having a plan for your outfits minimizes the stress and anxiety associated with last-minute outfit choices. 

  1. Enhanced organization:

An outfit planner promotes better organization of your clothing and accessories, making it easier to locate and utilize items in your closet.

  1. Improved styles and creativity:

It allows you to think strategically about your outfits and discover new ways to express your personal style.

  1. Budget-consciousness:

This helps you avoid unnecessary shopping and make more mindful purchasing decisions, saving money in the long run.

  1. Adaptability and flexibility:

This allows you to choose appropriate outfits based on specific needs, ensuring you are comfortable and well-prepared for different situations throughout the day.

When do I need wardrobe planning?

There are multiple situations when you may need to consider making outfit planning a part of your routine. Here are some most eloquent:

  1. You struggle to select an outfit from your wardrobe when you’re in a hurry.
  2. You rarely wear a significant portion of the clothes you own.
  3. You don’t feel confident or your best in any of your outfits.
  4. You feel out of context with your outfits wherever you go.
  5. You feel that people around you always have better outfits than you.
  6. You lose confidence because of your outfits when you are with other people.
  7. Your wardrobe lacks organization and is in disarray.
  8. You never maintain a shopping list for new clothes and don’t adhere to a clothing budget.
  9. You feel clueless about how to create different outfits with the items you already have due to the chaotic state of your wardrobe.

An outfit planner template will help you implement this kind of planning into your life painlessly. By providing you with a ready-to-use framework, it saves you from creating and customizing documents. It takes the most unpleasant formal part of planning away.

How to plan an outfit?

Determine your wardrobe requirements

When it comes to your wardrobe, it’s important to go beyond the basics, like a white T-shirt, black pants, and a little black dress. Instead, let’s focus on identifying specific wardrobe needs that align with your unique circumstances.

Consider the following factors when determining what your wardrobe should consist of:

  1. Lifestyle: 

Reflect on your daily activities. Do you work outside the home or from home? Does your job involve significant fieldwork or require you to spend long hours in an office? Does your office have a dress code you must follow? Are you a stay-at-home mom or retired?

  1. Climate: 

Take into account the weather conditions in your location. Is it humid? Is it predominantly cloudy? Do you experience colder or warmer temperatures?

  1. Appearance: 

Consider your body shape and complexion. Which colors and clothing styles flatter your body type?

  1. Personal preferences: 

Explore how you express yourself through clothing. What are your style preferences and dislikes? What values do you embody? How many clothes do you realistically need?

By considering these factors, you can better determine your specific wardrobe needs, allowing you to curate a collection of clothes that suit your lifestyle, climate, appearance, and personal preferences.

Assess your wardrobe

Once you clearly understand what should be included in your core wardrobe, it’s time to review the existing items in your closet and check whether they suit your needs.

Take a thorough look at what you already have. Are the pieces suitable for the current season or the specific period you plan for? Are they still in good condition? Maybe that favorite pair of jeans you’ve been wearing since high school deserve to have a rest. Pay attention to black items as they tend to lose color very quickly and might be the exact detail that makes the whole outfit look bad.

Try on the clothes and accessories that align with your needs to create complete outfits. It may take some time, yet it’s necessary because we can not always visualize everything successfully.

It’s important to pre-plan entire outfits because, sometimes, a wrong accessory choice can undermine an otherwise perfect outfit. Experiment with different combinations of jewelry, bags, shoes, and other outer elements. 

As you try on different outfits, take notes or, even better, capture pictures. That will help you keep track of the looks that work well and those that you particularly love.

A significant advantage of reviewing your wardrobe is that it allows you to identify items you no longer use or need. You can then declutter them and create a shopping list for necessary replacements or additions.

Schedule your planning day

Select a day when you have enough time to organize your outfits for the upcoming week. The day may depend on your schedule. It also may change occasionally when you need to participate in unexpected events or activities.

If you already engage in meal prepping and other weekly planning activities, make it a point to gather your outfits on the same day. This approach makes remembering and incorporating it into your routine easier, helping you develop a consistent habit.

Make sure to check the weather forecast

Next, it’s crucial to assess the upcoming weather for the week. It is essential to examine the forecast before planning your outfits when the weather may change in autumn or spring severely during a couple of days. The weather can be quite unpredictable, with mornings being extremely cold and afternoons scorching hot and vice versa. 

By considering the weather when choosing what to wear, not only will you be stylish, but you will also ensure your comfort. Layering becomes key during this time of year, allowing you to add warm clothing in the chilly mornings and remove layers for the hot afternoons.

Envision your upcoming day

Before organizing your outfits for the coming week, it’s essential to visualize the activities and events you’ll be engaged in. That’s why it will be easier if you’re engaged in weekly planning. Your outfit planning will be its natural continuation, and you never would be out of context with your looks. 

So, what is waiting for you this week? Will it be lengthy workdays and no play? Maybe there also will be a half-day at the office followed by an office party? Perhaps a day of shopping with friends or a partner? A trip? A hiking day outside the city? Or simply a casual day dedicated to cleaning? It could be something in between.

By understanding what your day holds, you can plan your outfit to be stylish and practical. That is one of the advantages of outfit planning. You won’t find yourself rushing to put something together only to feel uncomfortable and annoyed in your high heels when you have to walk a lot. When yo

Onboarding

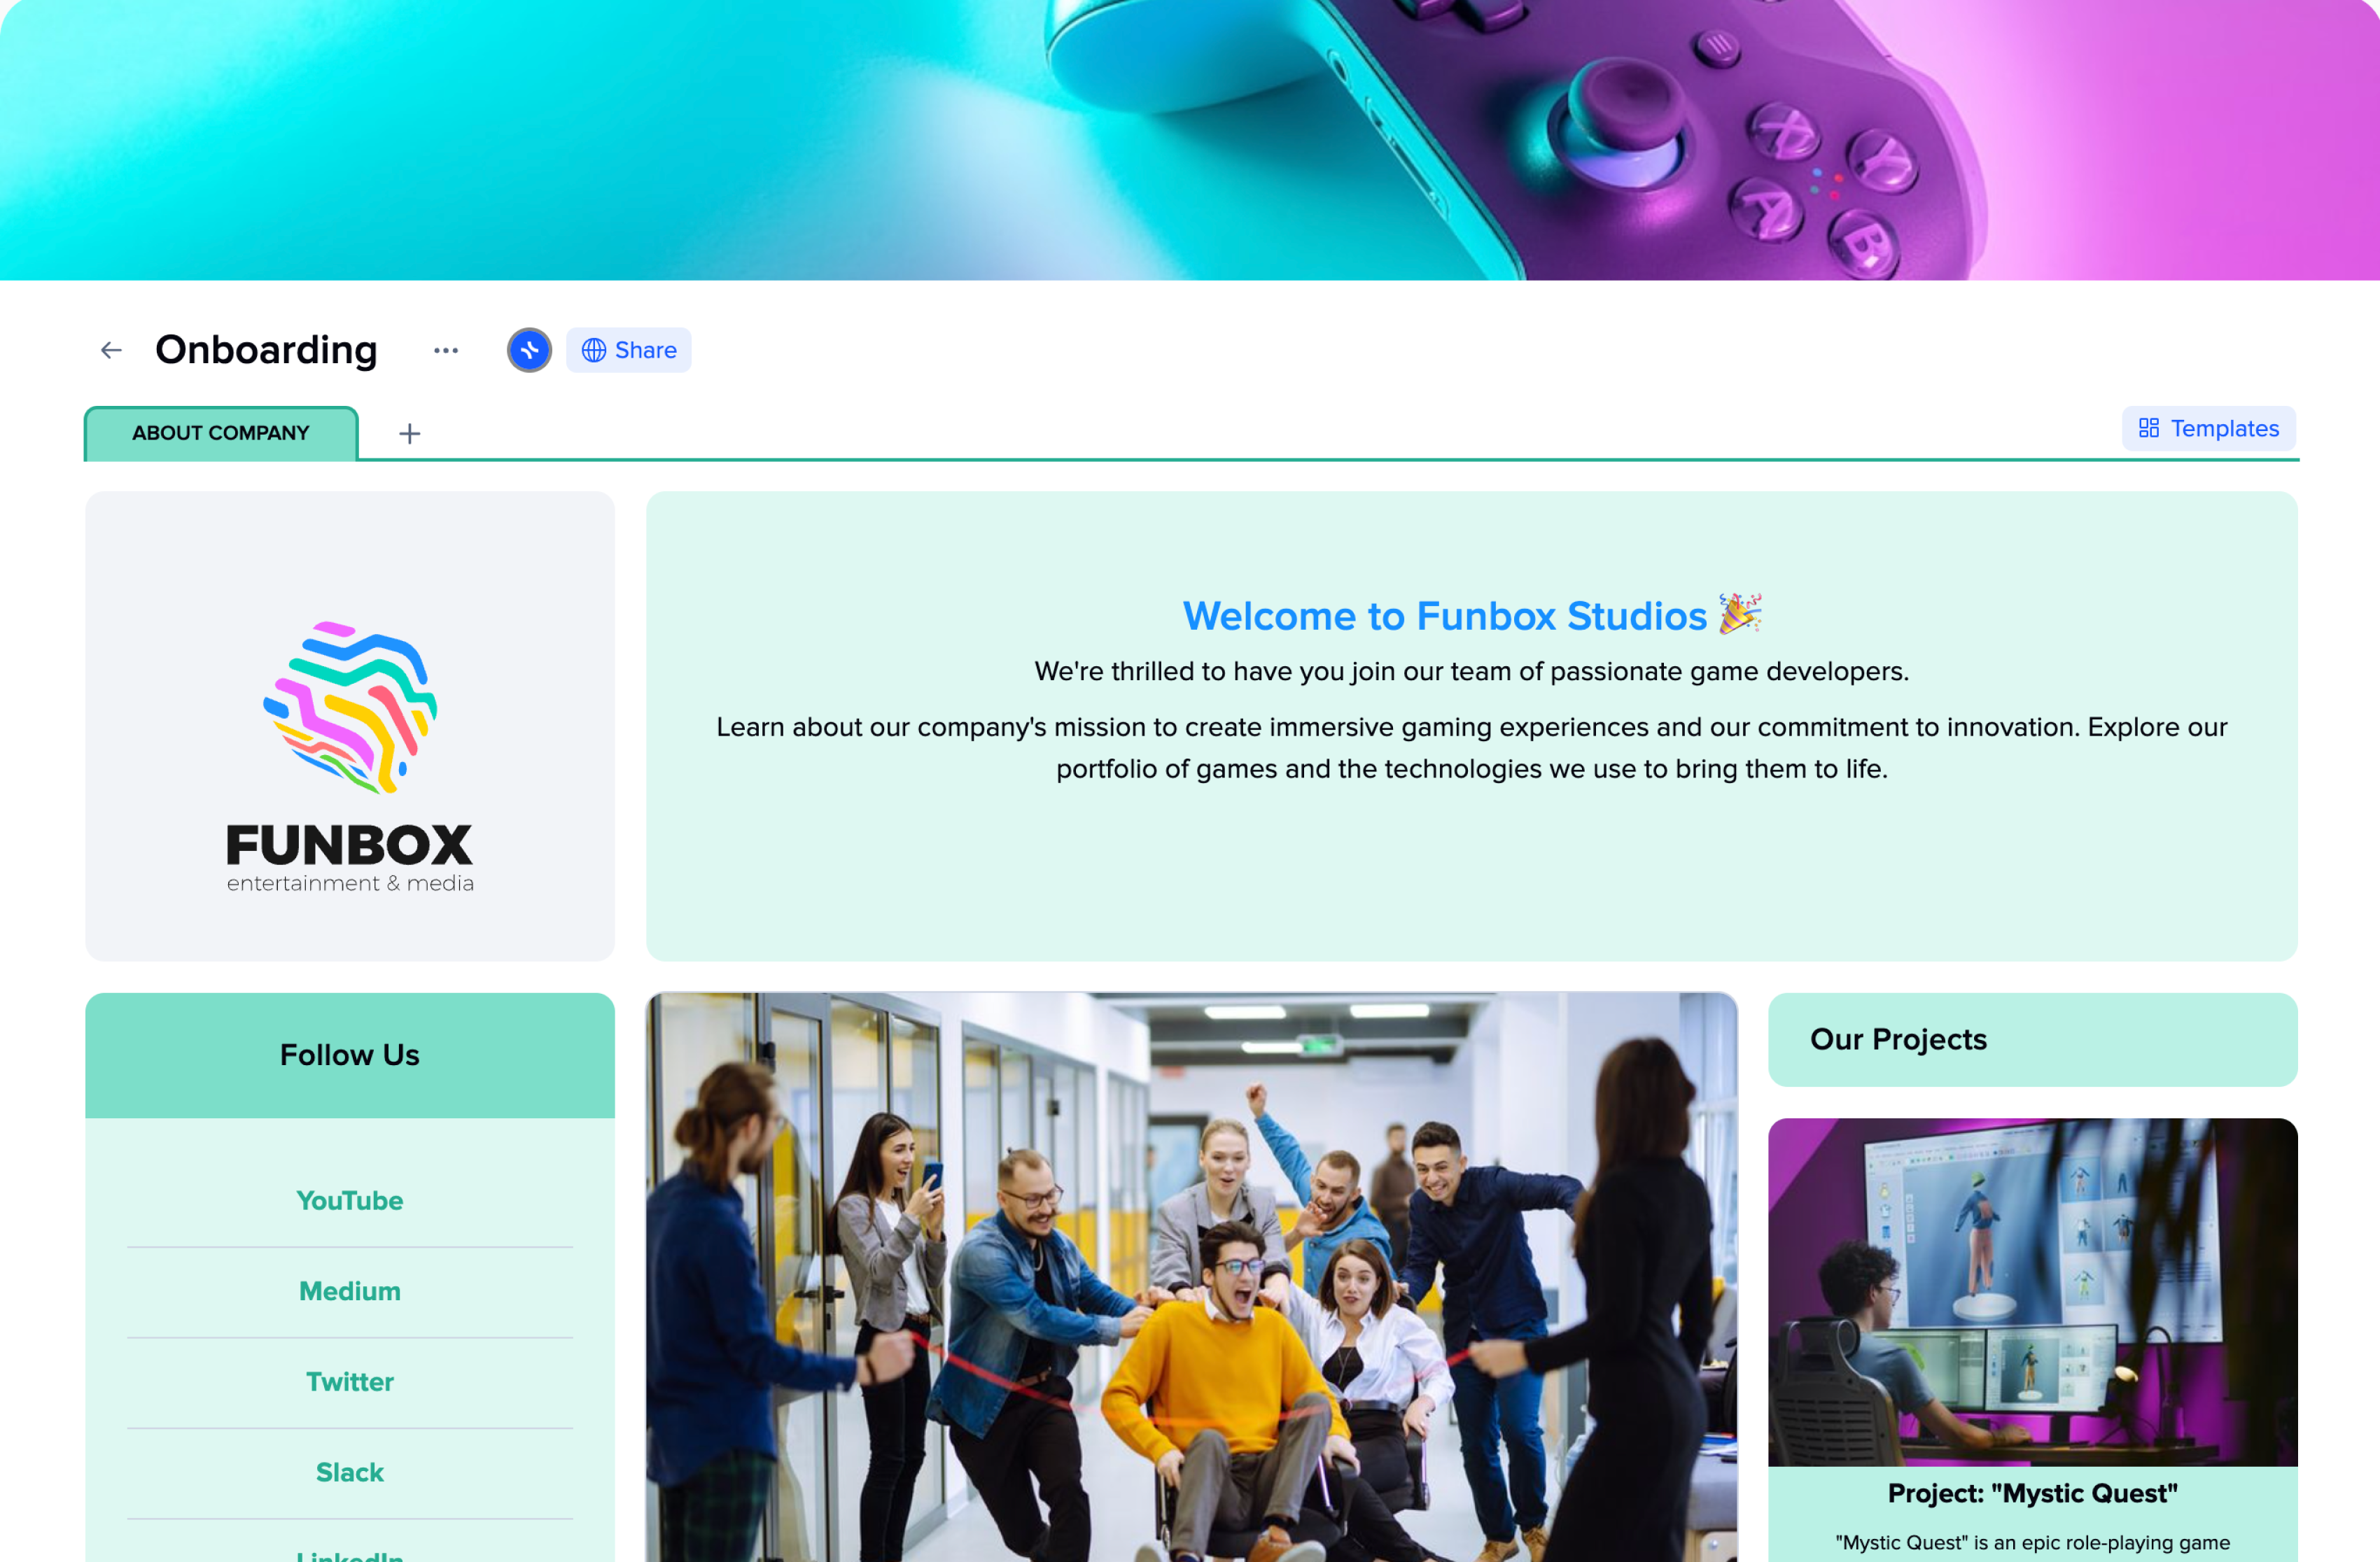
Onboarding Template

Do you remember your first day at work? How did that feel? Were you anxious or relaxed? Probably, the first. Few people wouldn’t feel tension during such important moments. That’s why we need onboarding.

Onboarding ensures smooth integration into new teams and organizations for new hires. Companies, in turn, get a new employee that understands and shares company culture, goals, and style of work.

Even though onboarding is necessary, many companies and organizations still struggle with establishing the process and making it as easy for new hires as possible, which might lead to losing valuable employees at the early stages of their employment. 

An onboarding template is what makes everything easier for the people responsible for building the process. The xTiles Onboarding Template serves as a basic structure to provide people with the main information for new employees. It helps you gather all the helpful data, resources, and links to help people become part of the company.

What does “Onboarding” mean?

New employee onboarding is the process of acquainting new employees with an organization’s expectations, behaviors, and culture. A successful onboarding not only enhances the new hire experience but also establishes the foundation for loyalty, leading to positive outcomes for the company’s bottom line. And strong employee loyalty, in its turn, increases the likelihood of long-term commitment and engagement.

However, the impact of employee onboarding goes far beyond these immediate benefits. Its influence extends throughout the entire employee journey, beginning even before Day 1 and continuing until their last experience with the company. In essence, onboarding encompasses the entire employee’s lifecycle within the organization.

Effective onboarding starts prior to an employee’s first day, involving activities such as pre-boarding communication, paperwork completion, and setting expectations. This early stage sets the tone for the employee’s experience and prepares them for a seamless transition into their role.

Once the employee joins the company, onboarding continues with comprehensive orientation programs, training initiatives, and introductions to colleagues and organizational practices. These activities aim to facilitate smooth integration, foster a sense of belonging, and equip the employee with the necessary knowledge and resources to thrive.

However, onboarding doesn’t conclude after the initial period. It extends into ongoing support, feedback, and development opportunities throughout the employee’s tenure. Continuous onboarding efforts ensure that employees remain engaged, motivated, and aligned with the company’s objectives, nurturing their professional growth and commitment.

By viewing onboarding as a comprehensive process that spans the entire employee journey, organizations can cultivate an environment of continuous learning, development, and engagement. This holistic approach to onboarding creates a solid foundation for a successful and enduring employee experience, leading to enhanced productivity, higher retention rates, and ultimately, a positive impact on the company’s overall performance.

In summary, onboarding encompasses more than just the initial introduction of new employees to the organization. It encompasses the entire employee journey, from pre-boarding to offboarding. By recognizing this comprehensive scope and implementing effective onboarding strategies, organizations can create a supportive and engaging environment that fosters employee loyalty, growth, and long-term success.

How has onboarding changed during the pandemic?

The onset of the pandemic necessitated significant changes in the way onboarding is conducted. Organizations were compelled to adapt and pivot in order to maintain some semblance of continuity amidst the chaos.

The onboarding landscape is no longer the same as it was before the COVID-19 era. The current circumstances demand that companies discard the traditional rule book and reimagine what effective onboarding should look like. Now, more than ever, there is a pressing need for a shift in employee onboarding and employee experience to ensure their effectiveness in this new reality.

The pandemic has brought forth numerous challenges and considerations that must be addressed in the onboarding process. Remote work setups, virtual interactions, and distributed teams have become the norm. As a result, companies have to modernize their traditional onboarding processes to accommodate these changes.

Virtual onboarding platforms, tools for video conferencing, and various digital resources have become inevitable for the success of this new onboarding. They enable remote interactions, virtual training sessions, and the seamless sharing of information and resources.

Why do both parties need onboarding?

The purpose of onboarding employees goes beyond a mere introduction to the organization. It encompasses a series of well-planned events and milestones designed to ensure a smooth transition and integration for new hires. 

The onboarding facilitates and harnesses the employees’ understanding of the company, familiarizes them with their new colleagues, and clarifies their specific roles and responsibilities.

In contrast to employee orientation, which is typically a one-time event, onboarding is a comprehensive process that unfolds over weeks or even months. While orientation may cover essential company information such as security badges and employee handbooks, onboarding extends from the moment an employee signs their contract and continues for an extended period. Its aim is to equip new hires with the necessary skills and knowledge to excel in their new position.

The responsibility for conducting onboarding often falls upon human resources or the learning and development team. A well-defined and organized onboarding process is crucial in fostering a sense of confidence and competence among new employees, enabling them to navigate their roles effectively and feel a sense of belonging within the company.

The fact that an unorganized and flawed onboarding process can have a devastating effect on your business isn’t surprising. New hires who don’t have a positive experience with their onboarding are likely to seek new job opportunities where everything is straightforward and clear. This way, you waste resources on finding and teaching new people without any profit. 

Clearly, onboarding holds significant importance. The decisions you make while constructing your onboarding process have far-reaching implications for employee retention, learning, performance, and ultimately, the financial health of your company.

Effective onboarding directly impacts employee retention by establishing a solid foundation for their long-term commitment. A well-designed onboarding program creates a sense of engagement, purpose, and belonging among new hires, reducing the likelihood of early departures and costly turnover. By investing in a comprehensive onboarding process that nurtures employee satisfaction and loyalty, you can mitigate the financial strain associated with frequent employee replacements.

Additionally, the onboarding process is crucial for fostering employee learning and development. It helps new hires acquire new skills and knowledge and set the available ones according to their new role. It also helps people accelerate integration into their roles, allowing them to contribute effectively and reach optimal productivity faster.

Benefits of the flawless onboarding process

The impact of onboarding, whether positive or negative, reverberates throughout an employee’s entire tenure at your company. By investing in creating a positive and valuable onboarding experience, you not only gain the appreciation of new hires but also enhance the overall well-being of your organization.

  1. Onboarding strengthens early retention:

Investing in employees’ career development from the outset is crucial. New hires may start their job with uncertainty and skepticism if lacking sufficient support, which might convince them to leave in the early stages. By providing opportunities for growth during onboarding, you demonstrate your commitment to their professional advancement, increasing their satisfaction and reducing the likelihood of premature departures.

  1. Onboarding streamlines administrative tasks:

Effective onboarding processes leverage organization and technology to expedite new-hire administrative tasks. Commencing a new job typically involves numerous administrative responsibilities, such as setting up accounts, completing tax forms, signing documents, and joining the payroll. These tasks can be tedious and, without an efficient process in place, hinder the enthusiasm and momentum of new hires. By optimizing the onboarding experience, you can swiftly navigate these administrative requirements, ensuring a seamless transition into their roles.

  1. Onboarding accelerates productivity:

New employees require a period of acclimation to acquire skills, familiarize themselves with tools and processes, and understand how your company operates. Onboarding provides an ideal opportunity to expedite this process, enabling them to contribute to their full potential as quickly as possible. By equipping new hires with the necessary guidance and resources during onboarding, you empower them to become productive team members sooner, harnessing their skills and expertise for the benefit of the organization.

  1. Onboarding fosters trust and community:

Onboarding is highly important for building a sense of community and inclusivity within your organization. It offers an opportunity to set the tone for your company culture and ensure everyone feels valued and part of a cohesive team. Ideally, onboarding should facilitate meaningful professional and personal relationships among new hires. Fostering a sense of belonging and connection prevents feelings of isolation and encourages a positive and productive contribution from the outset.

  1. Onboarding reinforces company culture:

One of the primary goals of onboarding is to introduce new hires to your company’s culture. By effectively integrating them into the cultural fabric of your organization, you pave the way for smoother operations and collaboration. For instance, if your company values collaborative learning, a successful onboarding program will instill this cultural aspect in new hires, fostering accountability and peer-based learning. Aligning new employees with your company’s culture during onboarding sets a solid foundation for future challenges and growth.

In summary, investing in a well-crafted onboarding experience yields numerous benefits. It boosts early retention rates, expedites productivity, streamlines administrative processes, fosters trust and community, and reinforces your company’s unique culture. By prioritizing onboarding, you lay the groundwork for long-term success and create an environment where both new hires and the organization thrive together.

Challenges new hires may face during the onboarding process

Employee onboarding can be a complex process, and various challenges can arise that hinder its effectiveness. Understanding these challenges is crucial to proactively address them and ensure a successful onboarding experience. Also, it will help to build the process while leaving the minimum space for such challenges in the future.

Here are some common pitfalls that can occur during employee onboarding:

  1. Too much new information:

Providing new hires with excessive information, especially unrelated to their immediate needs, can overwhelm them. It’s important to curate and deliver relevant information gradually, allowing them to absorb and retain it effectively. This prevents them from feeling bombarded and ensures they can apply the knowledge they acquire.

  1. Failed expectations: 

Clearly defining roles and responsibilities is essential. If employees are expected to perform tasks beyond their job description without proper communication, it can lead to frustration and disappointment. Aligning expectations from the beginning helps establish a shared understanding and fosters a positive work environment.

  1. Poor or no feedback: 

Regular and constructive feedback is crucial during the onboarding process. Providing feedback helps employees improve their performance, build stronger communication channels, and, as a nice bonus, boosts their morale. Recognizing their achievements and successes also enhances motivation and engagement.

  1. Leaving the employee on their own: 

Employee onboarding should involve the entire team, not just the HR department. By preparing and involving current employees, new hires can receive support, establish connections, and feel welcomed into the company culture. That promotes a sense of belonging and facilitates smoother integration.

  1. Lack of explanation concerning growth opportunities:

Communicating clear career development paths and growth opportunities is essential for employee retention. When new hires have a clear understanding of their potential growth within the company and the steps they need to take, they are more likely to feel valued and motivated to stay long-term.

  1. Unattainable goals: 

Setting realistic goals for new employees is crucial to avoid burnout and maintain morale. Expecting immediate high-level performance without providing the necessary resources and support can lead to frustration and diminished productivity. Balancing ambitious goals with proper guidance and training ensures a more successful onboarding experience.

Addressing these challenges requires a proactive approach. Regular communication, clear goal setting, ongoing feedback, involving the team, and providing growth opportunities contribute to a smoother onboarding process. Seeking advice from industry experts and benchmarking against best practices can further enhance the effectiveness of employee onboarding initiatives. By continuously refining and adapting the onboarding process, organizations can mitigate challenges and create a positive onboarding experience for new hires.

How to build a healthy onboarding process using the xTiles Onboarding template?

Everyone can explain onboarding in at least a couple of sentences, yet not all companies have mastered it, and that decreases their chances of building strong teams of experts.

So, let’s check in detail what onboarding is and how to make it as effective for the new employees and for the company as possible.

Understanding the different phases involved in the onboarding process is important to create a comprehensive onboarding checklist. Let’s explore these phases and highlight key points for each, allowing you to develop the ultimate onboarding checklist.

Pre-Boarding

Preboarding starts before the new employee’s first day on the job. It focuses on completing necessary paperwork and ensuring the new hire has all the information they need. 

Use the xTiles Onboarding template to gather all the necessary information about the company so that the new person can learn everything they need to know before they start. Having a background always feels supportive.

Also, providing access to the company’s online assets is important. Share links to relevant online resources that provide insights into your company’s culture, values, industry position, and goals. That may include blog posts, articles, videos, presentations, material from senior company members and thought leaders, inner rules, etc.

Thankfully, this stage can be done once and only reviewed and edited when needed.

Also, don’t forget to add photos of their new teammates, so it will be easier to remember new names and faces.

Here are some essential steps to include in the preboarding process:

  1. Create an onboarding program with goal tracking: 

Develop a structured onboarding plan that includes training and progress tracking. This plan can be part of your overall onboarding strategy or specifically tailored for remote employees. It should incorporate the following:

  • A personal 30/60/90-day onboarding plan that you can create using the xTiles 30-60-90 Plan Template.
  • Real-time goal tracking that you can create using one of xTiles ready-to-go templates or create your own depending on the new employee’s goals and position.
  1. Send the offer letter and make it special: 

Create a personalized offer letter using xTiles customizing features. Such a move will introduce the new hire not only to their new position and its key points but also to the platform where they will plan, work, take notes, collaborate with other team members, generate and develop ideas, etc.

You may even go the extra mile by including a personalized onboarding video to welcome the new hire. That is an opportunity to communicate core values, showcase the company culture, and create a warm introduction.

  1. Collect personal information: 

Gather personal details such as the employee’s address, emergency contacts, any allergies or dietary preferences, and any necessary certificates or qualifications.

  1. Preview benefits package: 

Share an overview of the benefits package, including health insurance, life insurance, disability coverage, and any other options. 

  1. Set up an email account:

Establish an email account for the new hire and provide log-in instructions, ensuring they have an active email account from day one.

  1. Send a welcome email to the team: 

Introduce the new employee to their future colleagues through a welcome email, fostering a sense of belonging and allowing team members to extend a warm greeting.

Onboarding

The onboarding process marks the beginning of the real work for your new hires. It begins on the employee’s first day and extends over the initial weeks or months. It’s a crucial stage where they start settling into their roles and understanding the expectations placed upon them. 

A well-designed onboarding process encompasses various elements, such as office tours, introductions to company culture and values, and setting goals for the new hire’s initial weeks on the job. By dedicating time to orient your new hires properly, you can help them quickly become productive and contribute to the organization’s success.

Here are some steps to enhance your onboarding process:

  1. Schedule a remote/hybrid employee orientation session: 

Arrange a remote or hybrid orientation session for individual employees or in groups. To ensure a successful meeting, consider the following:

  • Set up a video conferencing system that sends out reminders in advance.
  • Create an agenda for the session and provide it to employees beforehand.
  • Share digital copies of necessary documents, such as the employee handbook and questionnaires.

Individual remote orientation sessions benefit higher-ranking or important positions within the company, such as managers or junior executives. Group sessions are suitable for general team members, fostering a sense of teamwork from the start.

  1. Invite employees to select their benefits: 

Encourage employees to select their benefits, either before their first day or during their first week. Inform them of when the benefits will become active and make yourself available to address any questions they may have.

  1. Introduce the training schedule: 

Provide new hires with a clear training schedule that outlines the support and resources available to help them acclimate and become confident in their roles.

  1. Give your new hire a tour: 

If the new team member will be in the office on their first day, have their manager provide a comprehensive tour showcasing the office facilities and amenities.

  1. Take your new team member out to lunch: 

Consider structuring the office tour to end with a lunch outing. That not only provides a pleasant experience but also offers an opportunity to build professional relationships outside of the office environment. 

If feasible, invite the rest of the team the new hire will be working with to facilitate introductions and foster connections.

  1. Schedule an HR orientation: 

After the initial meetings, arrange an orientation session with the human resources department. That allows employees to review and digitally sign important HR documents, including company policies, employee requirements, PTO and benefits details, and account setup instructions.

  1. Give employees a “Review Period”: 

Allocate time for remote employees to review the provided onboarding materials before proceeding further. Depending on the amount of material to review, consider allowing up to a week for this process. Utilize this time to onboard other remote employees, optimizing your productivity.

It’s important to provide the same review period to all employees, regardless of how quickly some may complete the task. That ensures fairness and consistency throughout the onboarding process.

By incorporating these steps into your onboarding process, you can create a smoother transition for new hires, enabling them to integrate into their roles confidently and efficiently.

Follow-up

The follow-up phase occurs after the initial onboarding period and focuses on continuous support and integration. It focuses on ensuring that your new employee is settling into their role and achieving their goals. 

The follow-up stage involves regular check-ins with their direct supervisor to assess progress and provide additional support or training if necessary. This ongoing support and development opportunities contribute to the growth and advancement of your new hire within the company.

The duration of this stage usually varies depending on the individual employee’s needs, ranging from a few weeks to several months. 

Here are some additional steps to enhance the follow-up stage:

  1. Conduct a survey about their onboarding experience: 

Obtain feedback from new hires by sending them a brief survey comprising four to seven questions. This step helps identify areas for improvement in the onboarding process and demonstrates to the new hire that their opinions matter in shaping the company culture.

  1. Follow through with promises: 

During the onboarding phase, managers often make promises and commitments to create excitement about what lies ahead. The true measure of a great employer lies in their ability to fulfill these promises accurately and promptly. Strive to not only meet but exceed expectations, demonstrating a commitment to providing an exceptional employee experience.

  1. Provide ongoing support and development: 

Continue to invest in the growth and development of your new hires beyond the onboarding period. Offer opportunities for additional training, mentorship, or participation in projects that align with their interests and career aspirations. This enhances their skills and fosters loyalty and engagement within the company.

  1. Regular check-ins and performance reviews: 

Schedule regular check-ins between the new hire and their direct supervisor to review progress, address any challenges, and provide guidance. Conduct performance reviews at appropriate intervals to assess performance, set new goals, and offer constructive feedback for improvement.

  1. Career path discussions: 

Engage in open conversations with your new hire regarding their career goals and aspirations. Help them understand potential growth opportunities within the company and provide guidance on the skills and experiences required to advance. Offering a clear career path fosters motivation and dedication.

  1. Recognize and celebrate achievements: 

Acknowledge and celebrate the achievements and milestones of your new hires. Recognize their contributions and provide positive reinforcement to boost morale and motivation.

By implementing these strategies during the follow-up stage, you create an environment that supports your new hires’ continuous growth, development, and career advancement for your new hires. This investment in their success benefits the individuals and contributes to your organization’s overall success.

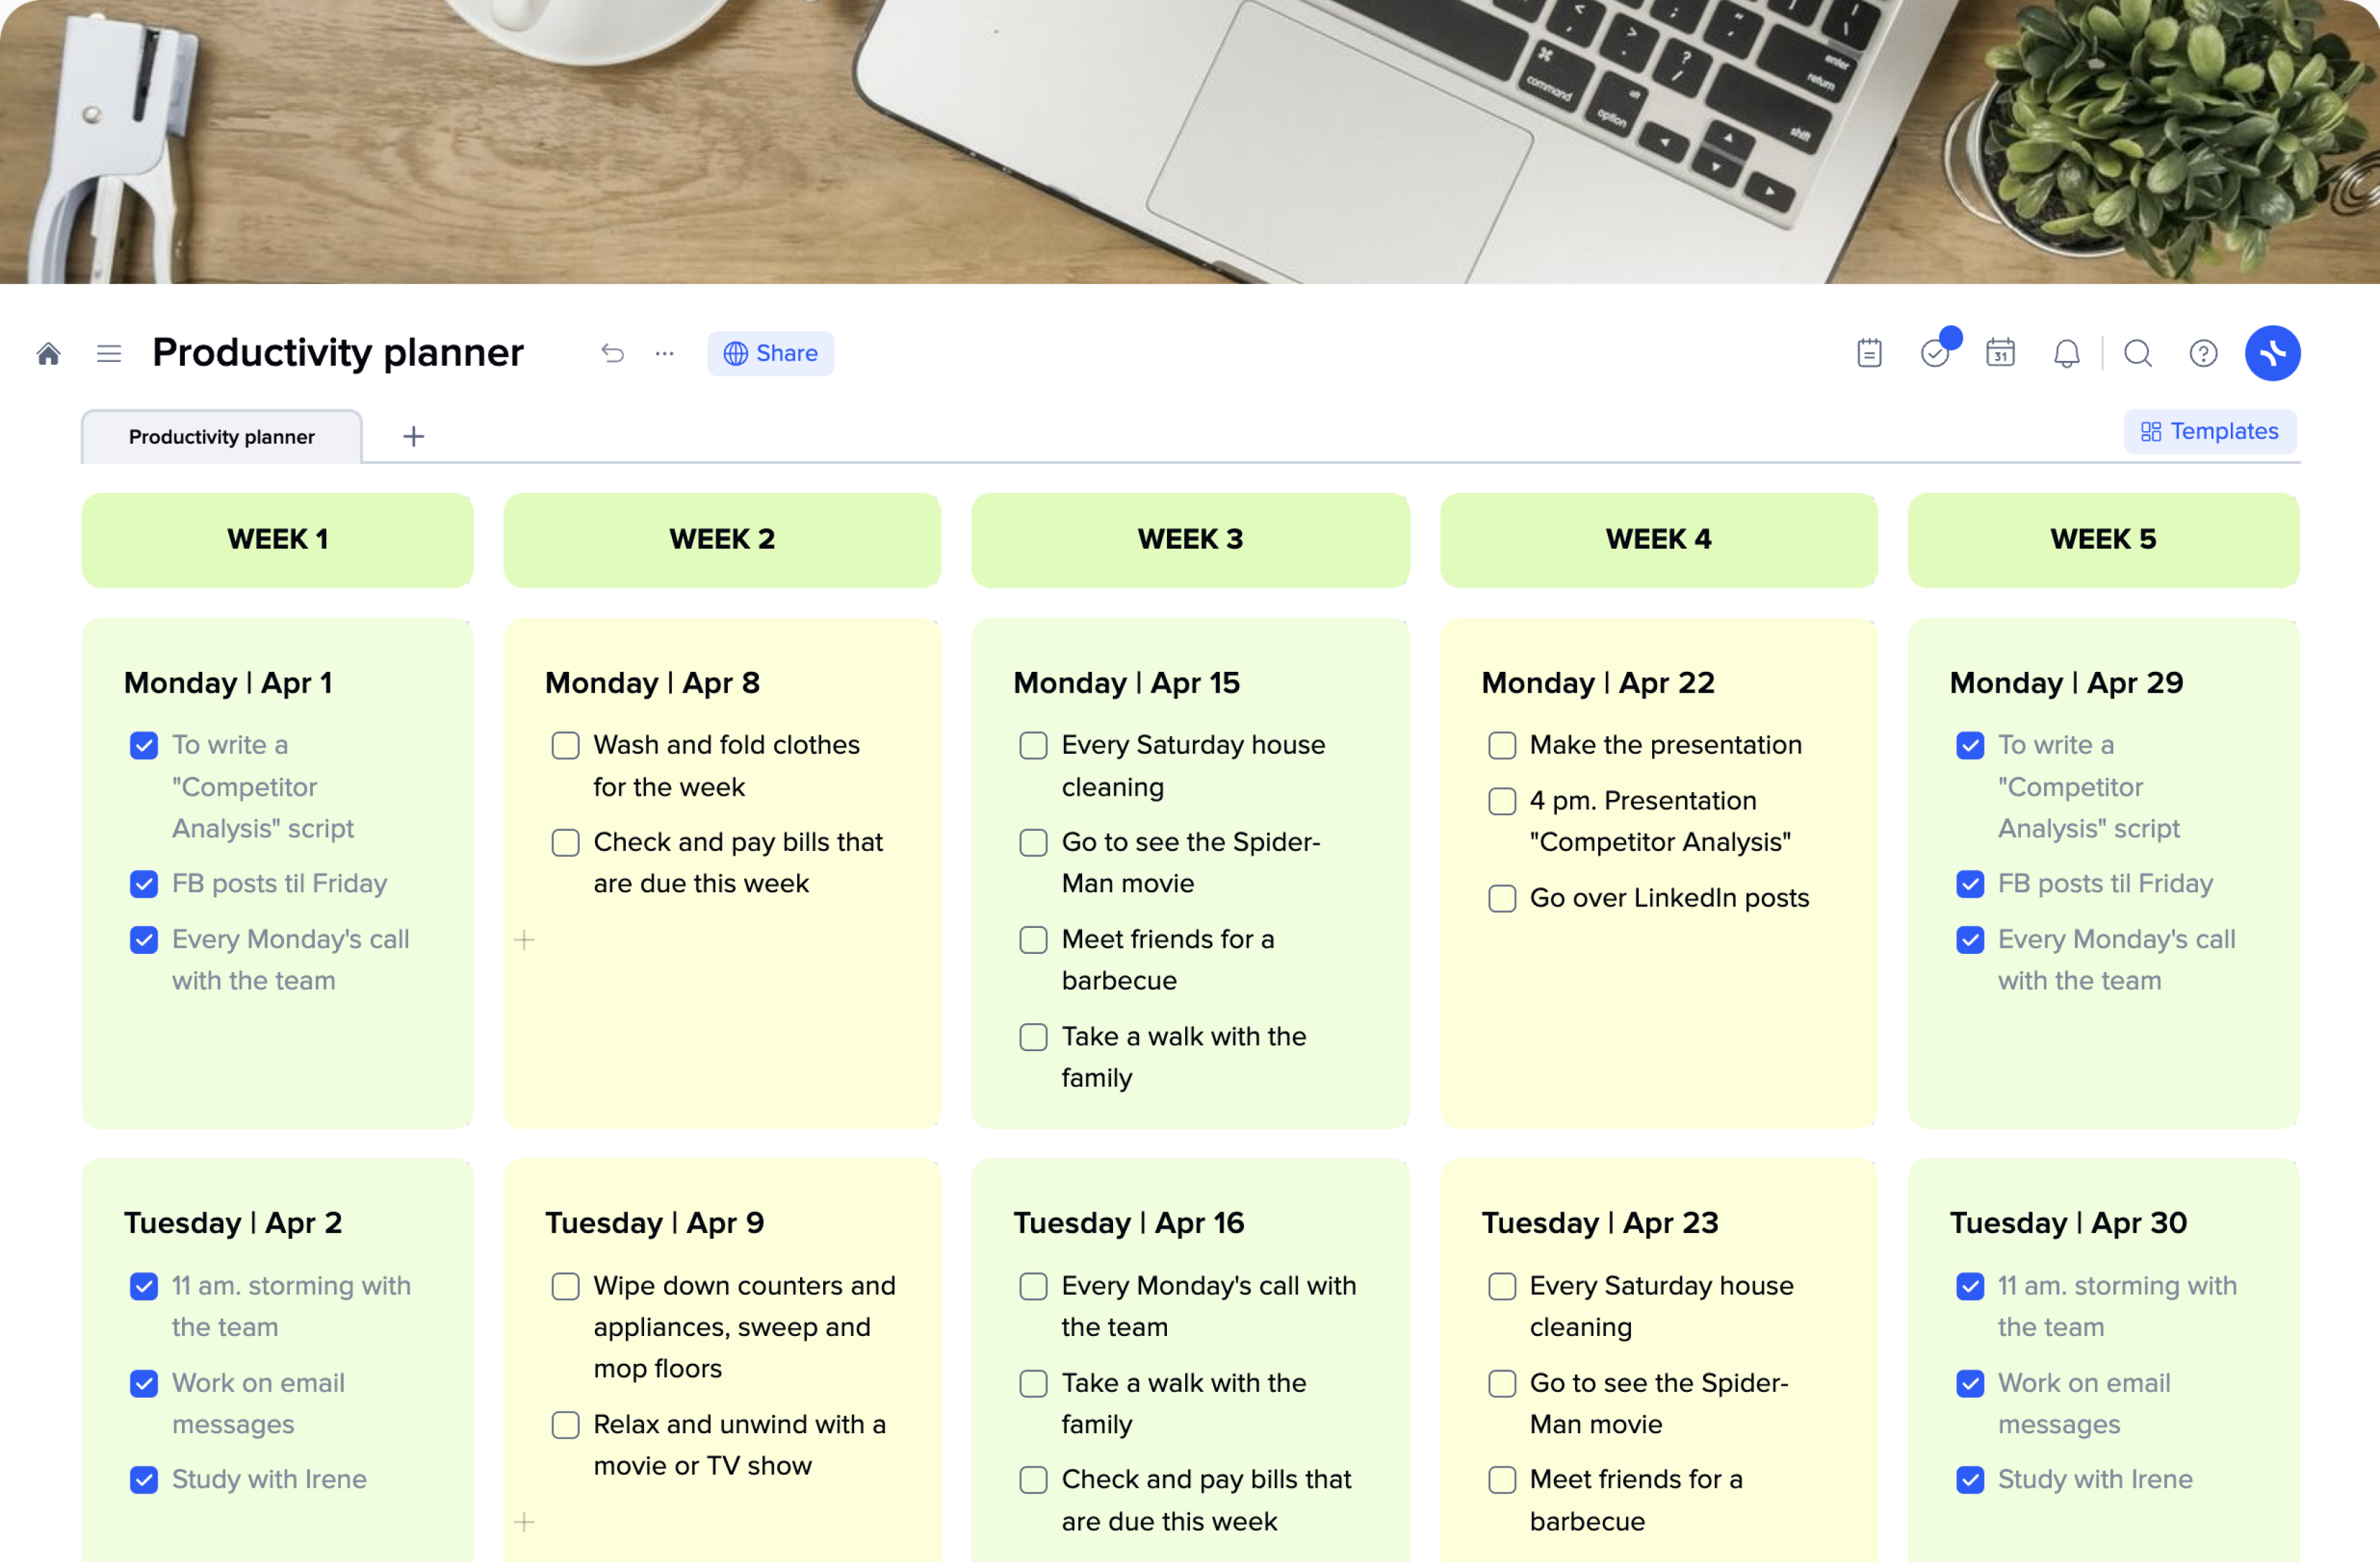
Novel Plan

📌 Novel Plan Template

A free novel plan template is suitable for authors just thinking about creating their own books. Here you can collect scattered ideas, describe the characters, brainstorm, and set the mood with the appropriate mood board.

A novel planning template will help you with your plot structure, hero’s journey, main characters, protagonist motivation, synopsis, etc., whether you’re a novice writer or a tough skilled author. Your ideas, suggestions, doubts, and interesting facts need a place to be organized for organic implementation into your story.

Pre-designed templates for writers can be of different kinds. Besides traditional novel plan templates that are one-size-fits-all solutions, writers can also use a hero’s journey template, character profile template, or three-act structure template.

You may decide on using all of them at the same time (which is a good idea if you’re working on a big text) or the one that is universal and helps to overcome main issues while you’re first mapping out the story outline and then developing it step by step.

Writing is an ongoing process of trial and error. You write, you delete, you write again, you edit, you delete, and so on until you get an entire novel you are proud of and ready to present to the world. The path between “beginning writing” and being “originally published” sometimes takes years of polishing, but don’t let this fact scare you. Writing is also about joy, not necessarily success.

Crafting exceptional stories requires substantial effort and life experiences. As you embark on your storytelling journey, be prepared for the possibility that it may prove more challenging than anticipated and sometimes inspiration strikes not so often as you would imagine. However, modern writers have many tools at their disposal to make the process of writing more convenient, satisfying, and faster.

While story novel plan templates do not solve all the challenges writers encounter because there are always new ones that depend on working style, writing style, new tendencies in the industry, etc., they significantly mitigate the impact these challenges might have on the writing process. These templates assist in organizing your thoughts, providing structure, and offering long-term benefits for your writing endeavors.

The xTiles Novel Plan Template is a solid foundation for various writing styles and story types, regardless of the genre you’re pursuing, be it a sci-fi thriller or historical fiction. Moreover, it is highly customizable and does not restrict you from implementing your most imaginative writing ideas.

What is a novel plan?

A novel plan serves as a fundamental blueprint for a future story, mapping out the major events, plot points, and character development process that will unfold. Authors often incorporate characters, settings, and key elements into the plan to gain clarity and analyze the story to avoid misconceptions, mistakes, and dead ends.

The level of detail in a novel plan can vary based on the writer’s preference and the novel itself. The more characters, settings, and longer timelines you have, the bigger your plan needs to be to keep everything in order within the text.

Neglecting a story outline (even if you’re working on a short story) can lead to confusion and mistakes in the final text, even involving editors or proofreaders might not help. Even successful writers can sometimes overlook inconsistencies, resulting in published texts with errors.

What is a novel plan template?

Utilizing a novel writing plan template streamlines the outlining process, enabling writers to plan each aspect of their future story based on their initial idea and maintain consistency throughout the writing journey.

Creating a solid plan with appealing elements that speak visually and lead in the right direction can be time-consuming. If you encounter limitations in customizing the outline according to your preferences, it may discourage you from using a novel writing plan altogether.

In contrast, xTiles Novel Plan Template is highly customizable and allows for easy sharing and modifications, empowering you to represent ideas on different levels using various expressive means.

The xTiles Novel Plan Template offers several benefits to writers:

  1. Organizing the story. A novel outline template ensures that every detail finds its rightful place, preventing authors from getting lost in excessive details, descriptions, twists, or information about characters and settings. If you use a Snowflake method, it will help you build complex elements upon the baseline.

  1. Time-saving. With a predefined structure, a template saves writers from overlooking important details and provides a solid foundation to build upon when they begin writing.

  1. Adaptability. As stories evolve and intentions change, a template allows for easy modifications and adjustments, accommodating shifts in the narrative.

  1. Consistency. A template helps maintain coherence and cohesion by ensuring the consistency of character traits, plot points, and other vital elements.

  1. Focus. By guiding writers in adhering to the overall direction of the narrative, a template prevents distractions from tangents or irrelevant details.

How to plan a novel using the xTiles Novel Plan Template

Since the template saves you from the preparation stage, you have more time for actual planning and idea development. Additionally, it serves as a framework for building a skeleton of your future story.

This template is strengthened with a step-by-step guide on how to outline your story:

Research everything there is to know about the topic of your novel

Conducting thorough research is an essential preliminary step in the writing journey. Research is a launching pad for fresh ideas, infusing your story with substance and credibility. New insights and perspectives will surface by consolidating your research in a single location.

When it comes to conducting research, platforms like Wikipedia, thematic blogs, forums, communities, and news websites become invaluable resources. These sources offer a treasure trove of historical events, records, data, and diverse opinions pertaining to your topic. However, don’t neglect the ordinary world, as it has a lot of amusing things to offer that can be reconsidered and developed to become a great story. New friends you meet can become your characters, places you visit can become your setting, etc.

Using videos and movie clips may provide a deeper understanding of a mood or emotion. Explore platforms like Vimeo or YouTube by searching for content related to your topic or era. 

Podcasts offer another valuable resource. Look for conversations on Spotify or any podcast platform that revolves around your topic, and incorporate them into your research process.

Another great way to get a swift and vivid understanding of a topic is through images and photos. They possess the ability to transport you to different times and places, aiding in detailed descriptions. Additionally, images are convenient to scan through when revisiting your research. Consider looking for images from platforms such as Google Images, Pinterest, Instagram, different photo stocks, etc.

Research may continue while you’re writing your novel. When you accidentally stumble upon something interesting or useful after your formal research is finished, wasting it would be a crime. It’s essential to have a convenient method for recording on the go to ensure you don’t miss out on capturing those moments.

The xTiles Web Clipper will help you capture everything you find interesting and helpful for your story when surfing the web. And the xTiles Mobile App will help you jot down any idea on the go.

Brainstorm

You have an idea and a lot of information and facts after your research. Now is the perfect time to combine your imagination with the data you found to create something tangible. Brainstorming serves as the ideal approach for this task.

Brainstorming, a timeless creative method, enables rapidly generating fresh ideas. It empowers you to conjure new characters, settings and even delve into the themes you aspire to incorporate in your book.

However, where to start? What will be the starting point? Start with the central idea or concept of your story. It may be a rudimentary idea or a subject you wish to delve into, but this approach will assist you in exploring its potential. Jot down a brief note encapsulating your concept in one to two sentences to initiate the process.

Now, embrace your creativity and let the ideas flow freely. Begin by incorporating any concepts that are connected to your central idea. Consider various elements of your story, such as settings, characters, or even the historical background of your topic. Let nothing stop you because the time to evaluate your ideas has not come yet. At this stage, producing as many ideas as possible and freeing your mind is important.

While delving into different tangents, it’s time to bring order to your ideas by identifying themes.

Begin by clustering similar ideas and assigning each group a title for easy reference. Your ideas might naturally align with categories like story, location, characters, or scenes, but feel free to organize them however you see fit. There are no strict rules in this process. You’re the artist, and you can do whatever you want with your ideas and story. Experiment, go crazy, invent the new wheel, and the xTiles Novel Plan Template will help you with that.

Outline your future novel

Now that you have all the information gathered and organized, outlining your novel won’t be complicated. By putting together the key facts needed for your novel, you save yourself from chaos and inconsistency that might occur in your text since it’s impossible to keep everything in your head. 

An outline for your novel serves as a roadmap or blueprint, allowing you to envision the overall structure and plan the progression of scenes, characters, and ideas that will shape your narrative. It is particularly beneficial for writers who thrive on visualizing the big picture as a series of interconnected events.

Begin by charting the significant scenes or pivotal events that you have identified thus far. These could encompass crucial turning points, important locations, or unexpected plot twists. Writing a novel is always an exciting experience. However, it can also be quite a daunting experience if you need help figuring out how to plan a novel, where to start, or what framework to use.

Be ready that even the most detailed outline might not guarantee your first draft will be good.

How do you write a novel plan?

To write a novel plan, start by brainstorming ideas for your story, including characters, setting, and major plot points. Once you have a general idea, outline the main structure of your novel, breaking it down into acts or chapters. Identify key events, character arcs, and any major twists or conflicts. Develop detailed character profiles, including their backgrounds, motivations, and relationships. Create a timeline or storyboard to visualize the sequence of events. Finally, review and revise your plan as needed to ensure a coherent and compelling story. A novel plan serves as a roadmap to guide your writing process and provides a solid foundation for crafting your novel.

How do you plan a novel fast?

To quickly plan a novel, using xTiles can be a valuable tool. Start by using the available templates or creating custom boards for character profiles, plot outlines, and scene organization. Use the drag-and-drop feature to easily rearrange and modify your ideas. Utilize labels, tags, or color-coding to categorize and track different elements of your story. Take advantage of xTiles’ collaboration features to brainstorm and gather feedback from others. With its intuitive interface and customizable options, xTiles can expedite the novel planning process and help you stay organized.

How do I organize my novel with xTiles?

To organize your novel with xTiles, start by creating separate boards for different aspects of your story, such as characters, plot, settings, and scenes. Use the board’s columns or sections to break down your novel into chapters or key story arcs. Within each column or section, add cards to represent individual scenes or plot points. Include relevant details, such as character motivations, conflicts, and important plot developments. You can also attach files, images, or notes to provide additional context. Use labels, tags, or colors to categorize and track different elements. With xTiles’ visual and flexible layout, you can easily navigate and reorganize your novel structure as needed, helping you stay organized and focused during the writing process.

By team

Startups

Scale your company

Remote work

Collaborate seamlessly

Agencies

Excite your clients