Lesson Program


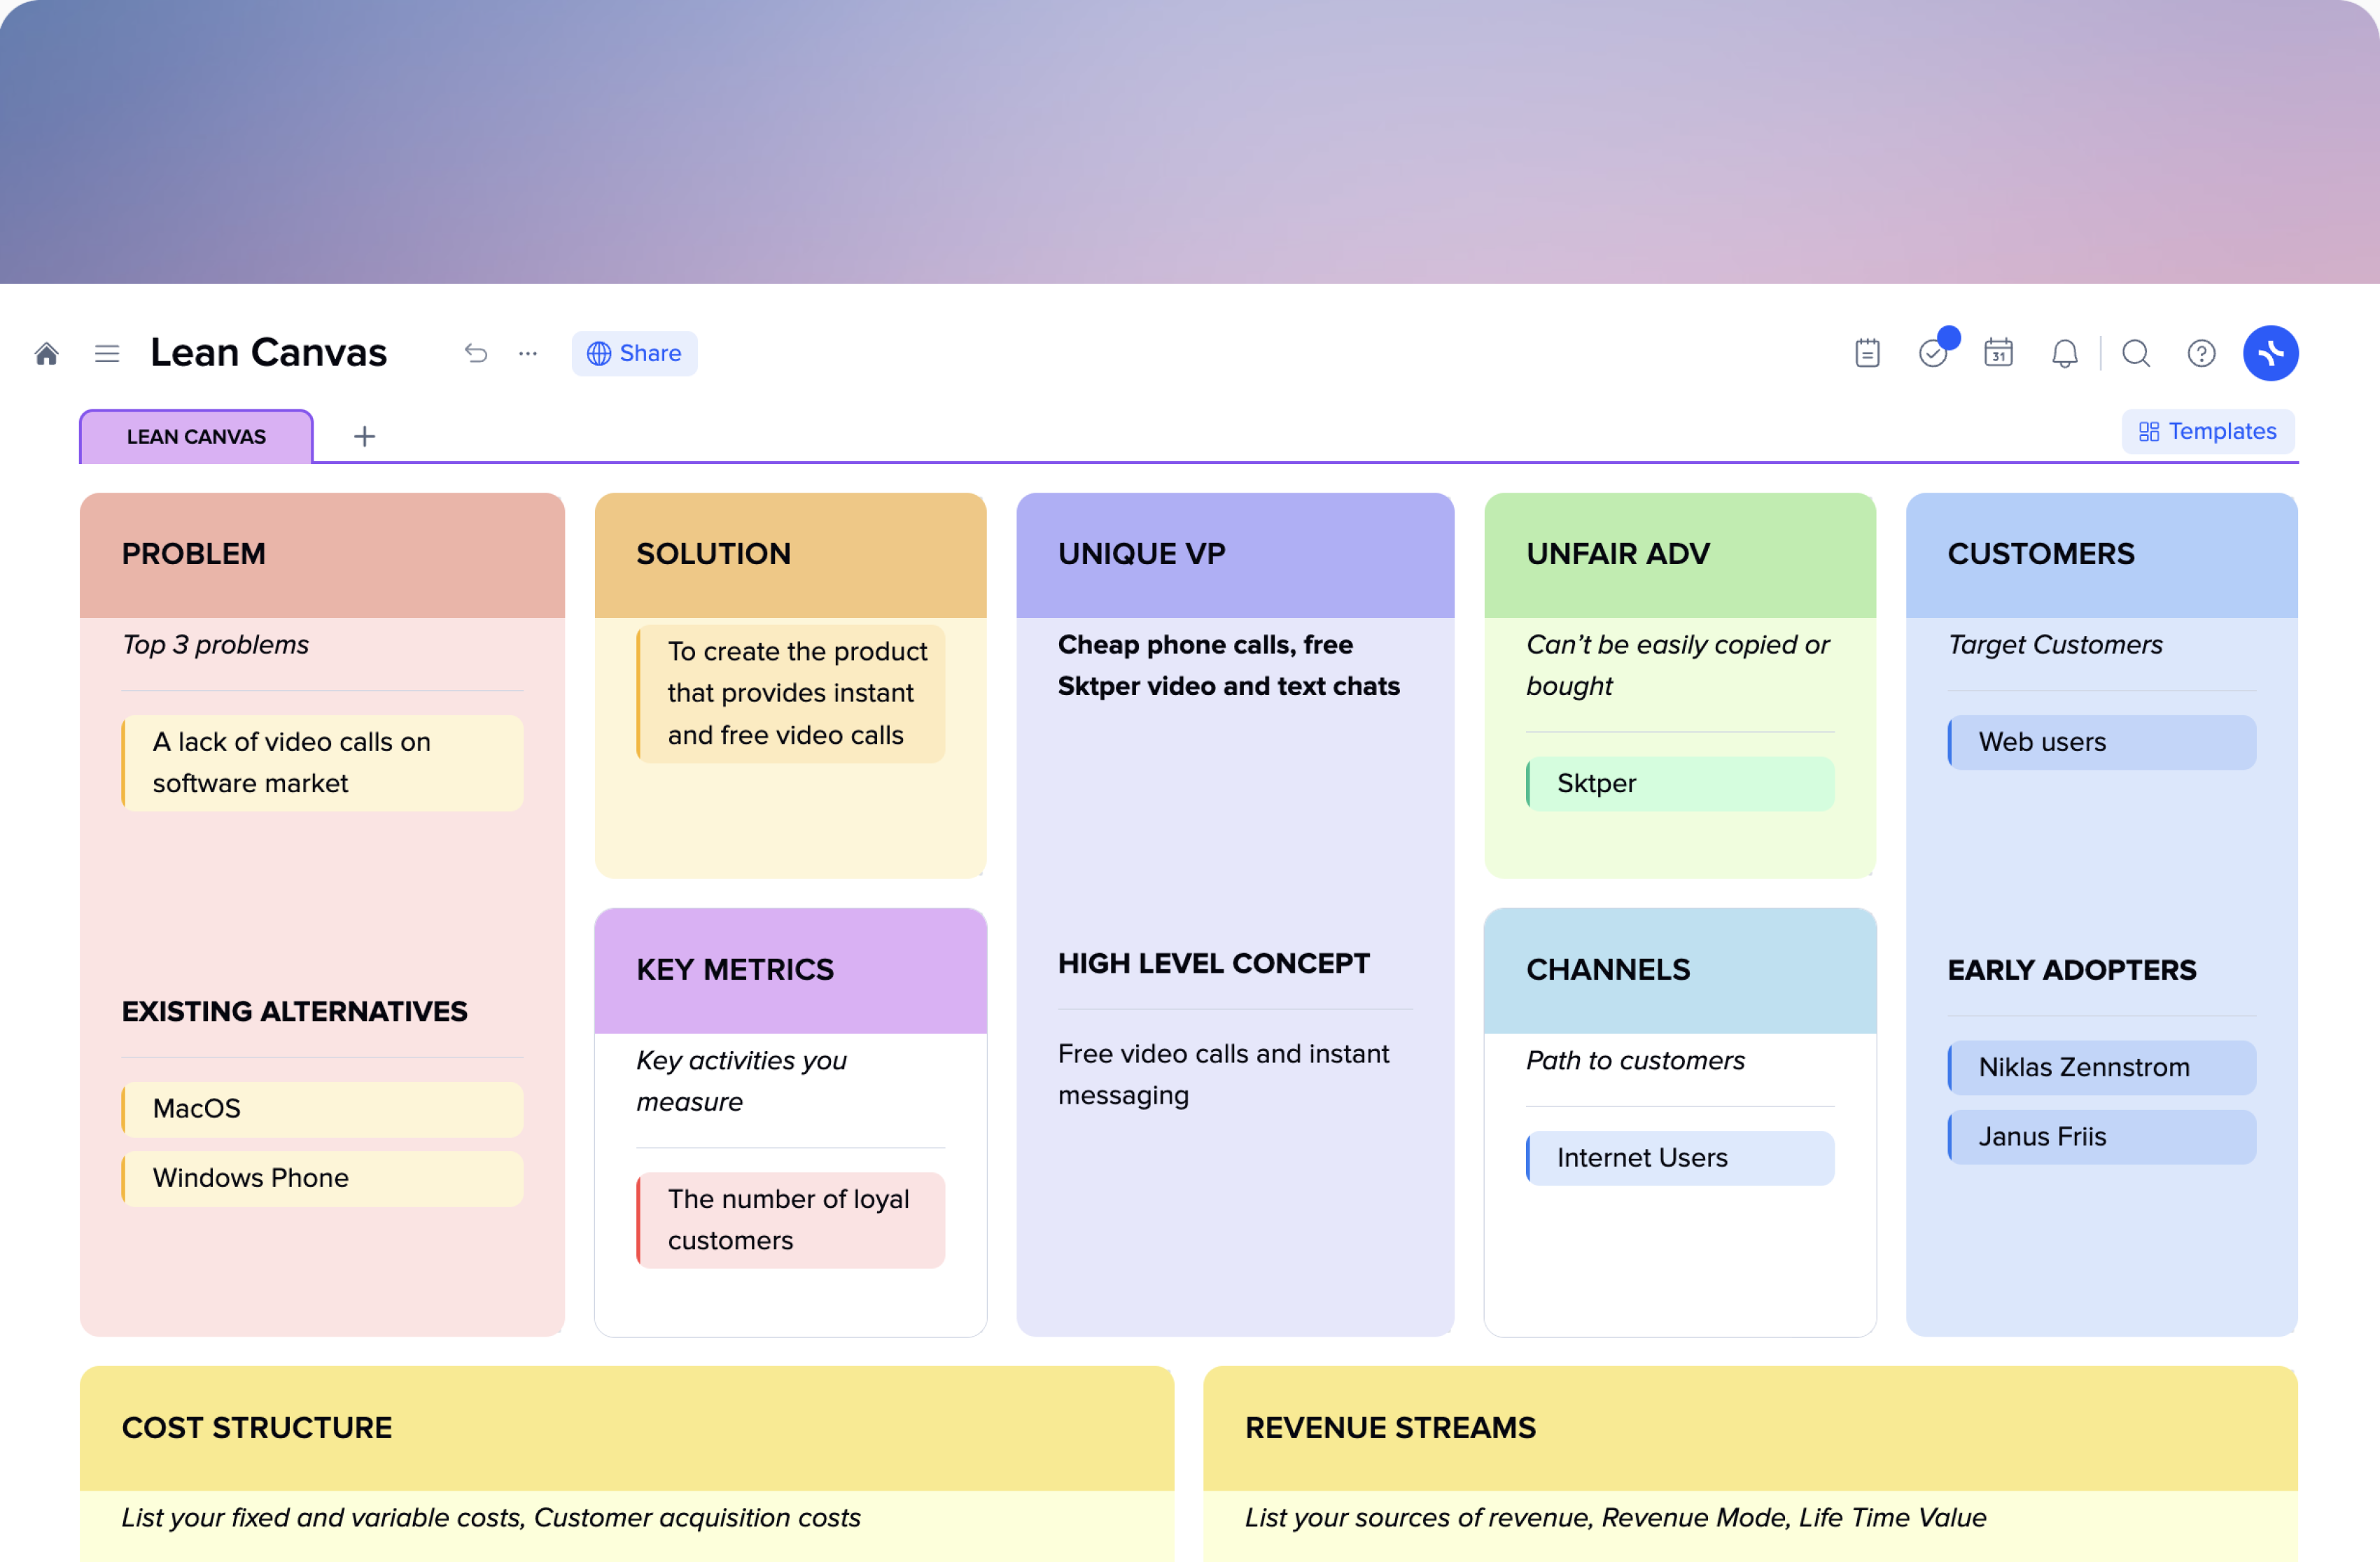
Your ideas should live elsewhere except your head, and a lean canvas is the best tool to extract and formulate them as a possible business model. It saves the time you usually need to present your idea to your stakeholders, boss, teammates, etc.
A lean canvas model’s predefined structure perfectly covers the most important elements of a business model in a well-defined and concise way to articulate your message.
If you ever felt like putting your idea or intent into words, pictures, video, or any other type of expression tools is not enough, a lean canvas template will help you.
The xTiles Lean Canvas Template is a powerful tool with the visual and content potential to showcase your idea in the best possible light and the ability to tailor the structure according to your idea’s specifications. Additionally, it saves time and resources by clearly identifying where they are needed and what is irrelevant or not important.
We offer you a ready-to-use Lean Canvas Template, a detailed step-by-step guide on how to create your own, and a lean canvas example to help you.
The lean canvas provides a framework to articulate the key elements of a business model in a concise and structured way. It’s a one-page document where you brainstorm key aspects of your potential business, startup, project, etc. You get the ability to showcase your ideas without spending too much time on creating a traditional business model.
A Lean Canvas was developed by Ash Maurya as an adaptation of the traditional Business Model Canvas created by Alexander Osterwalder. Both of these documents use the same nine blocks, except the lean canvas’ structure is slightly changed to be more time-effective and easier to use.
If there was some kind of competition, Lean Canvas VS Business Model Canvas, the lean canvas would probably finish a bit faster because it’s more user-friendly for people with no or little experience managing businesses or startups.
As a rule, a lean canvas is usually used in the early stages of a startup to validate a business idea. However, it’s perfectly suitable for being applied later to refine an existing business model.
A lean canvas helps entrepreneurs with many aspects of representing and articulating their ideas:
The list of cases when one may benefit from using a lean canvas model isn’t long, yet its narrow specification fully identifies and represents the main points of a new idea or business that is being developed. Entrepreneurs and startups use a lean canvas to outline a clear and concise plan for bringing their idea to market successfully.
Here are some of the most popular examples of when using lean canvas is beneficial:
The first steps may be the hardest as you need to understand where to move, what your business or product will be about, who may become your audience, etc. A lean canvas helps to clear all of these aspects and gives you a push to start active work.
When your business or product is not performing as expected yet, there’s no obvious reason why it is so. In this case, a lean canvas will help you to identify what needs to be changed. Usually, it happens if a lean canvas is skipped during the first stages of a project.
Launching a new product requires almost the same actions as starting a new business. A lean canvas will help you outline your product value proposition, find out who is your target market, etc.
You may have many ideas, but analyzing each of them in detail using a traditional business model canvas to learn whether it’s going to work or not will take time. A lean canvas is a much more time-effective tool for the same purpose.
Lean canvas 9-block structure is the step-by-step guide on what you need to find out. Once you complete the last of them, you will have a clear and highly-representative lean canvas of your business or startup model.
What problem do you want to solve by starting your business? Your starting point is someone’s problem, so be very specific and don’t try to resolve all the troubles people may face. The answer will help you determine the focus and direction of your lean canvas.
If there’s a problem, there must be a solution. At least in the business world. Your solution is what will bring you success. You may not come up with a solution straight away. Sometimes it takes many brainstorming sessions and interviews with existing or potential customers.
Even if your business is very small and there’s no one except you and your friend in your parent’s basement or garage, it still will have some key metrics to monitor performance. Key metrics in the lean canvas will help you soberly assess your progress.
What is so special about your business or startup? What will be the unique value that it is offering to your customers? For example, that may be an entirely new product or service, a better customer experience, or a more affordable price schedule.
That is something no one of your competitors possesses and barely can get. It will help you to find partners, investors, involve more professionals, etc. Sometimes, these advantages are imperceptible for teams, and they leave this block empty.
New technology, dream team, information no one in the field possesses, current customers, etc., may become your unfair advantage.
Now that you know from what problem you’re going to save the world and its solution, you need to specify your target customer. You can’t think about your potential audience separately from the problem. Their connection is highly important for a clear and true understanding of your further moves.
At first, not all potential channels may be available to you. That’s why it’s also important to concentrate on what will help you reach them in the future. Another important aspect is that you need only those channels where your target audience is. Don’t waste your time and resources on channels that have nothing in common with your potential customers and your business or startup.
That is the most technical part with lots of bureaucracy, yet very important for a successful launch and establishing an effective workflow. Identify the costs associated with running your business, such as team salaries, equipment, marketing and advertising expenses, etc.
Many startups die at early stages because the operation costs weren’t taken seriously. If you want your dream to exist, develop, and bring your dividends, you need to take care of its prosaic aspects.
What will be the ways your business or startup will generate revenue? Sales? Subscriptions? Advertising?
The exact way will depend on your business model. Some startups choose to offer their product or service for free to gain audience attention.
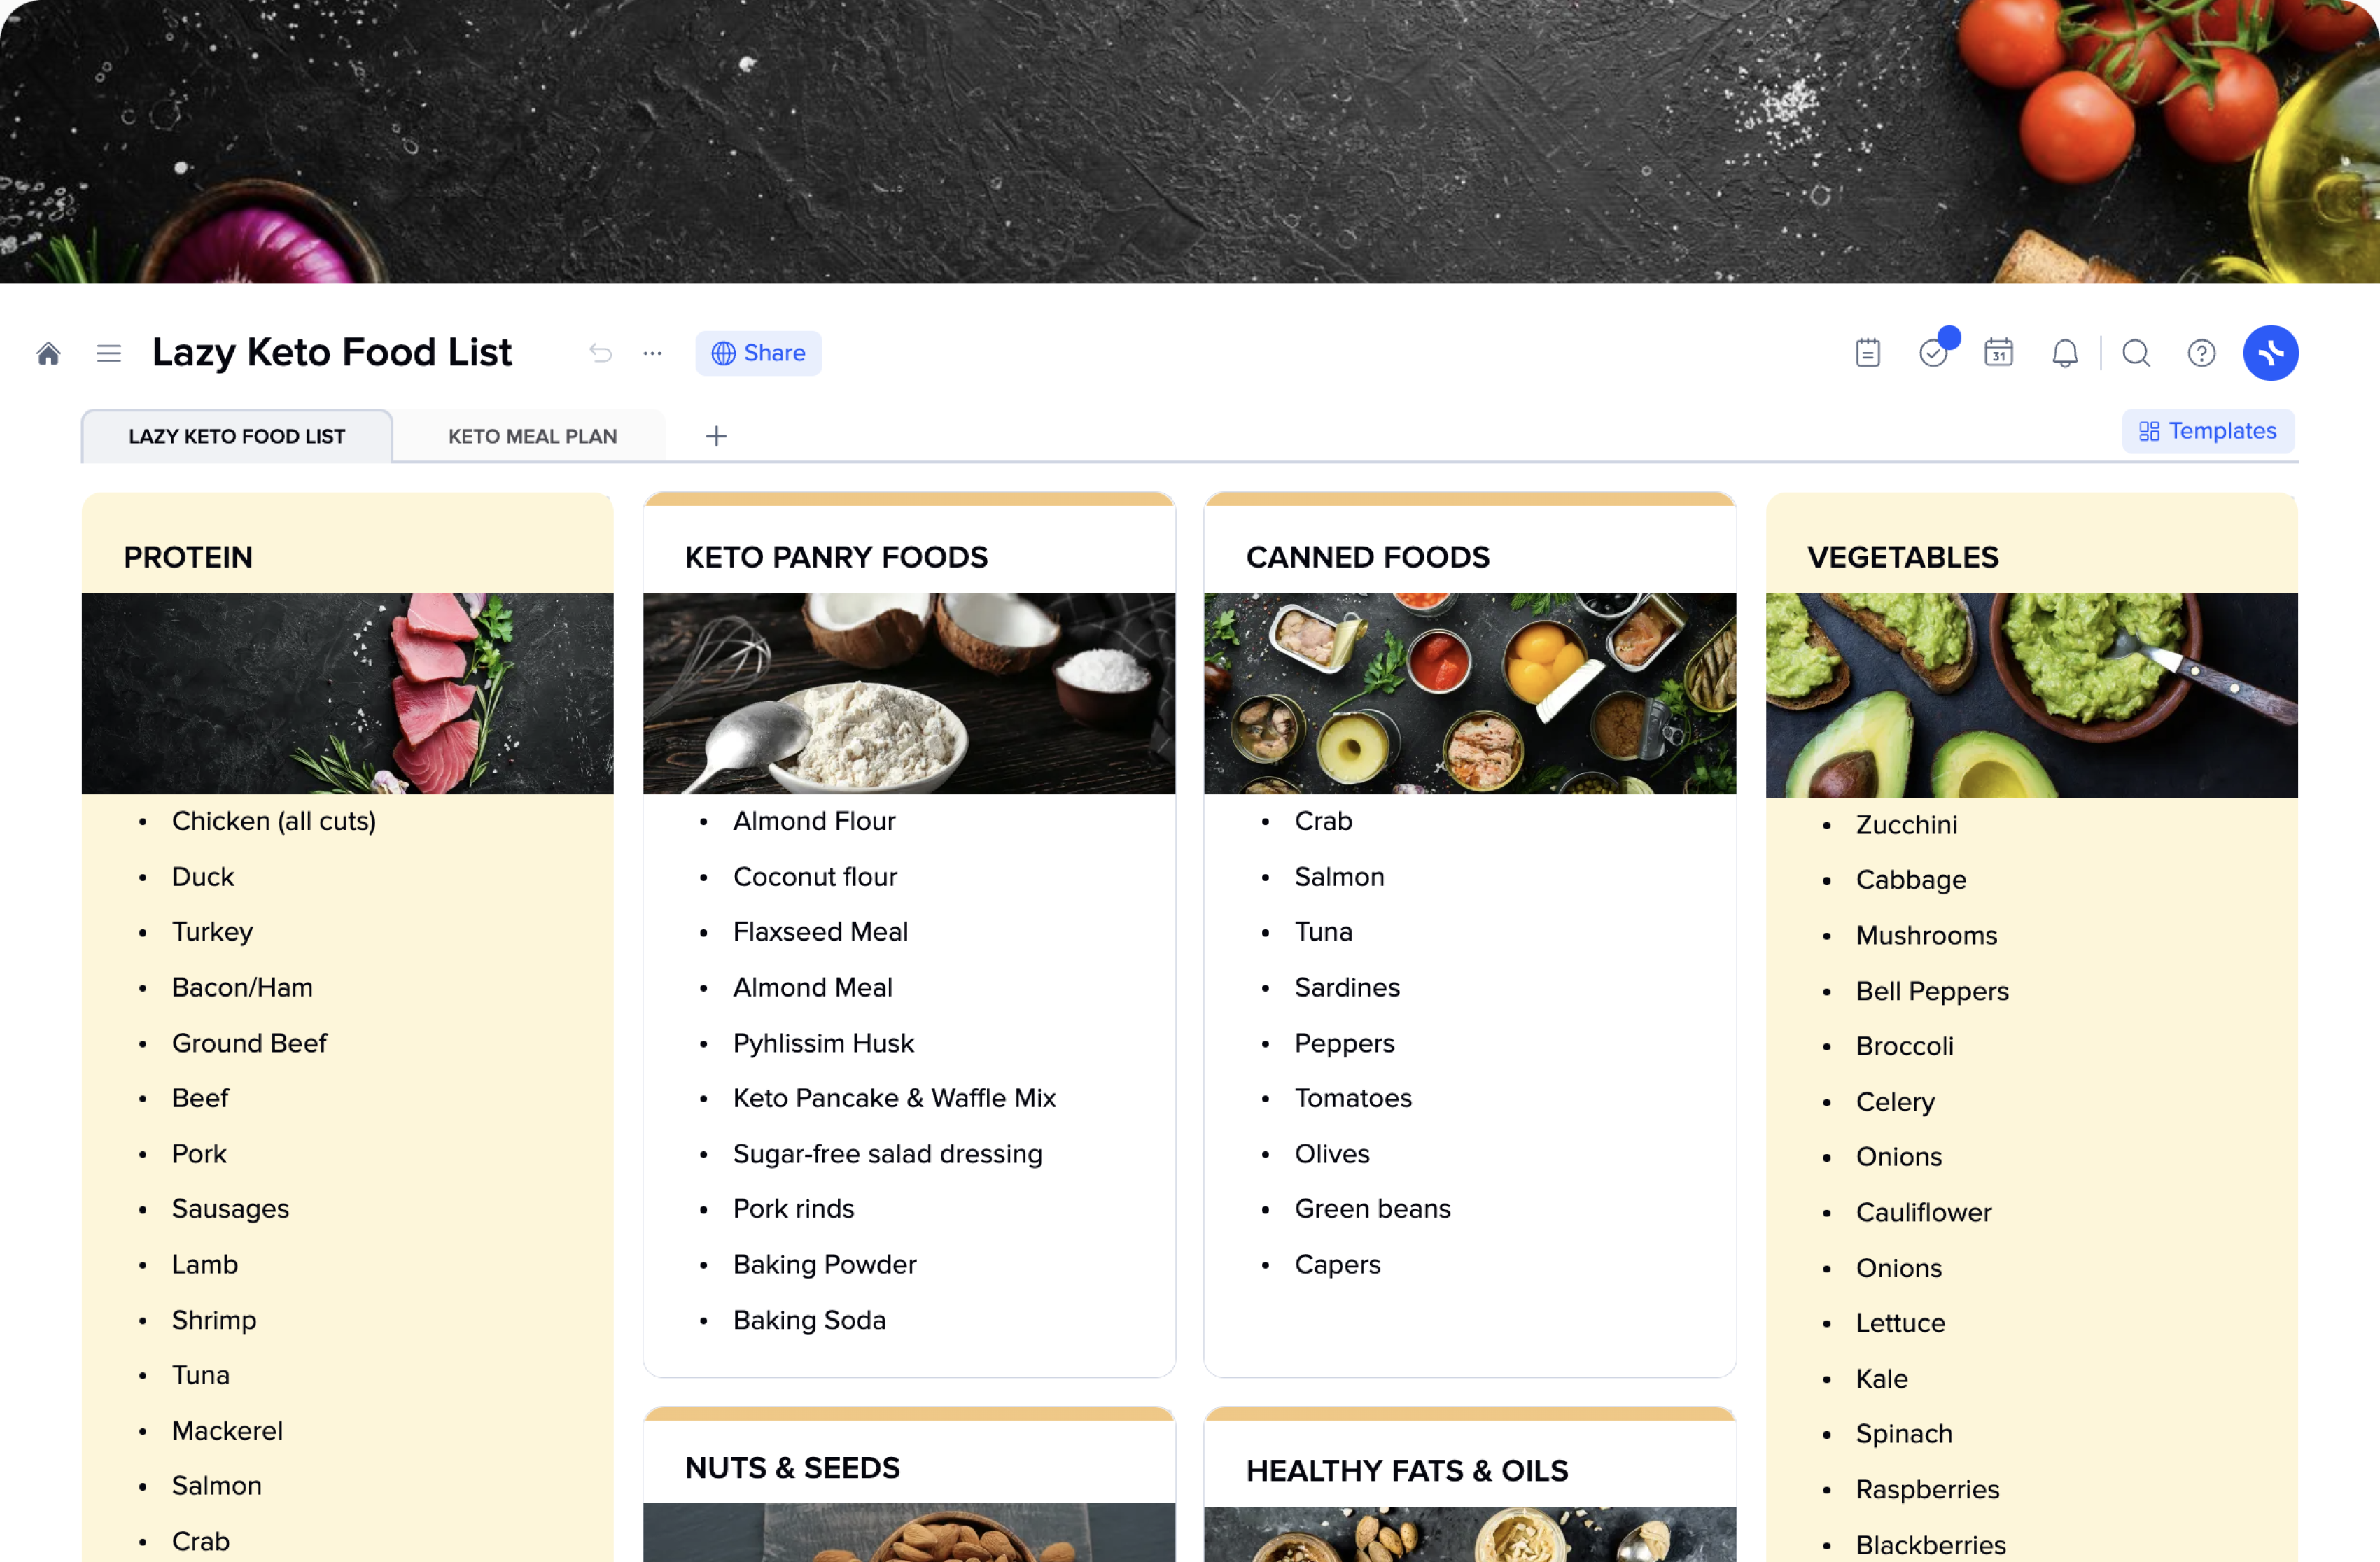

Learning has never been easy. New methodologies appear all the time, and except for dealing with new information you need to memorize, you also have to figure out how they work and how they may help. That’s why reliable shortcuts are so important for easier, quicker, and stress-free learning.
The template we offer to turn your usual learning and memorizing into an enjoyable experience is KWL Chart. Its name is an acronym that stands for “Know”, “Want to Know”, and “Learned”. Even this information is enough to understand how it works. However, we would like to provide you with more details, so you will get the maximum benefit from using the KWL Chart.
What is the KWL Chart? In general, it’s a tool for organizing your learning process. It allows you to divide what you already know from what you need to learn and summarize what you learned after the lesson is over.
Let’s take a closer look at how KWL Chart works, how to use it successfully, and how the xTiles KWL Chart template can ease your learning as much as possible.
At the end of the day, after you’ve attended a few lessons, your head is normally overfull with mixed information. What you heard in the first lesson somehow became a part of what you read during the third. Putting things in their places is much harder if you have nothing to rely on. Doing it with no tools is quite a challenge. However, getting acknowledged with some tools that might or might not help you in the future is quite a challenge too. Unfortunately, you won’t get far without a settled organization system for your learning process. That’s where a KWL Chart comes in handy.
Except for organizing and dividing your learning materials, KWL Chart templates help you find possible gaps and understand where you’re standing right now, what you have learned, and what you need to improve.
Thanks to its simple and flexible structure, KWL Chart can be applied to any lesson or topic. You don’t have to switch between different methodologies for every lesson. A KWL Chart will help you with math and literature, chemistry and social studies, etc. One system to rule them all.
When the semester or year is over, and your exams are closer and closer, your KWL Chart documents will help you track your progress and check what exactly still needs to be learned and what you need to go over. This way, you don’t waste your time checking everything. You only focus on what is relevant at the moment.
KWL Chart templates will help you establish communication with your students if you’re a teacher. It will work as a statistic to show you what is harder to understand and memorize, so you can devote more time and what is easier to grasp so you won’t waste your time on it. It also will help you polish the information you give to your students.
Teachers may use KWL Charts for group or individual learning. You present your students with ready-to-go templates to help them get new information quickly and understand what pitfalls there are for them. That is especially useful for young teachers or those who start to work with a new class or group.
A KWL Chart template may be a part of interactive learning or a way to distract and relax a bit from a usual course.
To start using a KWL Chart, you need to create a table with three columns – K, W, and L. We have already done it for you in our template. Now, let’s fill each column with the relevant information so that you will have a representative and helpful document and not useless gibberish at the end.
Our pre-filled example of the KWL Chart will help you grasp the concept if this is something you have never used before.
In this column, you need to write down everything you already know about the subject. However, if the topic is something entirely new to you, don’t worry. You probably have some associations. Note them because they are an important part of how you understand the topic.
Sometimes a teacher needs to push their students so they can come up with some ideas or thoughts on the topic. That’s why you may need to prepare some questions beforehand.
This column is supposed to help a teacher and students to understand what misconceptions they might have going into some topic. That’s why KWL Charts will be useful when you only start working on something new. Then they will help you check your intermediate results and track your progress. And, in the end, they will help you fill gaps if there are some.
This stage doesn’t require corrections if you’re a teacher. It’s more about showing the real picture, so you can plan your learning accordingly to the real issues and needs. However, if you prefer to make clear something with your class before you start, you’re free to do so.
When the first column is filled, it will be easier to identify what exactly you want to learn or what your students want/need to learn during the lesson or course.
If you split your students into groups, you will get more answers which will be helpful for the whole class. Ask students to note others’ answers if they feel that they resonate with their goals.
When you use KWL Chart for personal needs, be honest with yourself filling it in. It’s OK not to know something, and that’s OK to be interested in something that might seem weird.
Sometimes, simple questions like “Who?”, “What?”, “When?”, “Why?”, “How?” are enough to help understand what exactly needs to be learned or polished. Also, they will be enough to start a discussion in a class that may lead to more meaningful conversations and questions.
Filling this column, students help their teacher create a better lesson plan that will suit their needs.
The last column will conclude what you learned during a lesson. You may fill it in at the end or work on it throughout the lesson.
What kind of information should you put in this column? That’s the exact place to answer your questions from the second column. Also, that’s the exact place to correct your opinions and ideas from the first column in case there was some misconception. Everything you find amusing or interesting should end up in this column too.
This column helps you review what you have learned. And later, it will be useful for retrospecting a topic you need to go over again. If you’re a teacher, it will help you check what was unclear for your students.
Even though the traditional structure of the KWL Chart is well-known and pre-defined, no one can stop you from using it as you wish. You’re free to divide your columns into different sections, or you may add more columns if you want. The xTiles KWL Chart template is highly flexible and allows you to organize your learning materials the way you prefer.
What columns may make a KWL Chart even more helpful? For example, after you review your newly gained knowledge, you may add a column “Still needs to be learned” if there’s something you struggle to memorize.
Another helpful column or little section may be devoted to resources you used to find the information. You also may add a place for additional questions that arose after you dived deep into the new topic.
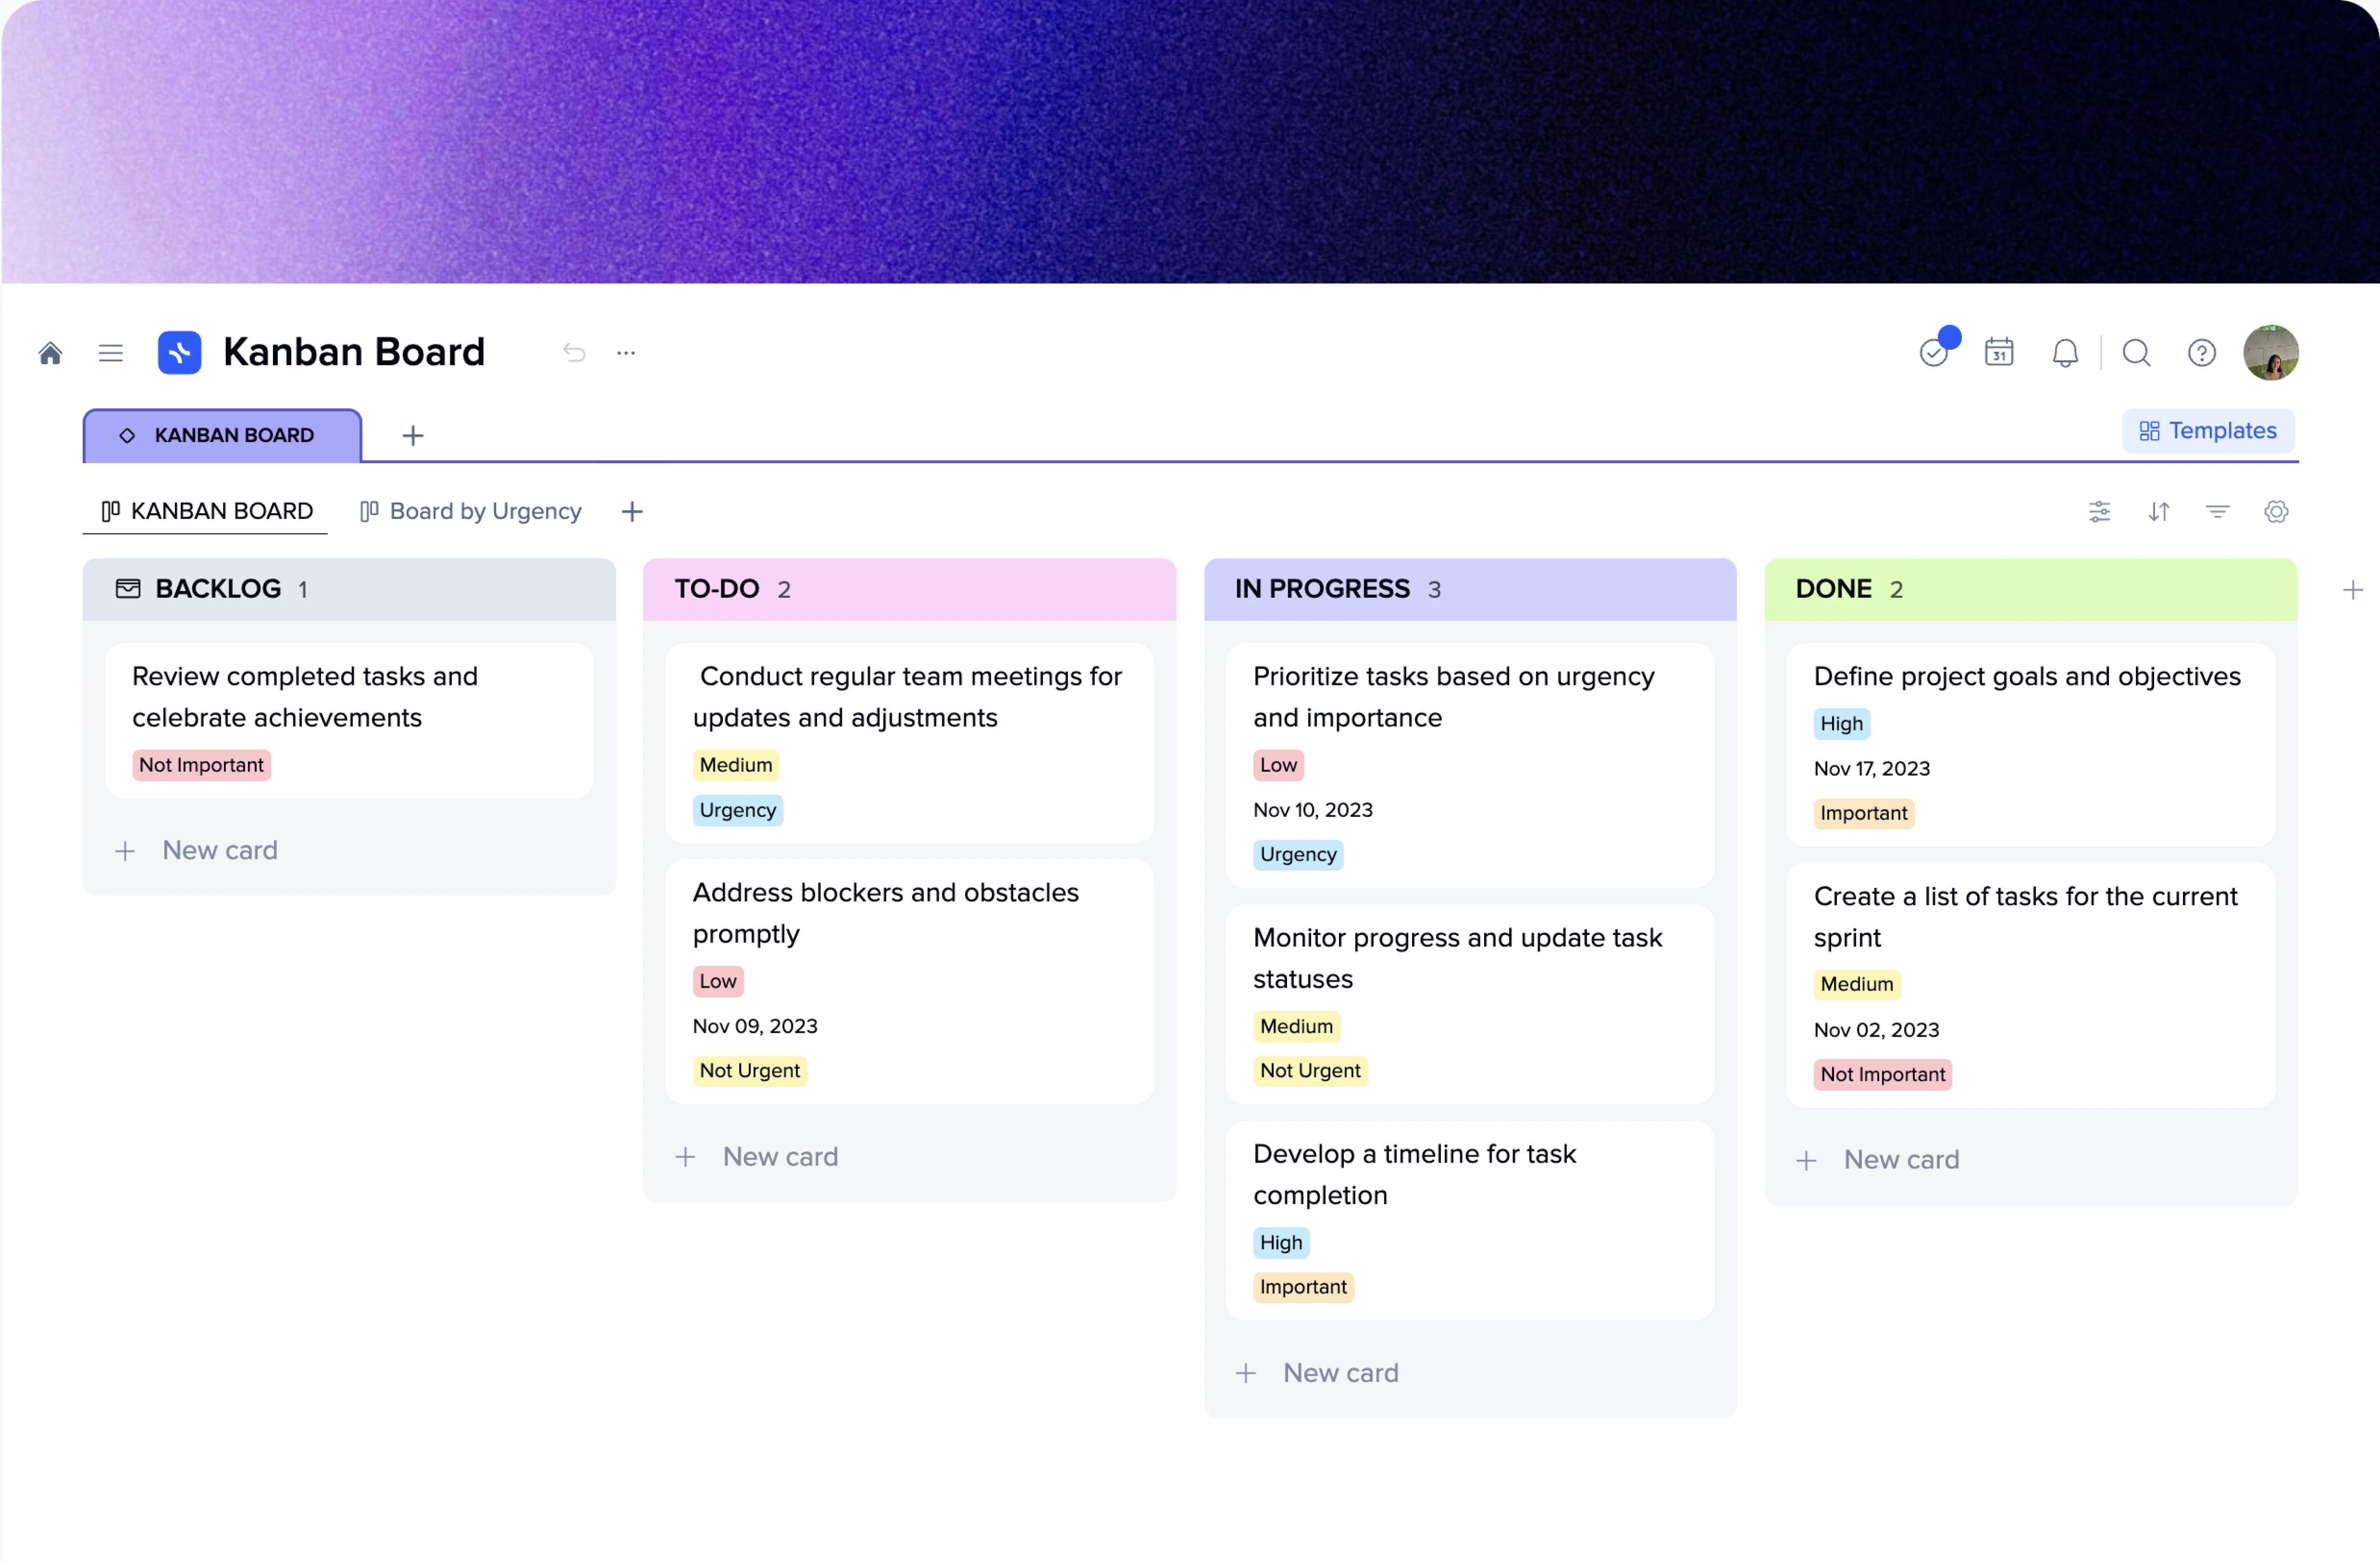

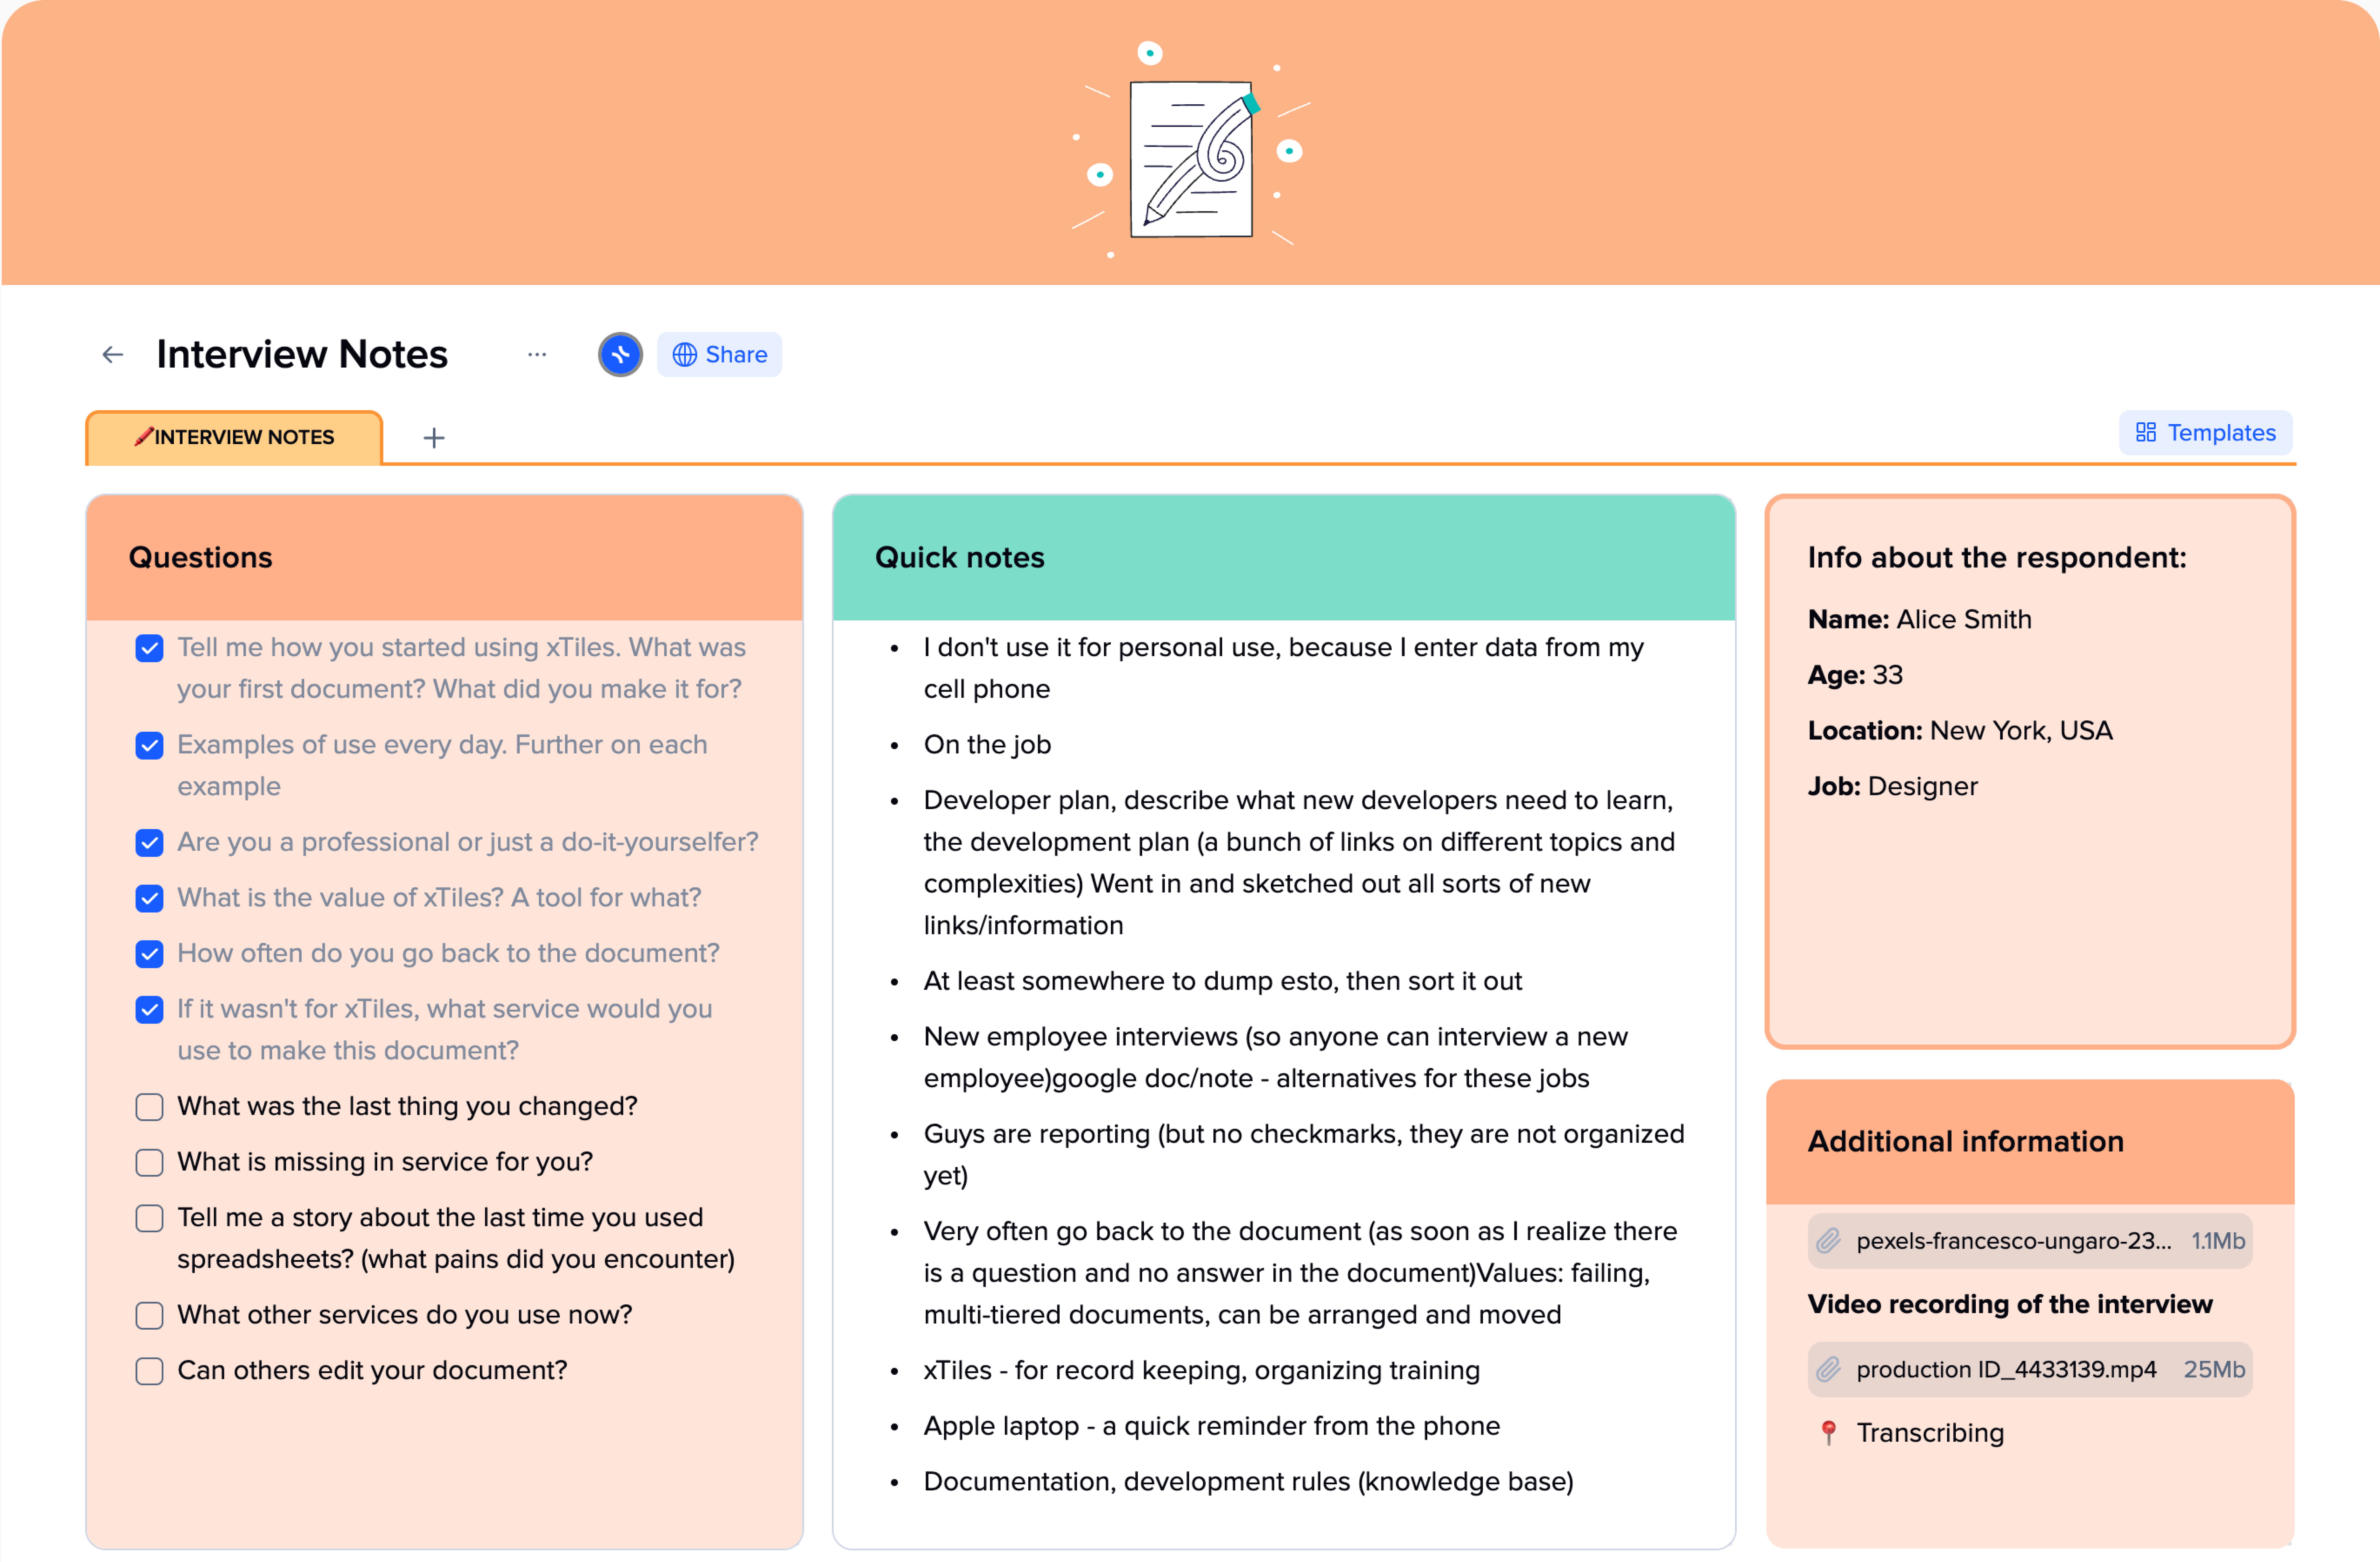
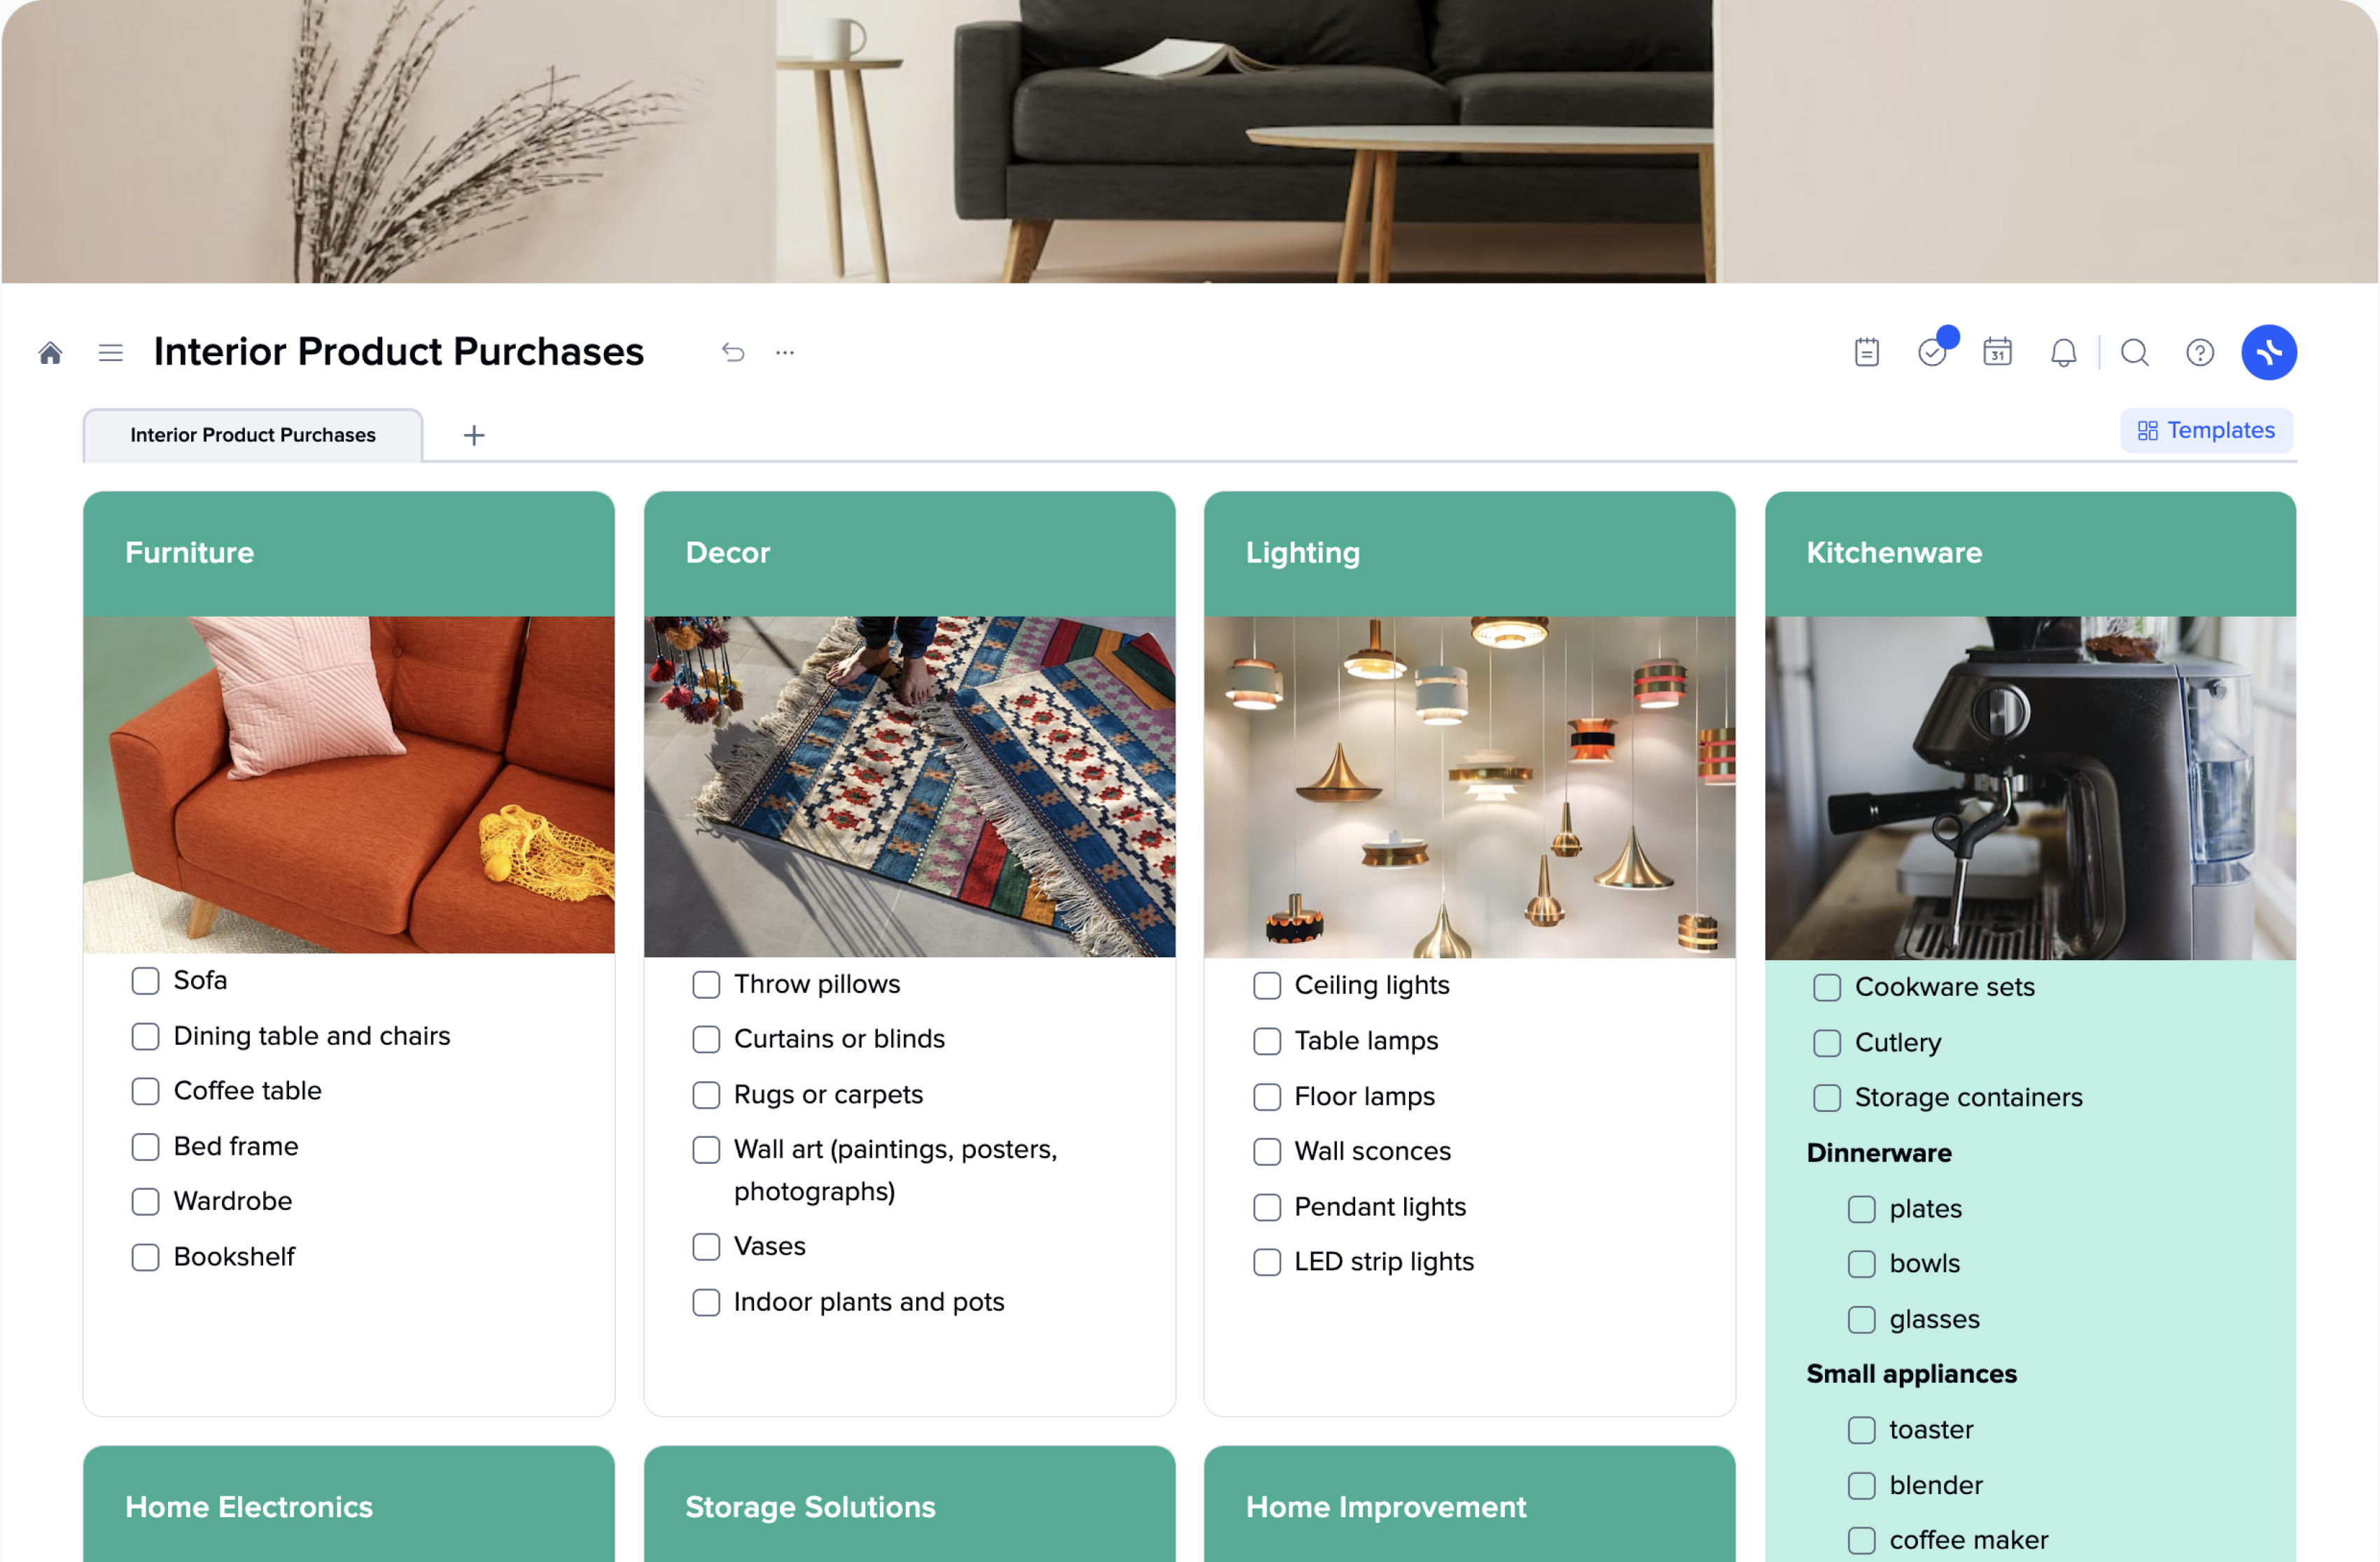
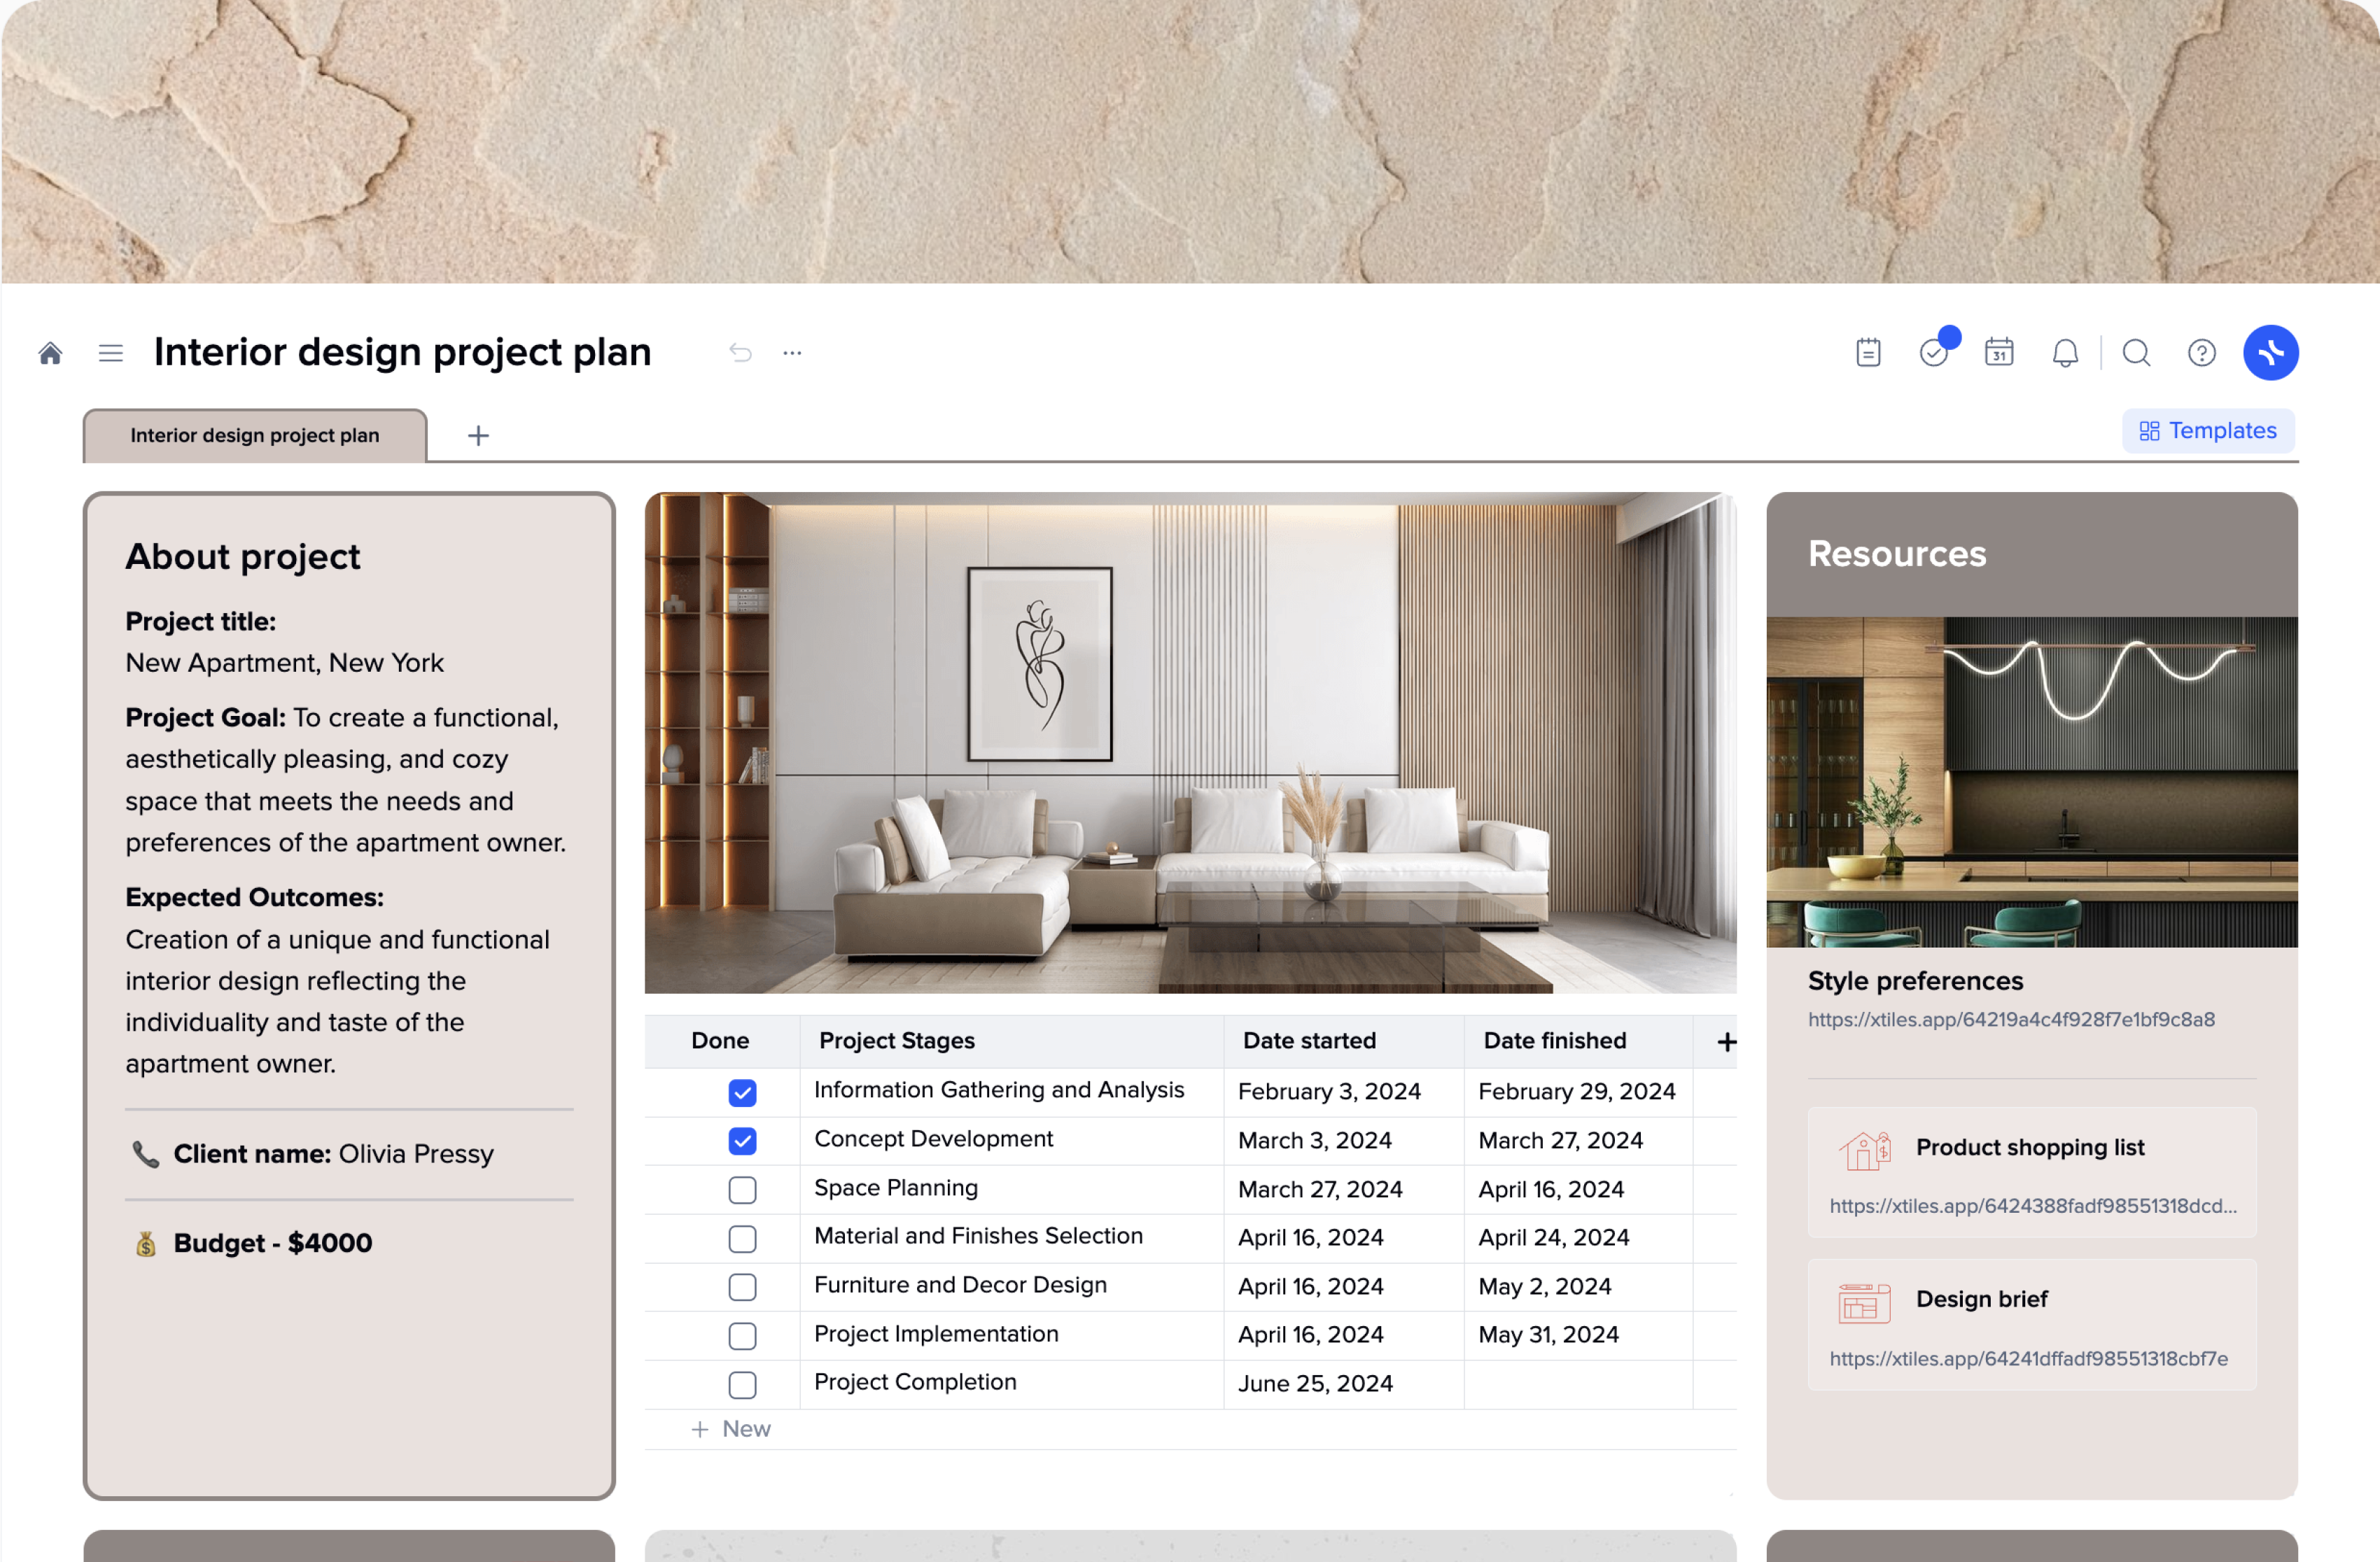
Every project risks descending into chaos, causing stress for those involved and clients without a well-thought-out and strict plan. Interior design projects require meticulous attention to detail. Every color must be carefully chosen to match the initial plan and create the desired ambiance in the room. Each piece of furniture must be thoughtfully selected and placed to ensure comfort and ease of navigation. In other words, no detail is unimportant when it comes to designing interiors.
An interior design project plan is a road map to guide a designer, performers, and clients through the renovation process safely. It facilitates the gathering of necessary information, keeps everything organized, and ensures everyone is up to date on the project’s progress.
The xTiles Interior Design Project Plan Template will help you create stunning interior designs and make them come true. With the ability to customize the template and add the needed types of content to visualize your ideas, it becomes the best communication and management tool.
There are numerous advantages an interior design project plan template offers to a designer and to their clients.
It is easier to organize every aspect of the project when you have an interior design timeline and schedule at hand. Smaller processes within your project become automated with a pre-designed template. It also helps to reduce costly errors and improve work efficiency.
With an interior design project plan template, you can better budget your time and determine if you can take on additional projects simultaneously.
With a well-planned schedule, you’ll have a clear understanding of the duration for each phase and the overall timeline for project completion.
Having an interior design project schedule template allows you to communicate with your clients through visual means. Also, when you share your project plan with your client, you can keep them updated on what stage of the project is taking place right now.
Crafting a well-structured timeline and work schedule template is vital for ensuring the success and timely completion of your interior design project.
Below we will provide you with insights into what an interior design project plan template entails, its role in your overall process, and key milestones to incorporate. By following this guide, you can enhance your project management and meet your client’s deadlines with confidence.
Establishing a solid groundwork from the outset is of utmost importance. A concise, motivating, and informative brief serves as the framework and guidance for designers to excel in their work. Interior design briefs generally encompass essential details such as background information, objectives, expected outcomes, visual references, floor plans, and relevant information about the intended users of the space.
It is crucial to determine the purpose behind the project. Allocate sufficient time to engage with your client, allowing them to articulate their vision using their own language.
Pose inquiries such as: What issue does this project aim to resolve? What elements do you wish to retain? What aspects require modification? Ask them to show interiors they find inspiring or interesting.
This particular phase will be revisited throughout the project, so strive for utmost precision. Enumerate each space or room that necessitates design, accompanied by the corresponding goals for the project.
After you get all the information from your client, you can set certain tasks for the interior design project to ensure it finishes on time.
In brief, you set the goals and deliverables for your project. It’s time to start exploring some visual directions with a mood board. A mood board is a collection of visual materials that evoke a certain style for a space. They serve as a representation of their idea for the building’s upcoming interior.
Interior design project management is much more than choosing curtains that will work with the color of the walls and that couch in the center of the room. An interior designer has to execute many small and big processes, make countless decisions, resolve issues that arise during the process, and ensure that the finished results are in alignment with the client’s intent and requirements.
Besides many challenges interior designers face, a project’s organization is one of the most significant ones. In all honesty, a poor organization can easily overwhelm the skills, most experienced, and toughest interior designers. It might belittle and ruin all of the beautiful design ideas and concepts.
It’s time to confront this reality and acknowledge that successful interior design projects require proper organization. Implementing management tools and techniques takes the burden off an interior designer’s shoulders, leaving space for creativity.
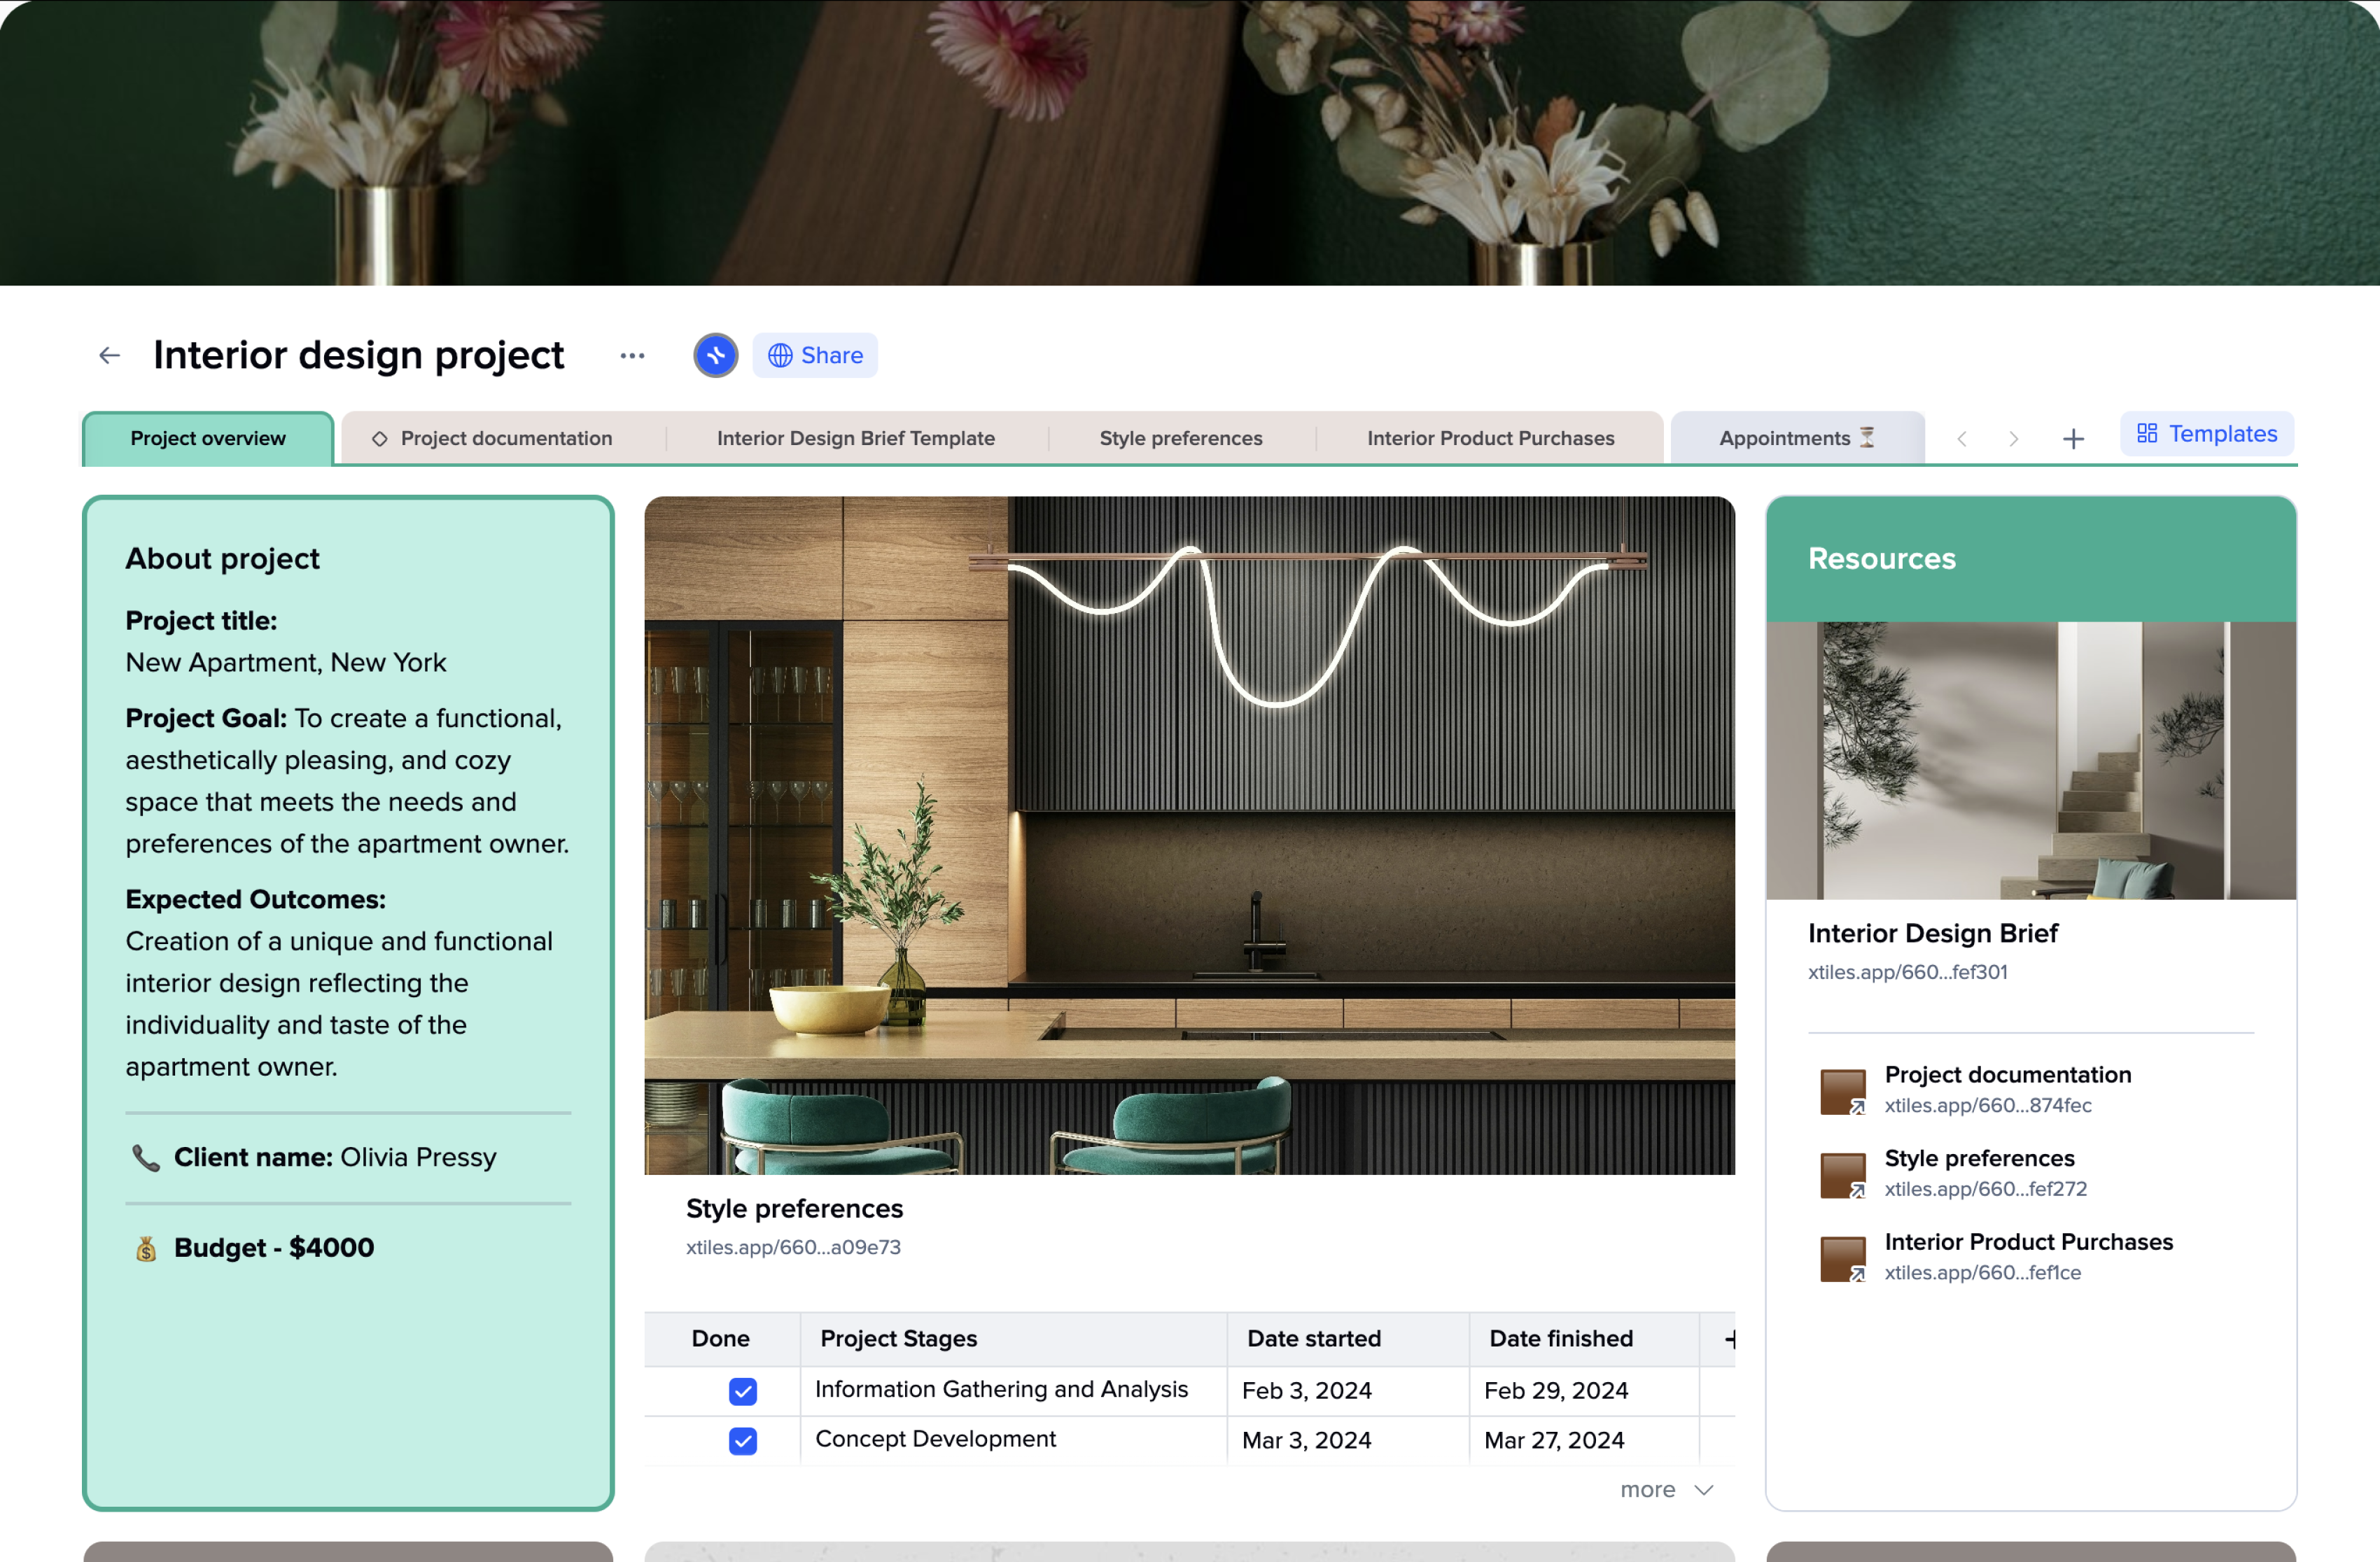
The xTiles Interior Design Project Template will help to cover various aspects of an interior design project, starting with gathering the needed information from your client, finishing with assigning tasks, creating the outlines of the future design, and creating shopping lists of necessary items. You may share it with your team and clients to ensure everyone is on the same page. Additionally, it will become a valuable resource for reflecting on your past achievements to embrace growth and create your exquisite easily-distinguishable design style.
Interior design project management involves keeping control over various interior design projects simultaneously to help designers and teams who work on implementing ideas encompass a diverse range of spaces and settings. For instance, an interior designer might be involved in a renovation of a smart apartment one week and then collaborate on designing a huge commercial office the following week.
Little or no interior designers limit themselves to work only with certain types of projects or clients. In today’s industry, they work with clients from different sectors, spanning various industries.
Interior design and project management might seem like two very different and non-compatible fields. However, it is not true. By combining these two, interior designers get the opportunity to plan and execute interior design projects effectively, with no missed deadlines, with little or no disagreements within a team, and with no overlooked details.
While each project presents its unique challenges and requirements, clients consistently expect high-quality and reliable outcomes delivered within specified timelines and budgets. A well-structured project management workflow is crucial in order to deliver beautiful projects on time, as it helps to organize tasks and monitor progress toward milestones, making the designer’s life much more manageable.
There is no one-size-fits-all project management workflow for interior designers because all projects are different, and each designer has their own style of work and management. However, professionals may use pre-designed interior design management templates to manage their projects efficiently.
An interior designer coordinates effective communication and ensures the seamless execution of the project. So, are they that different from a project manager?
Taking project management responsibilities is a part of being an interior designer and executing a project. Small projects can be handled with any special interior project management software or tools. However, for those that are large, require many people involved, and last for a long time, you may need to use all available means to ensure their success and smooth execution.
Being an interior designer is not only about combining elements to create a great site to satisfy your clients but also about managing various clients and projects simultaneously.
When you have a well-defined set of goals and deliverables, it’s much easier to meet deadlines and keep track of every detail, even the smallest ones. Fortunately, project management software comes to the rescue by ensuring everything goes according to the initial plan.
Whether you’re a solo interior designer or work on a team, utilizing project management tools, such as Kanban Boards, to-do lists, project management plans, etc., enables you to stay organized and keep a clear overview of your deadlines and deliverables.
What is your usual experience with orchestrating design projects? Millions of calls, millions of changes, and constant stress because people didn’t understand you correctly and missed something, and at the exact time you’re trying to make it on time to a meeting with your client or one of the vendors, you totally forgot about. Sound familiar?
Now, envision a world where your interior design project seamlessly progresses, resources are optimally utilized, and every detail is meticulously coordinated. Sounds great? That may become your reality if you make project management practices a part of your design.
Project management is a catalyst for clear communication among all stakeholders and nurturing a collaborative environment for any kind of project, and interior design projects are no different. Project management software and techniques have the power to end the days of confusion and disjointed efforts, providing every team member with the environment for working in harmony toward a common objective.
Project management practices protect teams and projects from potential risks. By proactively identifying and mitigating obstacles at the early stages or before they can become the neck of a bottle, you have enough time to prevent any disruptions that might have an effect on your project’s success. This approach proves invaluable in handling challenging clients and maintaining the smooth progress of your projects.
Project managers follow a methodical and replicable approach to steer projects from their inception to successful completion. In the context of interior design, this structured process is referred to as the interior design project cycle.
While the specifics of the interior design project cycle might differ from one company or project manager to another, they all share common stages, objectives, and outcomes.
The interior design project cycle comprises a few distinct stages:
Writing a client brief revolves around understanding your client’s preferences, needs, what they dislike (this is important too so that you have a more defined guide on what is preferable and what to omit in your designs), and desired outcomes for their project.
Interior design is always deeply personal. That’s why sometimes it might be hard to get all the information from your clients. However, gaining insight into your client’s motivations is crucial for making informed design choices. Being an interior designer is always about being a bit of a psychologist.
During this initial phase, it’s essential to ask your client relevant and thoughtful questions to explore their vision for the finished space—understanding how they imagine the look and ambiance they want to achieve. You need to establish a connection with your client. Sometimes, it’s wiser to refuse the project if it doesn’t feel like something you can deliver.
The project overview serves as a catalyst for sparking your creativity and contemplating how you can transform your client’s aspirations into a tangible concept. Also, there are always quick answers whenever you’re in doubt.
However, it’s important to keep in mind that the ideas discussed during the initial client brief are not set in stone. They only provide a general understanding of your client’s preferences. The real refinement of these ideas takes place during the concept development stage.
The initial page of your project should contain a bit of everything regarding your project. Mention people responsible for different processes, a quick overview of your budget, the project’s timelines, and all the contact information you may need during the project.
Also, it may be helpful to gather links to the client’s preferred design styles and solutions, references, mood or design board, etc. If you share your interior design project management plan with your clients, there’s a big chance that they won’t go further than the first page, so it better be comprehensive.
A site survey involves analyzing your client’s existing space to gather essential information for the interior design project.
As a rule, this stage is typically conducted during the initial client briefing. However, there are instances when they may be deferred or when you may need to do it again. Or when you have to do it later because when you write a brief, the building is still under construction.
There are a few important steps to keep in mind when doing your field survey:
Now that you have precise measurements, detailed notes, and a clear understanding of your client’s objectives, you can now refine your and your client’s raw ideas into something well-defined that has the potential to become an outstanding site.
During the concept development phase, draw inspiration from various sources, such as previous projects and interior design concepts, on platforms like Pinterest, Instagram, or Houzz. Generally speaking, any resource where you can get inspiration and new ideas is suitable. Every tool to supercharge your creativity is a good tool.
Remember, concept development is not just about getting a pile of photos of ideas you would like to implement in the space you’re renovating. It’s about compiling those ideas and design solutions and organically integrating them into the site you’re working on so that they align with your client’s specific needs, including features, finishes, furniture, colors, and overall tone/mood of the place they would like to see.
Discovering ideas worth pursuing can be a challenging process. Yet compiling them without turning them into a mess is an even bigger challenge. Techniques like creating a mood board or design board can be immensely helpful in narrowing down the styles, themes, and standout features that resonate with the project.
You may make a different document if you don’t like people checking your design board while you’re still working on them, using the xTiles Mood Board Template. Or you may have everything regarding your project gathered in one place using the xTiles Interior Design Project Template.
xTiles documents offer you easy drag-and-drop and wide customization options so that you can combine the elements whatever you want and as long as you need.
Once you have a few well-developed concepts, start fleshing out your scope of work and consider putting together interior design tasks to formalize the project’s direction and ensure a clear understanding between you and your client.
Now comes the time to source and acquire materials, furnishings, equipment, and all other essential resources for the project. This stage often causes stress because it may be hard to find the exact piece of furniture or decor that you had in your mind when planning the interior. That’s why it’s important to choose items while checking their availability.
Sometimes, the whole project stops because you can’t find the needed paint for the walls. A well-executed procurement process ensures seamless progress, avoiding delays caused by unavailable or low-quality items.
The procurement stage is inseparable from the budget. Effective budget control and management ensures you deliver the outcome that your client is going to like within the budget you discussed earlier.
Talk with your client to find out if it will be okay to purchase second-hand items for decorating their building. That’s a great way to create a vintage vibe and save some money that can be used on items that require to be of high quality.
Once you present your preliminary design, discuss it with your client (sometimes you need to explain your ideas so that it’s better to prepare notes and remarks about your design ideas before the discussion), and get their approval, you can start the development stage.
You will need not only to find the needed items to make your design come true but also to ensure they work exactly as you intended them to. In the design development phase, meticulous attention is given to refining details and completing all aspects of the design, such as finishes, furniture, fabrics, colors, lighting, decor, millwork, appliances, and other stuff defined by the specifications of the room (bedroom, kitchen, bathroom, etc.).
Be prepared for several revisions during this stage as your client strives to strike a balance between cost and quality. For instance, they may opt for more expensive furniture and inquire if choosing more budget-friendly light fixtures could compensate for the increased cost.
At this stage, you need to work with your client or get their consent to do whatever you think is right. There may be many meetings with your client to discuss this or that detail in practice. Besides your client, you will have many meetings with the team who works on the renovation process. That’s why it’s important to keep track of every appointment you may have regarding the project. The separate page on your xTiles Interior Design Project devoted to appointment scheduling will help you be on time and prepare for meetings.
The project closure stage marks the finalization and completion of the project. That’s where you add the last touches to make the design eloquent. That’s where you tie up all the loose ends, encompass financial touches, inspect the results, and present the outcome to your client. Additionally, project closure involves recording and finalizing all contractual obligations, financial transactions, and legal aspects associated with the project.
Even though this is the final push, the stage sometimes takes much longer than you would expect and requires all of your attention in order to resolve all the issues, even the smallest ones that seem to have no power over the finished results.
Needless to say that every phase is important and needed, yet this one holds the utmost significance in ensuring the project’s successful conclusion and client satisfaction. Seeking client approvals is vital to confirm their contentment with the finished project.
Proper documentation and knowledge transfer are the last step of this phase. Taking care of all necessary project information, including warranties, maintenance manuals, and final billing, serves as a valuable reference for the client, enabling them to manage future maintenance, repairs, or modifications of their building effectively.
Once your project is finished and your client is enjoying their renovated space, it’s time to reflect and learn from the experiences you’ve just gained while it’s still fresh, and you can remember many issues you faced and resolved during this project. Conduct a thorough review of the project, analyzing every aspect using your interior design plan. Additionally, you may take notes during the project about every stage of the project to have resources for reflection later if you practice learning from your own mistakes.
During this stage, gather feedback and opinions from all parties involved, including clients, designers, contractors, and suppliers, to understand the whole picture. They will work with your own opinion, filling the blank space or extending your own thoughts on the subject. This feedback plays a pivotal role as it highlights both the strengths and areas for improvement.
There are many tiny secrets to successful interior design. However, they are mostly very specific and may not work for every case or every creator. Instead, there are widely-known insights that often stay hidden for years, or designers don’t recognize them as something that may help them deliver their project easier.
Here are some suggestions on how to make the process go smoothly even though there are many people and elements involved.
A lack of communication is the most significant challenge faced by their teams as it leads to a lack of understanding, which may ruin the whole design idea, or, in the best possible scenario, the outcome will be far from what you and the client expected.
Whether you’re interacting with clients or collaborating with your project team, a breakdown in communication is like a ticking time bomb. Everything is fine now and seems like you’re following the plan, but tomorrow it may become a disaster.
It’s crucial to have everyone updated on the latest information regarding the project to avoid such disruptions. Also, before the project starts, you may need to establish a communication charter. This document should outline the preferred communication methods for both your team and the clients in case any of you want to discuss something with others.
However, effective communication within any project, whether you have worked with the team or client before or if it’s your first time, goes beyond just organizing meetings. It also involves providing regular updates and clear direction regarding tasks, which means you should be ready to address a multitude of questions from various stakeholders. Emphasizing strong communication practices can greatly contribute to the success of your interior design projects.
Every project offers valuable learning opportunities, whether you claim it is successful or not. Probably, those that brought you only bad feelings and stress are the best tool for your development.
Once you have finished the project, take the time to conduct a thorough review with your team or alone to define its successes and shortcomings. Your Interior design project plan will help you as many details and issues you encounter might fade in your memory after you manage them. If you have a team you work with on all projects, it’s especially crucial to encourage open discussions about what aspects worked well and what could be improved for your and their further development and convenience.
Also, it’s important to seek honest feedback from your clients as well. Your future clients will thank you for that. Additionally, you can use it as a recommendation when looking for new projects.
You may provide your clients with a questionnaire to make sure they give you the information you need. Or you may invite them to participate in an interview to share their experiences openly. However, not all clients would like to share their thoughts on your work during the interview, they simply may feel uncomfortable. That’s why you need to choose the best way according to the current client’s preferences.
Remember that you conduct this audit not to put the blame on someone or external factors that might have affected the performance or the outcome. It’s only a tool to identify any inefficiencies, enabling you to make necessary corrections and enhance your competitiveness when working on the next projects.