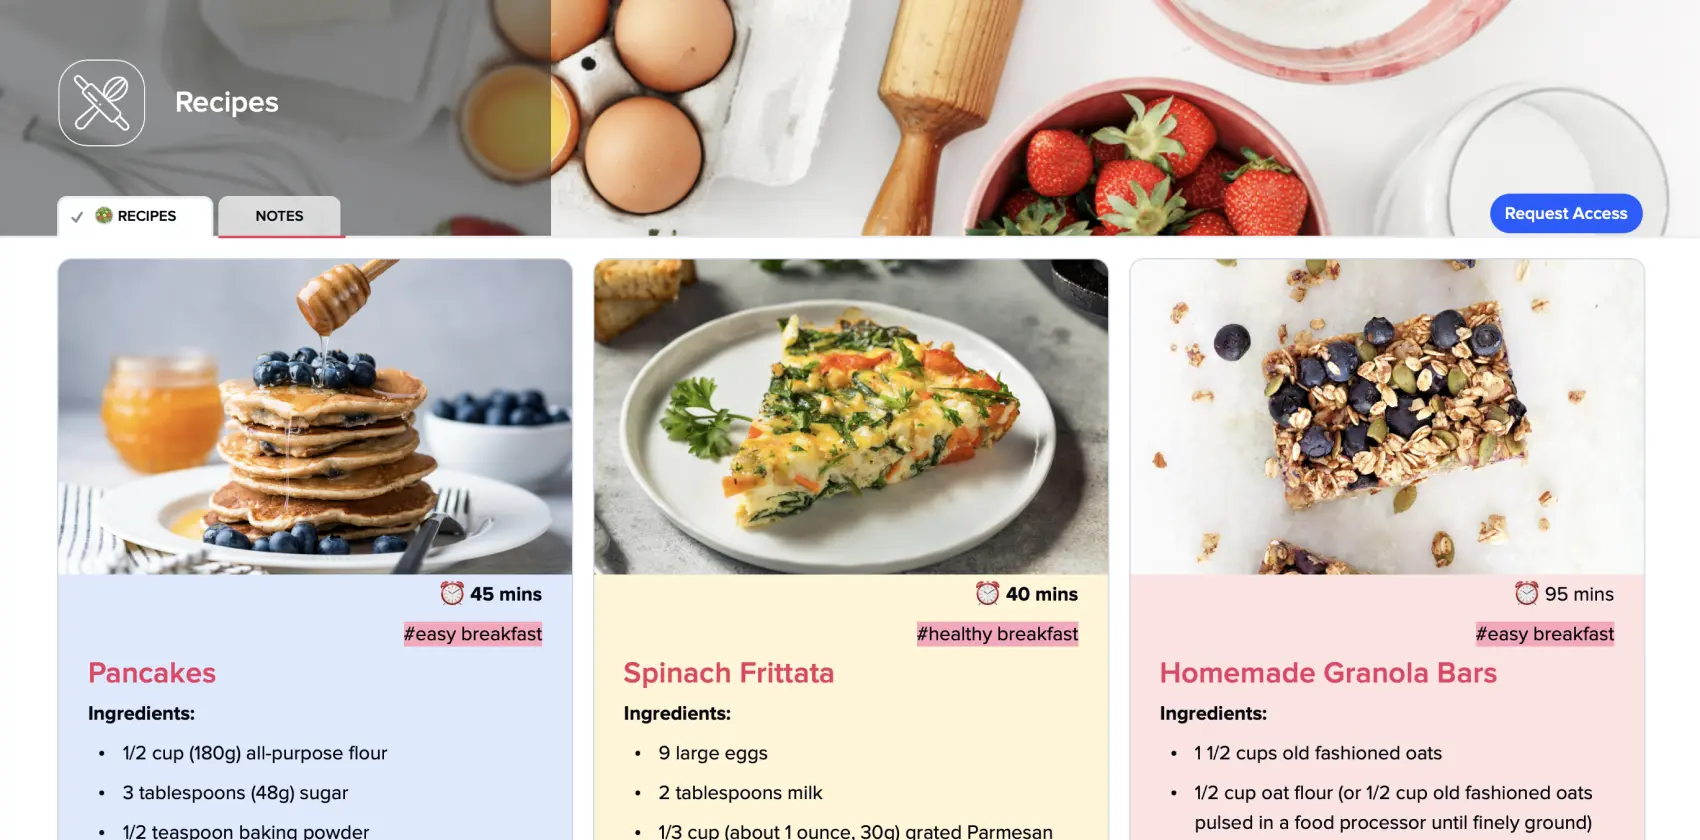
Social Media Content Calendar Template
Success in social media depends on many factors, and thankfully, a lot depends on you. If you want to reach your target audience, your social media posts must be regular and planned. If you want your planning to be easy and seamless, you need to have a workspace built specifically for this task.
The xTiles Social Media Calendar Template is the perfect solution. It shortens the time a social media team needs to organize the planning routine, offers multiple tools to do it efficiently, and allows planning for different projects without a mess.
What is a social media calendar template?
A social media calendar template is a part of a social media management template suite. It’s a tool to assist in the content creation process from the moment content ideas flash upon your mind until the moment they take shape and are posted. It assists in building a social media presence in your industry by serving as a centralized workspace for a team that works on content.
Social media templates can’t effectively replace project management tools. It’s an element of your workflow for building an effective social media strategy and making it come true across different social media channels you decide to use.
However, a social media calendar can hardly be replaced by Google Sheets or Google Calendar because none of them are suitable for creating and implementing a content marketing strategy that can make a difference without forcing social media teams to struggle with all the rows, columns, and poor customization options.
The template is useful not only for planning upcoming social media posts. Social media managers and marketing teams can schedule, track, and optimize their content across various social media platforms using social media calendars. It also helps monitor and evaluate the content you post, its performance, and engagement data to inform future strategy updates.
It features a content calendar with planned social media updates, publication timetables, and content concepts to share on various social networks. Content calendars help marketers plan the social media updates for a particular week and ensure their content is well aligned to specific marketing campaigns or product offerings, enhancing engagement with the right audience.
A well-designed template helps a marketing team to communicate their content through multiple social media channels, such as Facebook, Instagram, Twitter, LinkedIn, etc. This centralized approach is useful to ensure that all the social media channels are consistent and, at the same time, have content that fits the specific site and its audience.
Another good thing about content calendar templates is that they are flexible and help all social media team members. For example, you can use it as an editorial calendar template if you’re responsible for reviewing the content before it gets posted. If a team uses the content calendar regularly, a social media manager can use it for a social media audit to evaluate the strong and weak points of their marketing efforts.
What are the benefits of a Social Media Calendar Template?
An effective social media calendar template brings many benefits for marketing teams and content creators.
What are the drawbacks of using a free social media marketing calendar template? None. While providing you with a centralized spot for turning your marketing efforts into results, it takes nothing in exchange.
Save time with the template
Time is a limited resource. A social media calendar template helps go faster through the content creation process, which is especially important when you have to work with something trendy at the moment.
By centralizing your social media strategy and posting schedule, you can streamline content creation. Especially when dealing with time-sensitive or trending topics that need to be responded to quickly.
Organization of the process
Organisation is another big one. A well-structured media content calendar keeps your social media marketing efforts across all platforms on track. You can plan and schedule posts in advance so content keeps flowing even when team members are away on holidays or other commitments.
Posting schedule
It also enhances long-term planning. You can schedule posts for as long as you need in case a team member responsible for social media content is on vacation.
Long-term planning becomes so much more manageable with a calendar template. You can plan your social media content weeks or even months in advance, in line with broader marketing campaigns and business objectives. This forward-thinking allows for better resource allocation and a balanced mix of content types.
Performance tracking
Performance tracking is also made easier. Many templates have sections for recording post metrics so you can see what content resonates with your audience. This data-driven approach helps you refine your social media strategy over time and achieve your marketing goals more effectively.
Features of use for different social media
Different social media platforms have their own rules, that’s why it’s important to tailor your social media calendar to each platform. A good media content calendar should account for these differences to get the most out of your social media posts across all platforms.
For this reason, the xTiles Social Media Content Calendar Template is flexible to suit your unique vision, your or your team’s way of working, and multiple platforms.
Here are a few examples of how to use the social media calendar template based on the social network you’re preparing a post for:
YouTube
For this video-centric platform, your social media calendar should focus on longer-form content, like very solid videos that cover the subject from A to Z. However, don’t forget about YouTube Shorts to convince people to try your content after a few-seconds video.
Plan for regular video uploads and consider optimal posting times and video length based on your audience analysis and what your competitors post.
On your social media planning calendar template, include fields for video titles, descriptions, and tags. Also, you may add some notes if there are details your team needs to consider when posting a video.
Additionally, you can track watch time and subscriber growth to measure performance in your calendar. It will help you find out what your audience likes and what doesn’t, what YouTube wants from you, and what types of content it doesn’t show to potential viewers.
TikTok
TikTok has a fast-paced and trend-driven nature, which needs to directly impact your posts in order to meet your audience’s intent. Your TikTok section in the social media calendar template should be flexible. Allow for spontaneous content creation to jump on trending hashtags and challenges. Schedule regular posts but leave room for real-time adjustments.
Track performance, engagement rates, and follower growth as key indicators and insights for your future content planning.
Your social media content calendar for Instagram should accommodate different post types – feed posts, Stories, Reels, and IGTV. By using all the post types this social network has, you maximize your chances of being heard.
Plan a mix of visual content to ensure a cohesive look across your profile. Include fields for captions, hashtags, and potential collaborations or influencer partnerships. Track reach, engagement, and story views.
For this platform, your social media content calendar should include different post types – text updates, images, videos, and links. Plan for organic posts and paid ads. Consider audience targeting for each post. Track post reach, engagement, and click-through rates.
X
X is a special platform among all the other ones on this list. With its real-time nature, it allows for planned tweets and spontaneous engagement. Schedule regular posts but leave room for news-jacking and trending topics. Include fields for hashtags and mention relevant accounts. Track retweets, likes, and overall account growth.
You’ll develop a better social media strategy by customizing your social media post calendar template to each platform’s features and audience. This way, your content will resonate with each platform’s audience and generate more engagement. Review and adjust your calendar regularly based on analytics and audience feedback to optimize your social media across all platforms.
Guide to using the Social Media Marketing Calendar Template by xTiles
The xTiles Free Social Media Calendar Template is a flexible tool to help you plan and post relevant content. It is one of our many planning templates to help you with your tasks considering their specifics and aspects, without forcing you to put your plans and posting schedule into something that doesn’t suit them and your team.
Use this template to manage your social media marketing, save time in content creation, and have a consistent presence across all your social media platforms. Whether you’re a solo entrepreneur or part of a bigger marketing team, this will help you improve your social media and workflow.
Here’s how to use it:
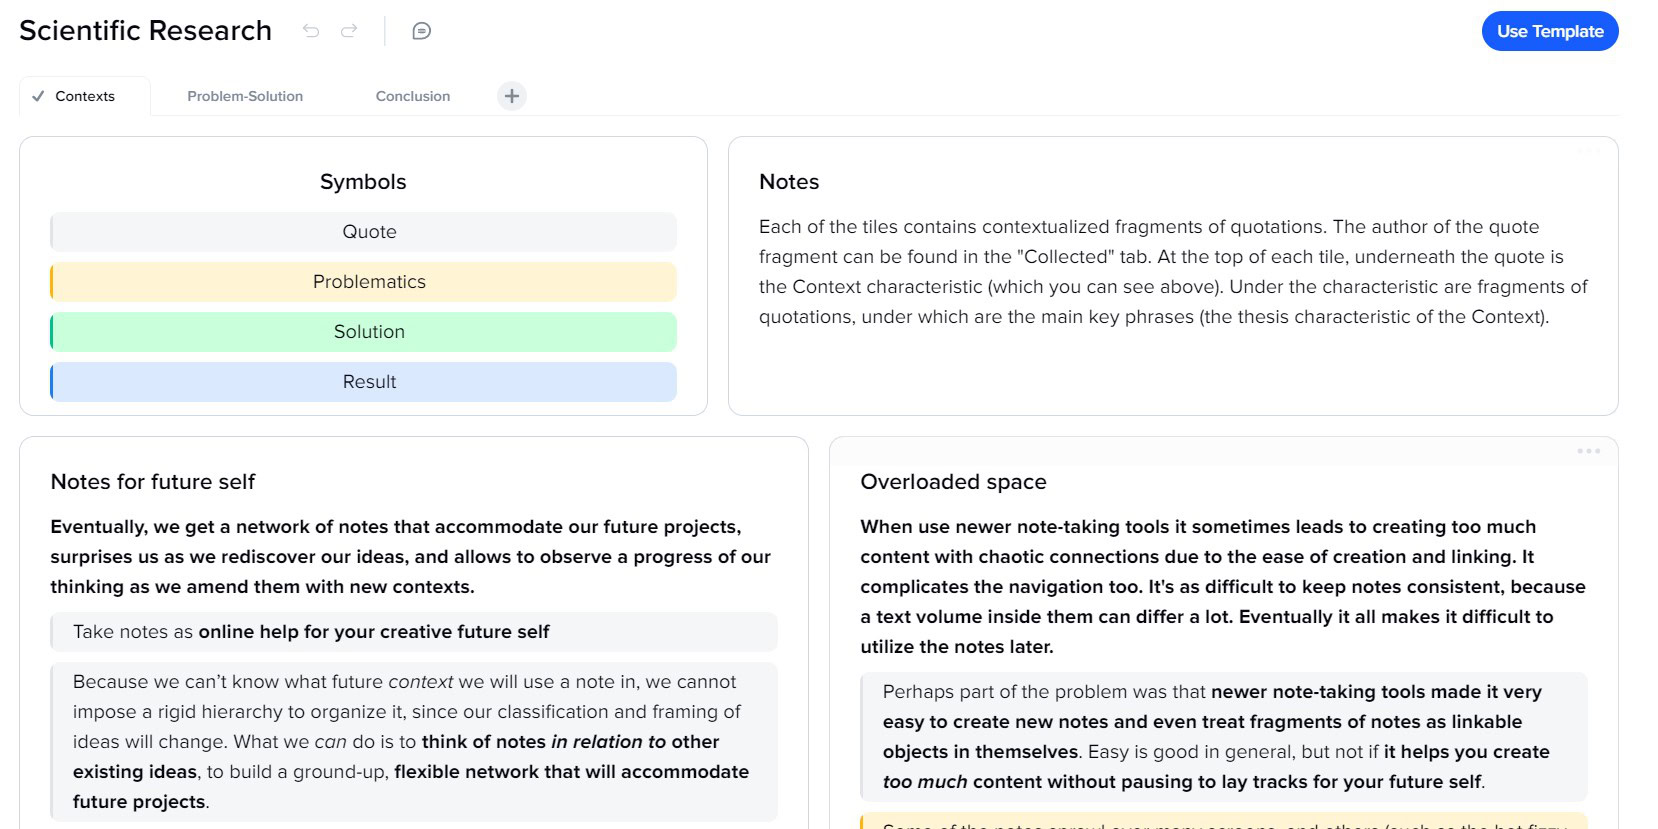
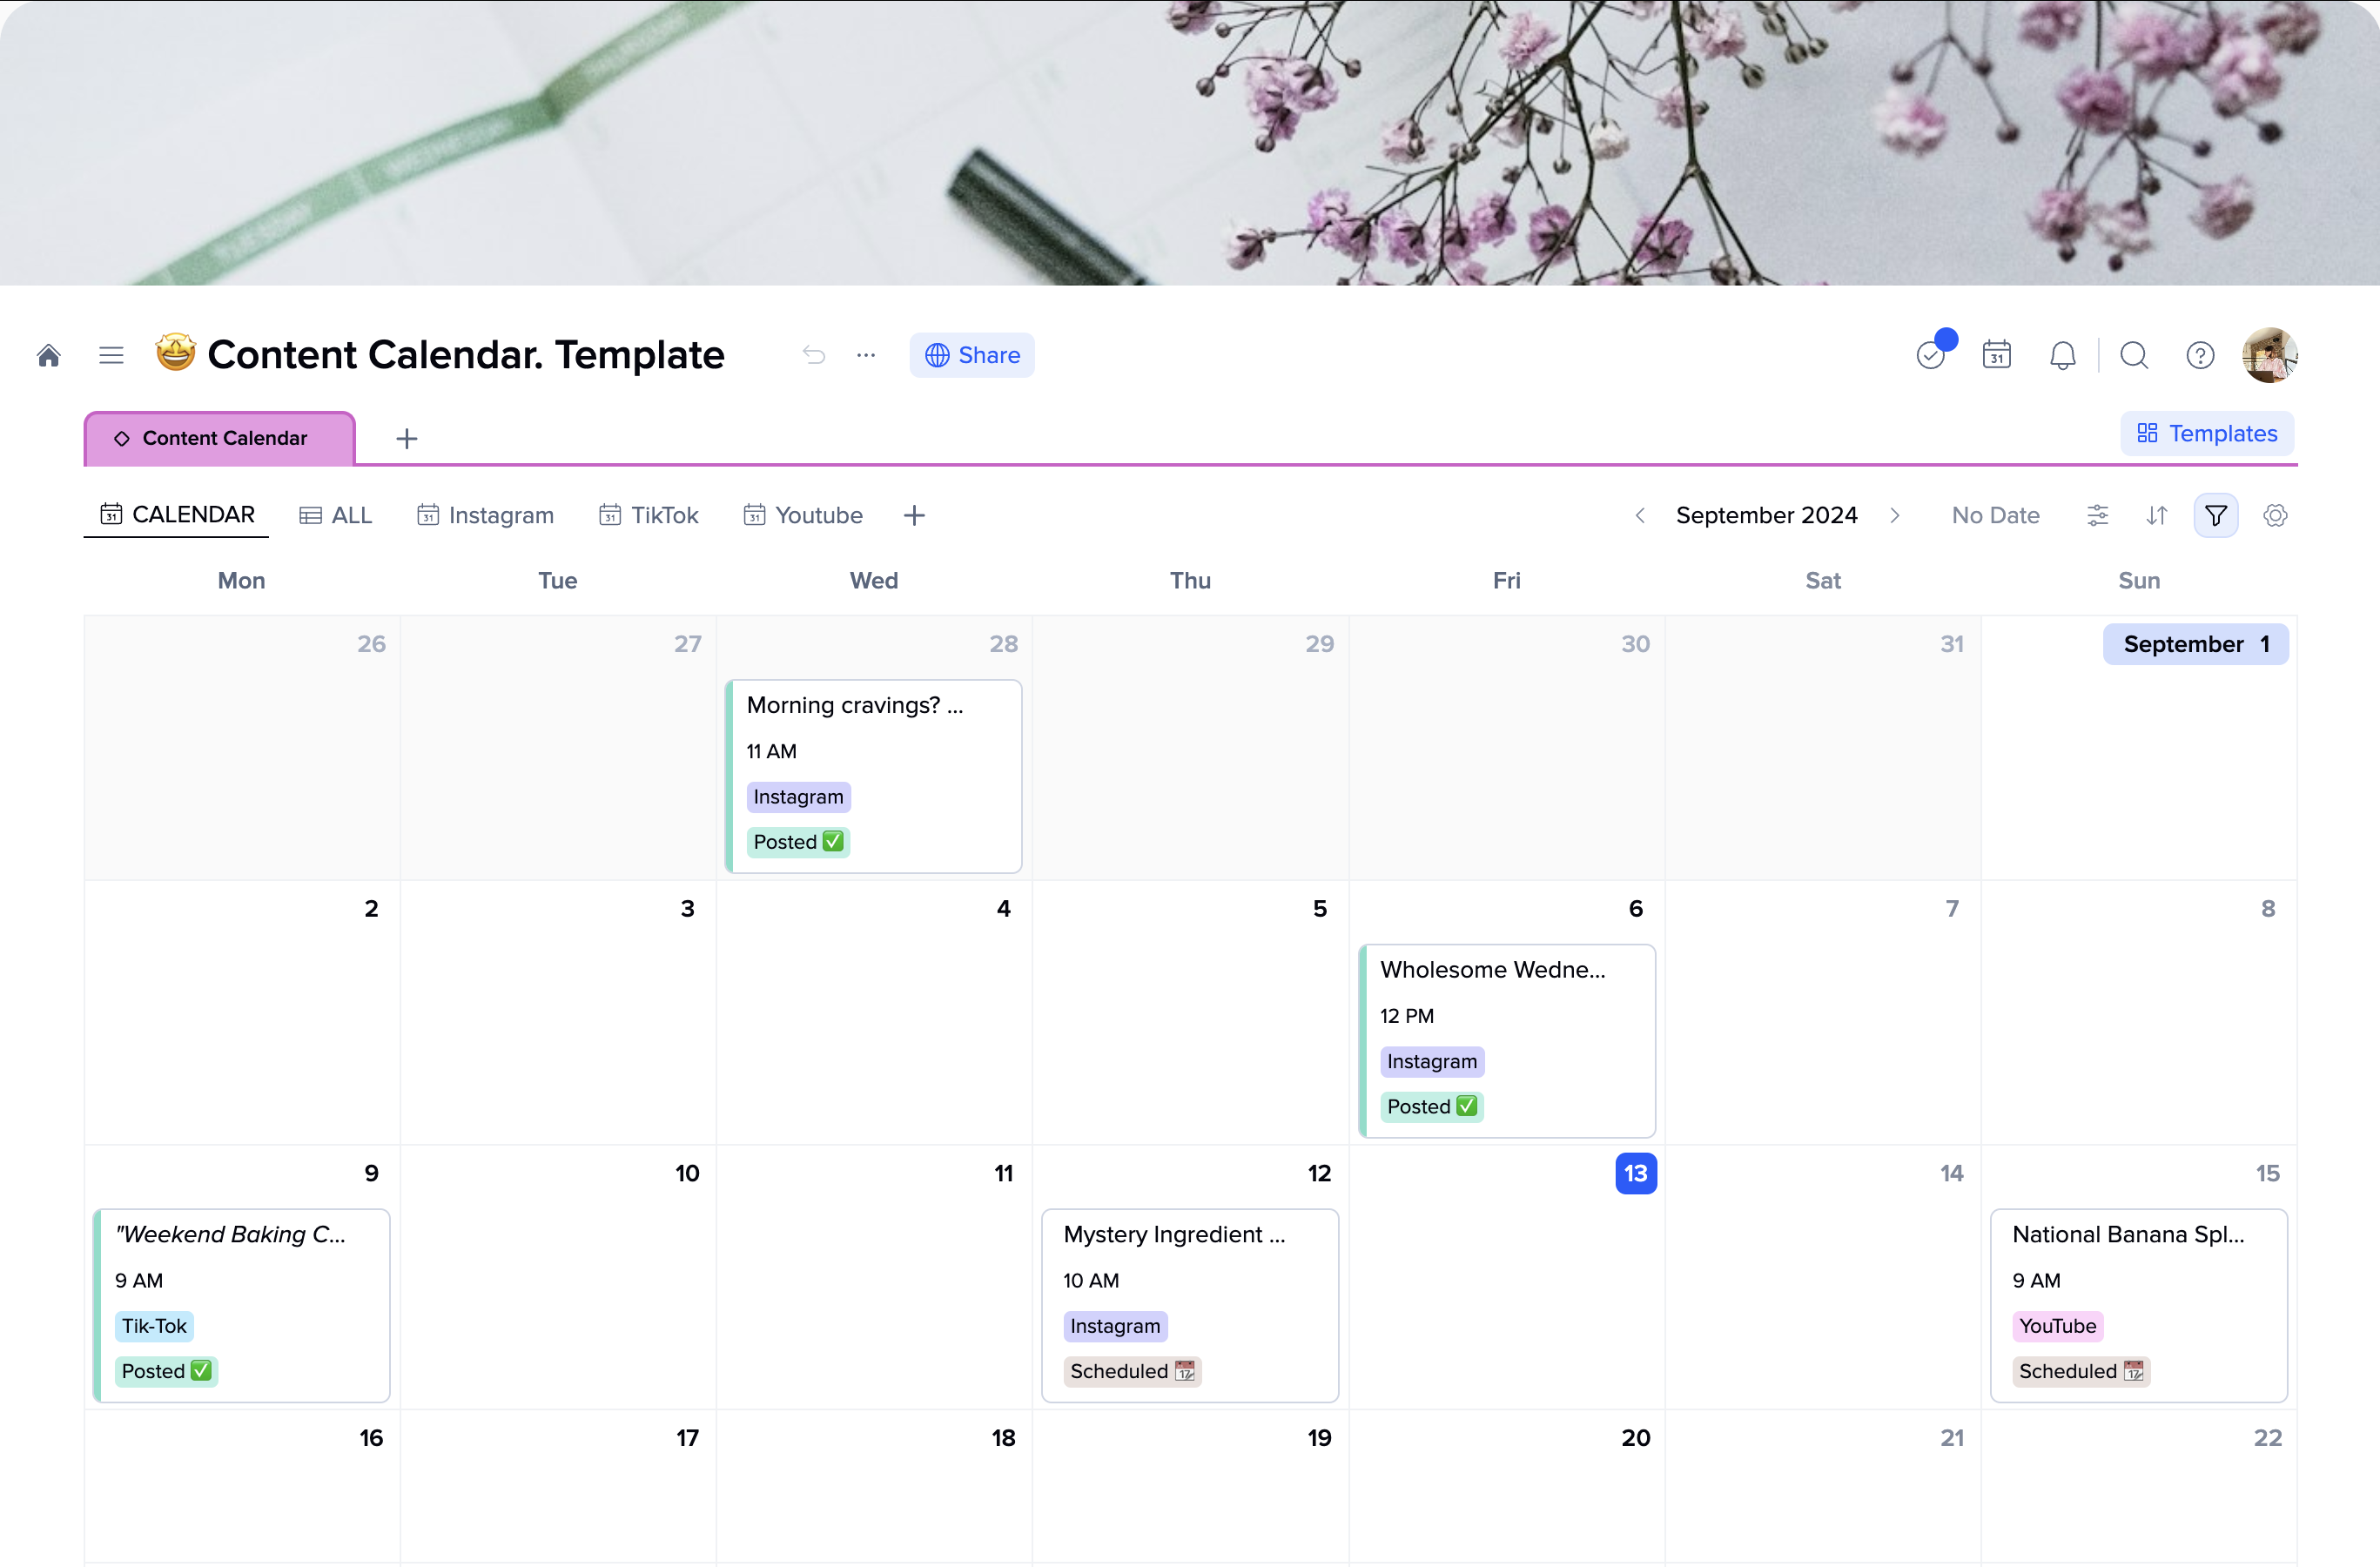
The main part of this template is the calendar where you can create and see your planned social media posts. Each post is a task, so you can assign it to people responsible for content creation, reviewing, posting, etc., and see your content at a glance distributed across days and weeks.
Simply create a task on the date you want. Tasks in xTiles are separate from a common note and can be assigned to other people and have different properties for execution. Additionally, assignees will have all tasks (even from different projects) in one menu accessible from any project or workspace. Tasks in xTiles can be recurring, saving time on task management.
Add properties to make it very detailed to avoid confusion:
-
Due date: When to publish
-
Social media platform: Where to share (e.g., Instagram, Facebook, Twitter)
-
Status: Track each post (e.g., Draft, Ready, Published)
-
Content type: Categorise your posts (e.g., Image, Video, Blog link)
-
Assignee: Who is responsible for the post creation.
Also, you can add your post directly to each task.
One of the social media planning template’s strengths is the ability to switch between views. You can sort and filter your planned posts by any field. For example:
-
View all posts for a platform
-
Filter posts by status
-
Get a table with all the posts you need currently
-
Check which posts need visuals
The other part of the xTiles Social Media Posting Calendar Template is for social media content creation process and your content ideas. It will help you accumulate materials and resources for direct planning. Use this page as a brain dump, mood board, or some sort of a little Second Brain related to your content strategy to streamline your planning.
Use the calendar to plan your content. Ensure you have a balanced mix of post types across platforms and align your content with your broader marketing strategy.
Once posted, you can update each task with performance data. This will help you see what content works best with your audience and refine your marketing strategy. A marketing manager can use this data when creating a content calendar for the next month.
If you’re working on a team, use the template to assign tasks, leave comments, and make sure everyone is on the same page for the content calendar. xTiles is a perfect tool for collaboration due to its flexibility and a wide range of tools that enhance teamwork. Moreover, if your team works across multiple workspaces, you won’t be charged every time. Pay for a user only once and save money for your social media campaigns.
The difference between a free social media calendar template and buying a template: advantages of our service
xTiles free social media calendar template is marketers’ and social media managers’ dream. It has all the features you need to plan your social media campaigns without the cost. This template has customizable views, post task creation, and property fields for due dates and platform specific details.
Unlike paid alternatives, xTiles free template doesn’t compromise on functionality. It can help you with long-term planning, performance tracking, and collaboration – features you only get with premium tools. It’s flexible, so you can use it for any social media strategy or team size.
You can get the same results from expensive social media management tools with this free template. By choosing xTiles you get to keep more of your marketing budget for content creation or advertising and still look professional and organized with your social media management.
FAQ
How do you create a social media calendar template?
Use the xTiles Social Media Calendar Template, a centralized space to plan. Create tasks for each post and add properties like due date, platform, status, etc. Customize the template to fit your needs and use different views to sort and filter posts.
What should I include in my social media calendar template?
Include fields for a due date, social media platform, status (Draft, Ready, Published), content type (Image, Video, Blog link), etc. Consider adding sections for a target audience, performance metrics, captions, hashtags, and associated marketing campaigns.
For which social media platforms is the social media posting calendar template best suited?
The template is flexible and can be used for any platform, including YouTube, TikTok, Instagram, Facebook, and X (formerly Twitter). The xTiles Social Media Calendar Template can be adapted to each platform’s features, audience expectations, and social media team’s workflow.