Reading List

Reading list template

A reading list template is a convenient tool for creating your reading list, keeping track of your reading journey, saving something interesting to check later, building exquisite taste in books, and noting your impressions.

Reading lists have become a routine for many people who read regularly or try to make it a part of their daily routine. Some prefer to keep their lists for themselves, and some use Goodreads to update their friends about their latest books and what they think about them.

A reading list is a very specific kind of to-do list. It may help you implement a new healthy habit or ruin your reading experience if created not according to your preferences and inclinations.

Many people started reading regularly during the lockdown, and once we were returned back to the world, many stopped. Reading has an incredible ability to take us from our world to millions of others. When reading, we face different experiences we would never have had in real life. In other words, reading is cool.

When do I need a reading list?

Reading lists are tools for planning your reading process. In some sense, they define your further development as a person. That’s why your approach to creating one is important.

There are many cases where you can benefit from creating and using one.

1. Studying

A detailed reading list will help you stick to your studying routine, guiding you through the information and topics you need to learn step-by-step.

2. Healthy leisure

A reading list will provide you with the activity for your free time.

3. Developing a new habit

A reading list will help you stick to your goal and read book after book with pleasure. Also, when building one, you dive into the subject deeper and find many interesting facts and new information. Creating your list is already useful, not to mention how much you will get when you finish the last book on it.

4. If reading books is your job

Book bloggers read and review books for a living. That’s why for them, it’s super serious and has to be well-organized and thoroughly planned to keep their audience’s attention and gain new viewers / readers / listeners.

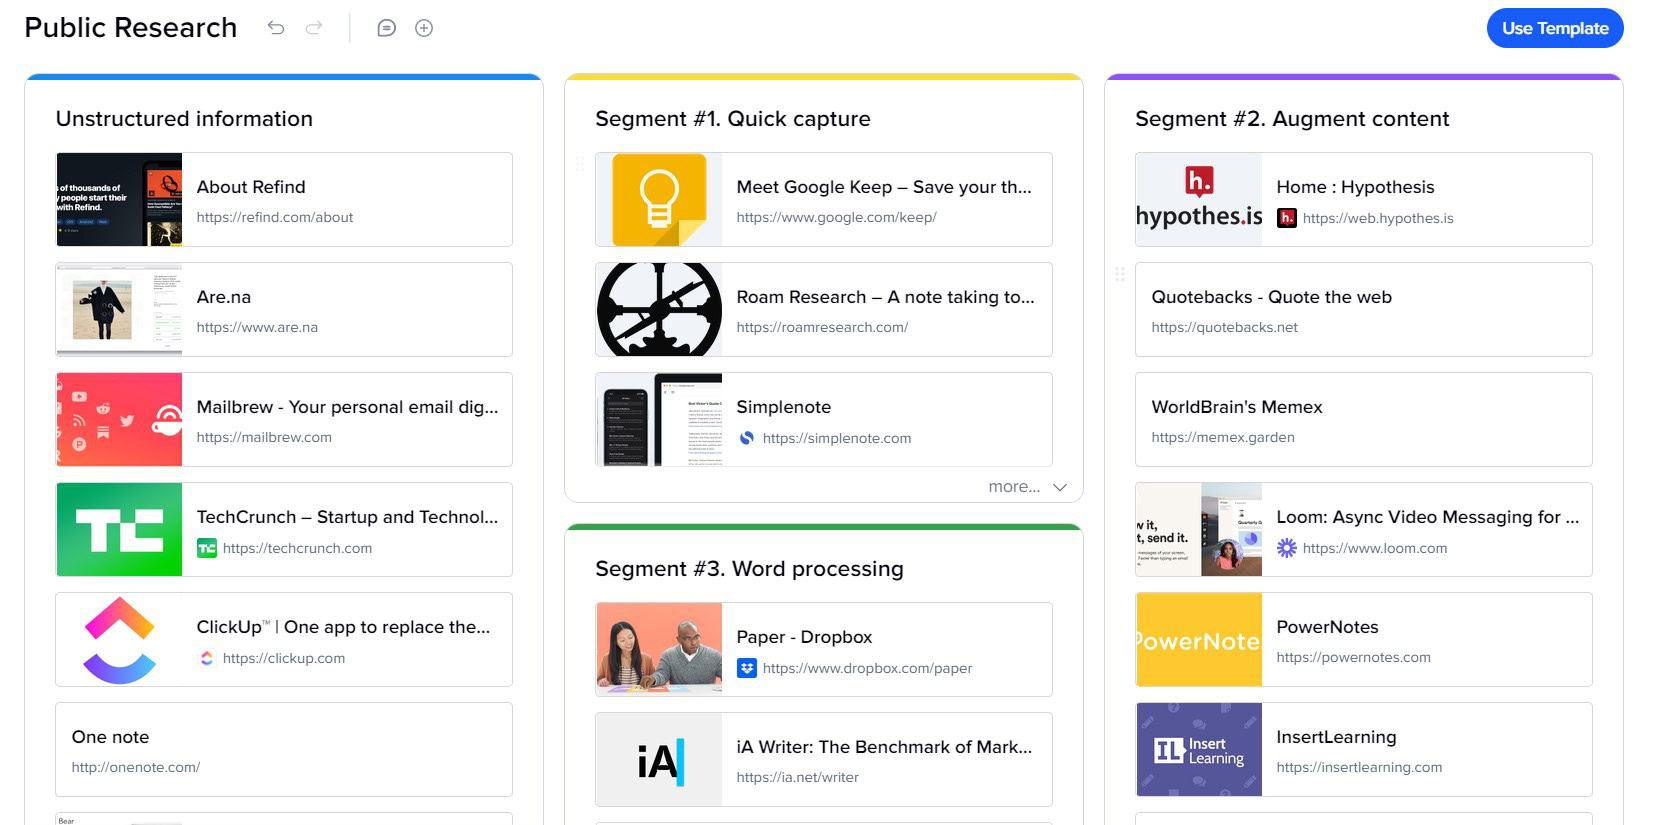
Online reading lists

More and more people give up on their paper notebooks every day. And more and more people start noting and making reading lists because now they can do it on the run easily, quickly, and with as many edits as they want without spoiling the visuality using their smartphones or laptops.

However, many apps or extensions have at least one big disadvantage. For example, reading lists for iPhone or Chrome reading lists are suitable for surfing the internet and collecting articles and interesting blogs. But for your books, you will need something else.

xTiles resolves that issue by syncing the desktop version and the app. Additionally, we also offer you to use the xTiles Web Clipper to save every piece of information that might be interesting or worth reading later.

Another phase of reading list evolution is free reading list templates, where you collect and sort your books or articles.

Popular reading lists

The internet today is full of famous people’s reading lists. Using one as a base for yourself may be indeed alluring as you won’t need to research books alone. Everything was done before. The only thing left for you is the most pleasant one – reading.

However, you need to be particularly careful when choosing one because it may not match your taste in books. And forcing yourself to go through books you don’t really like only because it’s a Rory Gilmore reading list or Bill Gates reading list might make you hate reading or at least make it less pleasant for you, which might be very dangerous if it’s not your regular practice.

Creating your own reading list based on suggestions of famous people who have great taste in books, in your opinion, or simply seem nice, interesting, or intriguing is much safer and likely to bring you better results.

How to use popular reading lists?

If you’ve decided to read books from, let’s say, Lex Fridman’s reading list or Elon Musk’s reading list, start with carefully reviewing each of them. Some may be far from what you like or expect to get.

It’s important to understand that reading is not about achievements and checkmarks. You don’t have to waste your time reading a book you don’t like. Put it aside and start something else.

That’s why it’s advisable to adjust pre-made lists according to your expectations and what you want at the moment.

Also, if the reading list you want to give a try is about an immortal classic, you need to be particularly careful. Some pieces might be so out of context today that you might be shocked.

How to create an effective reading list using a free xTiles reading list template?

Once you answer a couple of questions about why you need this reading list and what goal you want to achieve by reading every book on it, creating one will be much easier.

Above, we described four main cases when a person might need a reading list. Let’s stick to that and look at important aspects and some tips for each.

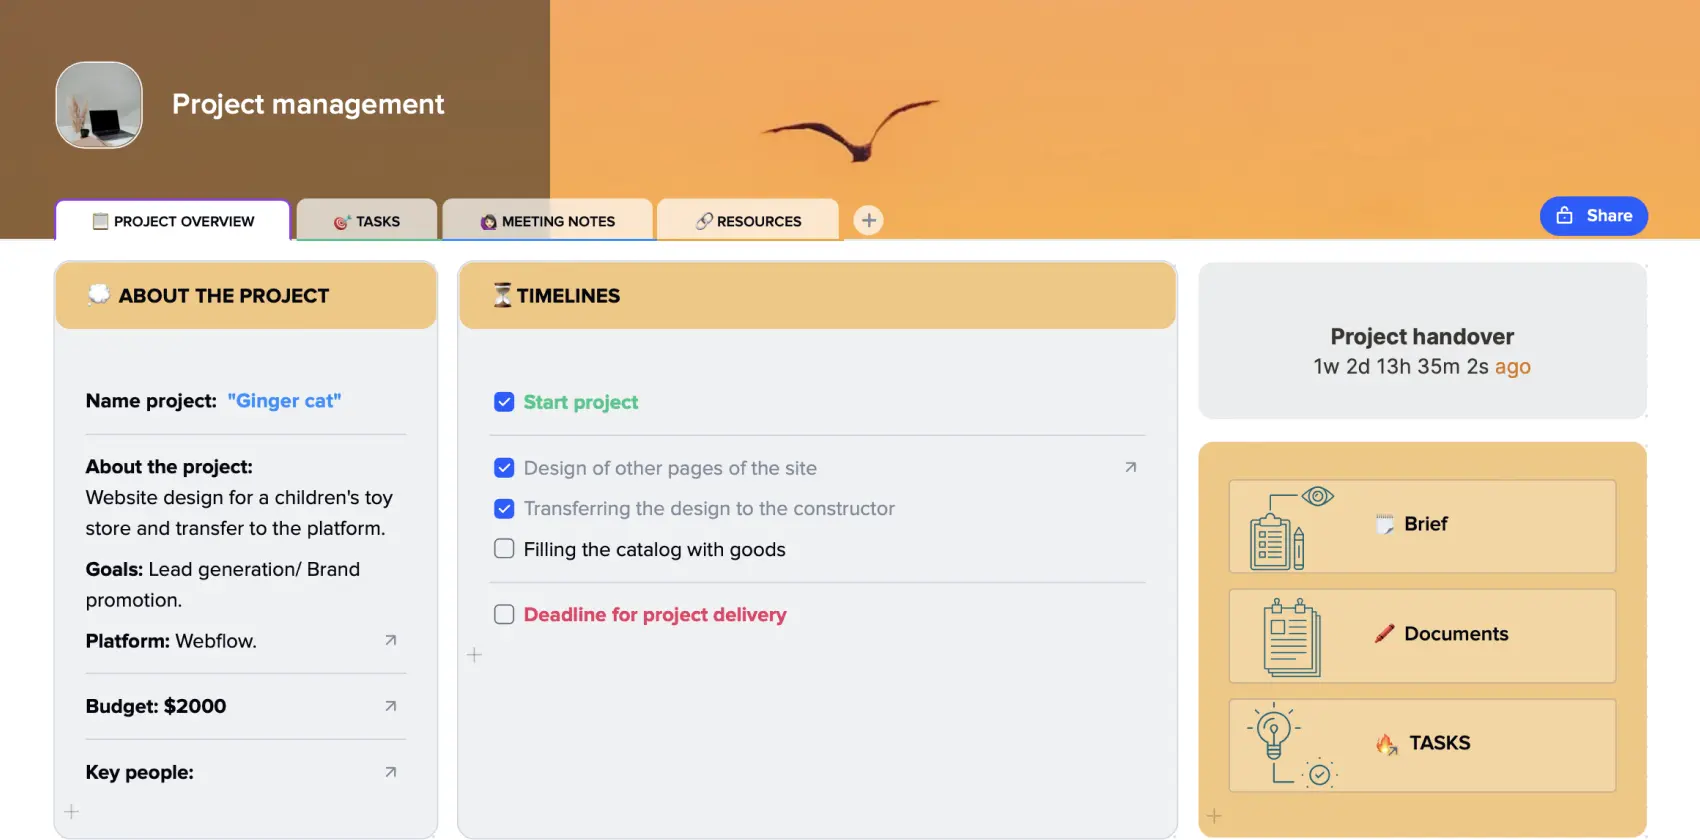
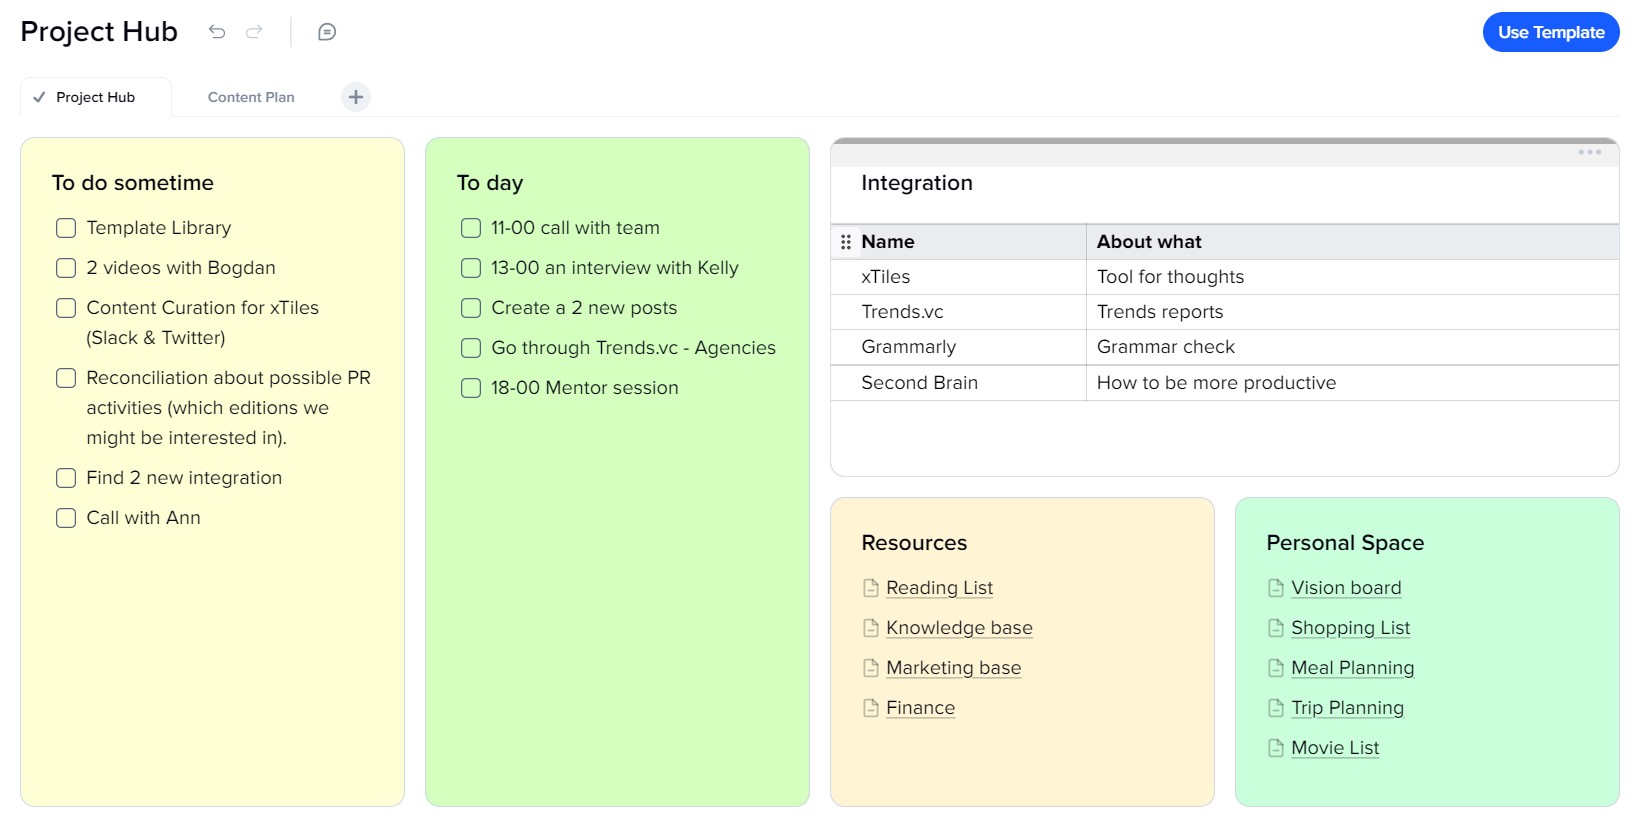
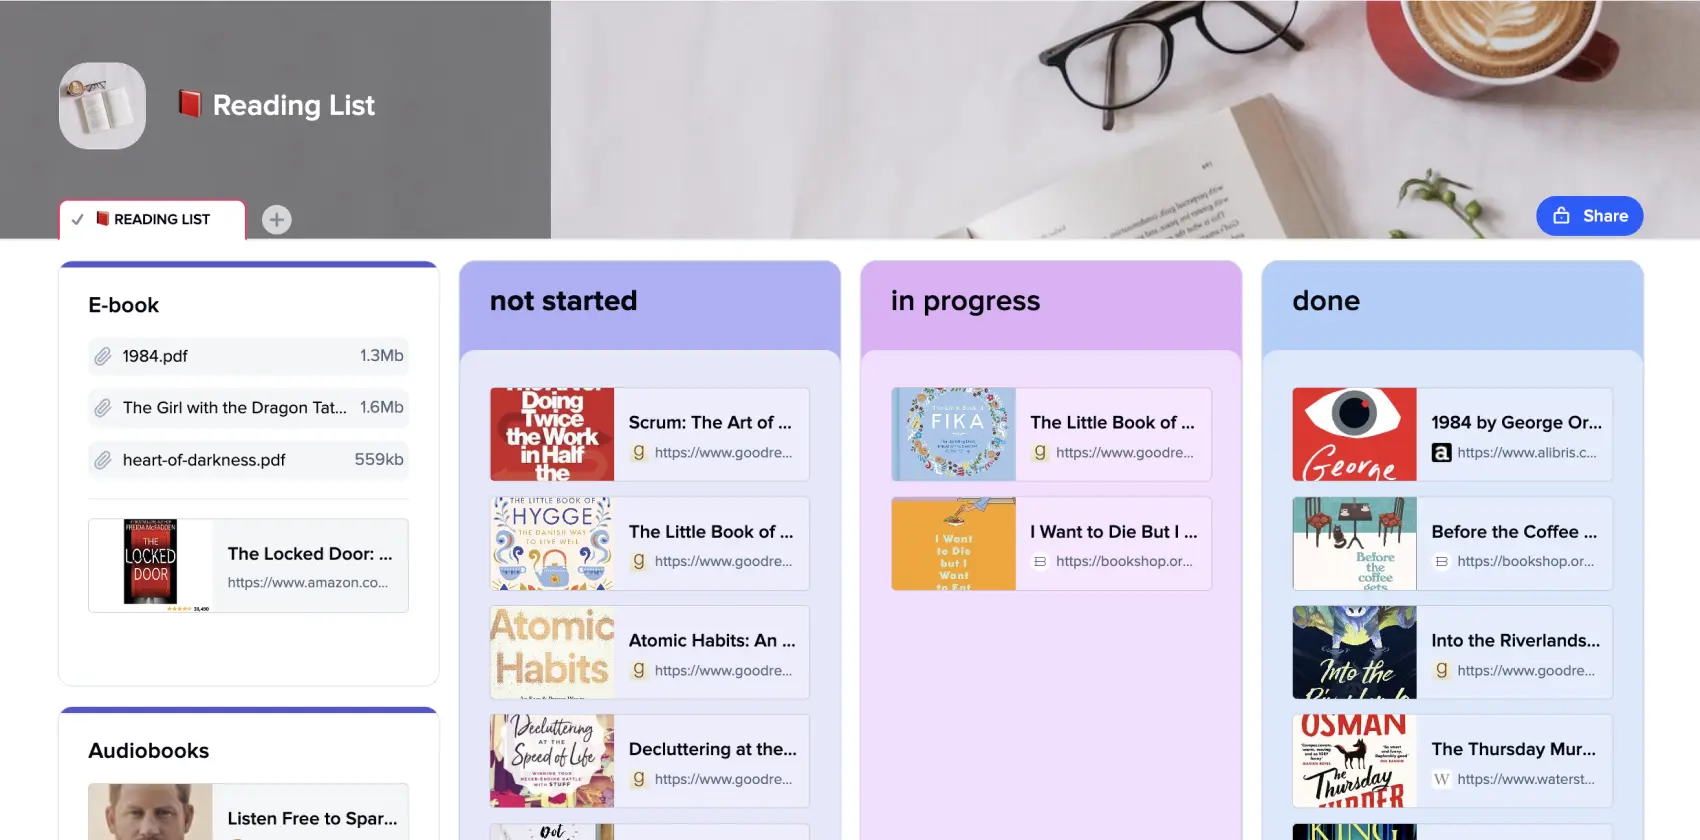
The technical part is similar for all purposes. You add books you want to read to the column “not started”, when you start reading one of them, you drag-and-drop it to the column “in progress”, and when you finish reading, you move it to the “done”.

However, the reading process might be harder than that. That’s why you may create another section for books that had turned out to be too complicated for now and you decided to postpone reading them.

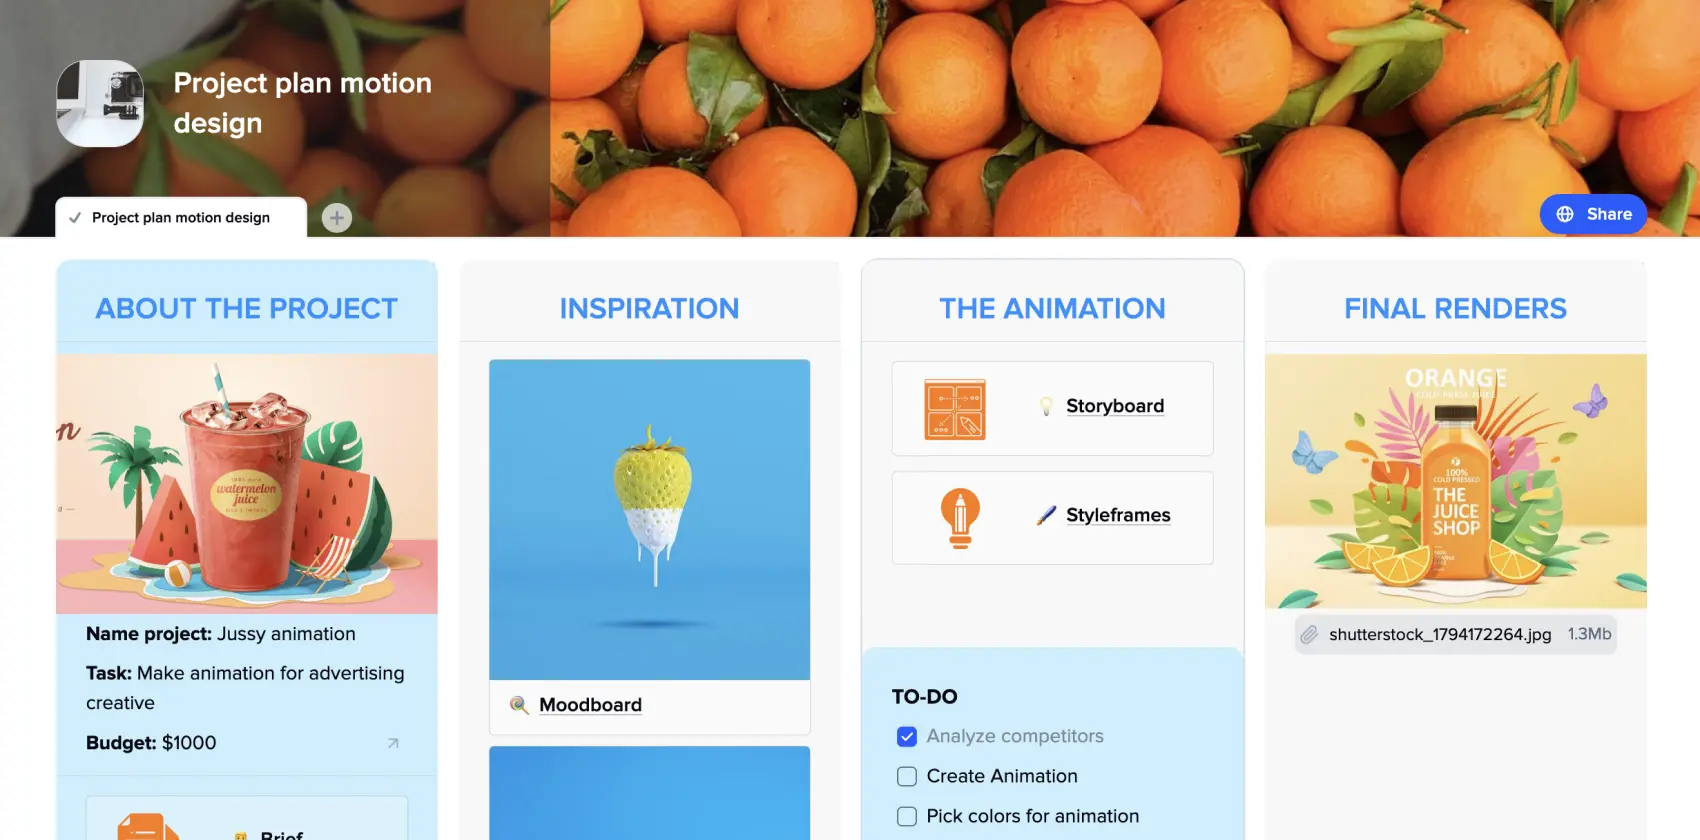
The xTiles reading template is easy-adjustable, so you may have as many categories as you prefer. For example, you may divide poetry from prose or nonfiction from fiction. Or, if you’re more in context, you may have different documents for pieces from different periods of literature.

Also, before adding books you plan on reading to your list, think of how long this list will be relevant. A month? A year? Or maybe you’re preparing your summer reading list?

How to create a reading list for studying using the xTiles reading template?

Sometimes you get an already created and structured reading list from your teacher. However, if you study independently, there will be no source to get one. Also, if you’re a teacher, creating different reading lists may be a part of your work routine.

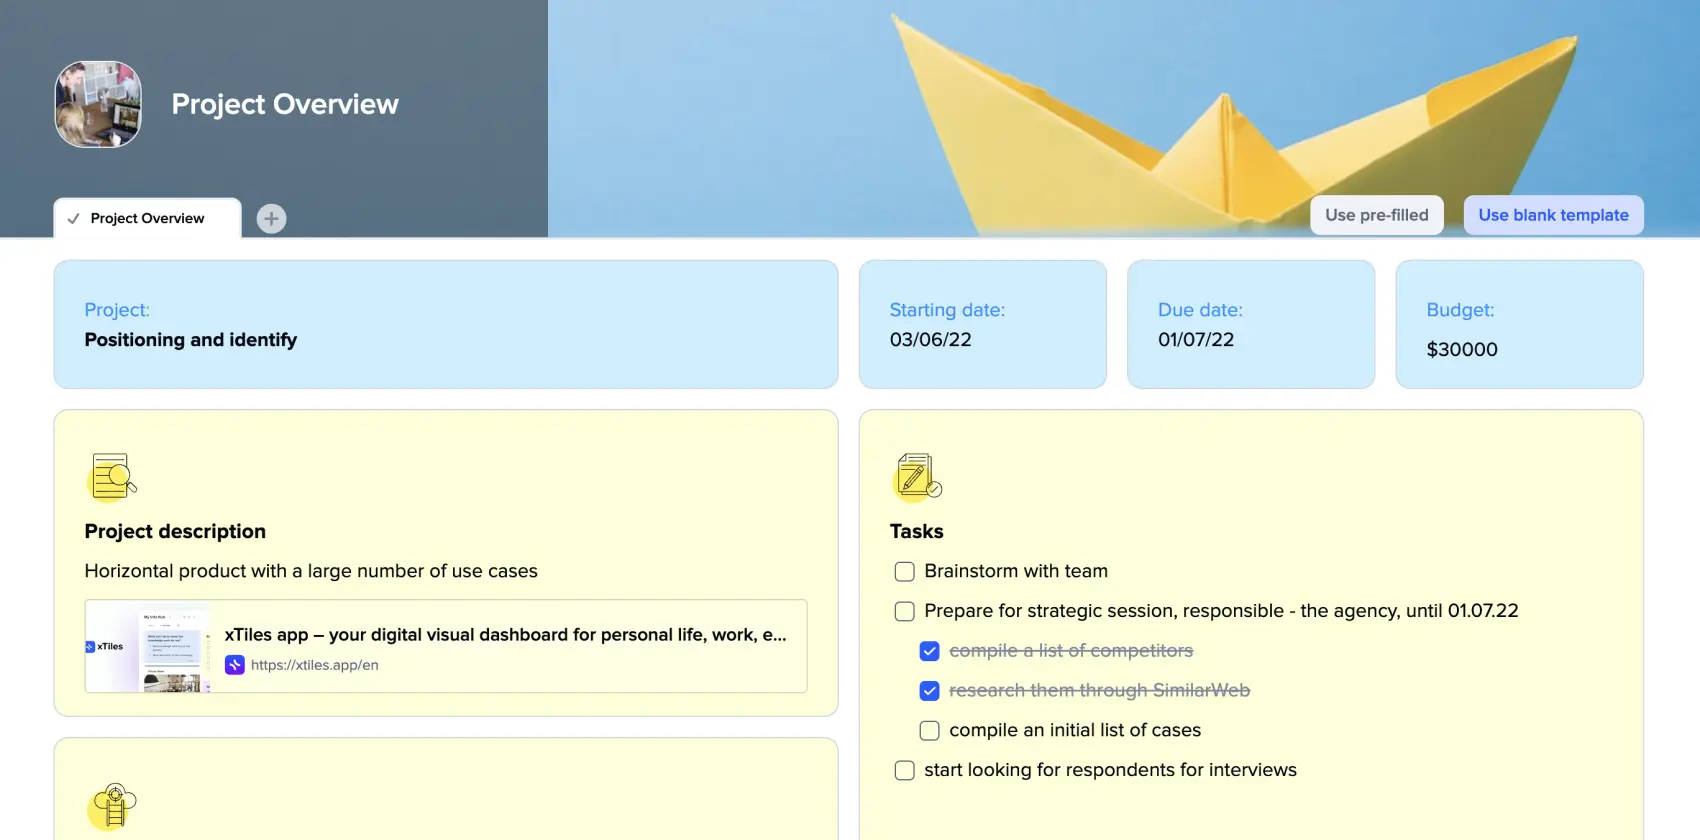
The xTiles reading list templates offer a structure where you collect all the books you plan on reading and keep track of your progress and how many of your planned books you have finished. If you’re a teacher, you may share the same documents with your students and check how well they are doing.

Uploading your files and adding links allows you to keep your planned books in the same place handy. Also, it will ease the reading process for your students if you provide them with all the needed sources. You simply cut off their escape route so they couldn’t say they didn’t read something because they couldn’t find it 🙃.

It may help if you prioritize units on your studying reading list in case you don’t have enough time to go through all of them. In this case, you still will miss something, but at least it will be less important.

How to create a reading list to plan your leisure activities using the xTiles reading template

If reading is your usual activity when you have nothing else to do or that is your way to relax, your reading list is more likely endless. You constantly add some new books you heard about recently from your favorite booktuber. Your “not started” column constantly competes with the “done” column for which one is longer.

In this case, you need a reading list to keep everything organized and ensure that you have a variety of interesting and engaging books to read in your free time. You may also add a section for “want to read” or “suggestions”.

However, if you want to make things clear, you may divide your endless book wish list into sections, smaller reading lists, and go through them each at a time or jump between them.

We don’t recommend setting goals or making schedules if reading is a pleasure for you because they may ruin everything, and the process, once well-loved, might become something you avoid.

Some people like to compete with themselves. The growing number of their reading list “done” section makes them happy. Reading counts book lists are more about form than content, but it doesn’t matter until they make you a happy reader.

How to create a reading list to make reading one of your habits using the xTiles reading template?

Many people stopped loving reading in school, where they were forced to go over boring stuff. That’s why parents are responsible for giving their kids books that will catch their attention. If you’re a reader and want your child to be one, you may prepare a reading list with books you liked when you were little. Additionally, it will help deepen the connection between you two.

So, start with researching what you’re interested in. If you have read no more than three books in your life and haven’t liked any of them, then at least you know where not to go now.

You may try an option that always works – classic literature. Don’t know any names or titles? No worries. Classic literature reading lists are quite popular. Reputable journals like The New York Times and Le Monde have their own lists of classics everyone should read in their life.

The more you read, the more you learn what you like. So, adding new ones will be much easier after ten books. Thankfully, there are dozens, and sometimes thousands, of reviews on almost every book to help you decide.

When you only work on starting to read regularly, it’s better not to put yourself under pressure. Don’t like this book? That’s okay. Just start another one. Do you feel like you’re reading too slowly? It just seems so. You’re doing great.

Most of the time, reading is about comfort and pleasure, but some books can really hurt or devastate, and not because they were written badly (this is another kind of readers’ pain you will discover after some time). So, don’t be afraid if you come across such a book.

How to create a reading list if you’re a book blogger using the xTiles reading template?

A chaotic reading list or no reading list is a skeleton in a book blogger’s closet. However, it’s not rare because there’s too much on their mind except for planning and tracking their recently read books.

People who read and review books for a living need ready-to-use reading list templates even more than anyone else. Such a template will help them work on their content to publish it regularly.

Start by taking down all books you want to read. That pile of books near your bed probably should go first. However, prioritizing depends on your preferences and your audience. If you interact with them to know what they want to learn next, you will avoid the torment of choice.

It’s important to update your reading list according to recently published books to provide your audience with relevant content.

However, a reading list template won’t be enough to plan your content uploading effectively. You may try our other templates to get the best results.

Public Research

Project Management

Project Management Plan Template

Whether it’s software development, large marketing campaigns, or small interior design renovations, project management is essential for delivering a great product on time, especially when multiple projects are being developed simultaneously. However, no matter how hard a manager tries, or how consistent the team is in maintaining communication and staying aligned, there might be instances where something gets missed or overlooked.

Project management templates come to the rescue by helping teams start their projects on a solid foundation, execute them effectively, and finish them on time. These templates may seem like a lot for a single document, but when tailored to the project’s specifications, with the team’s abilities and expertise in mind, they become powerful tools for reaching success.

The xTiles Project Management Plan Template is a ready-to-use framework that provides a blueprint for your project, regardless of its specifications or the industry you’re in.

What is a project management plan?

A project management plan is a formal and approved document created by a project manager, incorporating inputs from the project team and key stakeholders. Its purpose is to define how the project will be executed, monitored, and controlled. 

The plan can take the form of either a concise overview or a detailed document, encompassing baselines, subsidiary management plans, and other relevant planning materials. Its primary objective is to guide the project team in achieving the project’s intended scope within the defined parameters.

Throughout the project’s execution, performance is measured against the performance measurement baseline outlined in the project management plan. Any deviations from these baselines are promptly addressed by the project manager, who makes necessary adjustments to correct the course. If these adjustments prove ineffective in rectifying the deviations, formal change requests to the baselines are initiated.

The project manager invests significant effort in ensuring that the baselines are attained, ensuring that the project sponsor and the organization can fully benefit from the project. Beyond proficient planning skills, a successful project manager excels in effectively controlling the project’s progress, ensuring the timely delivery of project deliverables, and adhering to the provisions outlined in the Project Management Plan.

Why Use a Project Management Plan?

A project management plan helps teams gain a comprehensive understanding of the project and guides its successful execution. Successful projects require attention to many aspects, such as manpower, resources, risk management, communication, and talent. A plan aligns all these factors, ensuring smooth execution. Here are the essential reasons why incorporating project management plans is crucial for successful projects and teams:

  1. A project management plan provides a clear and comprehensive outline of the project’s goals, timelines, and benefits, ensuring all stakeholders are fully engaged and supportive of the project’s objectives.
  2. It helps identify the specific tasks and activities required to complete the project successfully.
  3. It helps determine the right expertise and skills needed to develop the project, maximizing the chances of accomplishing project goals efficiently and effectively.
  4. It enables meticulous evaluation of potential risks that may arise throughout the project’s execution.
  5. It ensures effective communication within the team, critical for project success.
  6. It helps set clear and achievable goals and milestones.
  7. It ensures efficient management of financial resources, raw materials, manpower, and other assets.

How to create a project plan using the xTiles Project Management Plan Template?

A project plan may be for different kinds of projects. Whether you’re looking for project management in healthcare, project management marketing, or project management for freelancers, you may go for a pre-designed template to save time.

Utilizing the xTiles Project Management Template and a detailed step-by-step guide ensures you create a comprehensive plan highly useful for the team, stakeholders, and everyone involved.

Step 1: Prepare for Planning

Some think that planning is the first stage of any project. However, in order to be effective, planning needs to have an envisioned base. In other words, a project manager needs to discuss with the client and the team all the aspects of the project.

  1. Gather the information:

Gather together all the information you already have about the upcoming project. This section is very important because it helps to identify from the first glance your current project. Later, when you have more information, add everything that may be necessary.

Also, don’t forget to record your resources and everything you need for successful project development. Put together links and files that you and the team need for inspiration, your competitors and what you like about their projects, and any kind of files and notes to ensure people involved understand where to move.

Even before diving into a detailed brainstorming session, take the necessary steps to envision your plan.

  1. Try to understand the problem and envision it from different angles: 

Take the time to understand the problem you’re aiming to solve with your project. Analyze its various aspects and implications to gain a comprehensive perspective. However, remember that it’s always better to focus on one specific problem than trying to save the world with your project.

  1. Generate diverse ideas: 

However, during the brainstorming session, encourage the generation of a wide range of ideas. Don’t restrain people’s imagination and accept even the wildest ideas. You and the team will consider them later to choose what will work best, what may work, and what probably won’t work in any circumstance.

Encourage your team to think outside the box and aim high. Embracing bold ideas can spark innovation and lead to breakthrough solutions. Remember, it’s easier to scale back a daring concept than to transform a safe idea into something extraordinary.

Also, during brainstorming sessions, it’s always good to explore different approaches and solutions as they can address various scenarios related to the problem from different perspectives and help the team generate more ideas.

You may make your meeting notes in the xTiles Project Management Plan Template to have everything at hand at any stage of your project.

  1. Discuss and vote: 

After every idea is carefully written down, allocate time for team discussions to evaluate and assess the proposed solutions. You may take a break for a couple of days, so everyone can think of these ideas and decide how they feel about them. Usually, straight after the brainstorming sessions, people’s minds might be overwhelmed with the amount of what they heard and saw.

It’s important to encourage open dialogue within the team and everyone involved in the brainstorming and allow team members to voice their opinions and insights. 

Try not to accentuate who came up with certain ideas during the discussion to avoid confusion and disagreement. You may use a voting system to prioritize ideas and determine which ones should be explored further in a democratic way so that everyone feels responsible and involved, even if the chosen idea isn’t theirs.

  1. Visualize and align: 

Create visual representations of the chosen ideas to enhance understanding and alignment within the team and everyone involved. Make sure everyone understands the idea. 

The visualization may include diagrams, charts, sketches, or any other type of content to depict the proposed solutions and their potential impact in the most representative way.

When working on this part of the project, imagine that you need to explain your idea to someone who hasn’t attended your brainstorming session. That’s why it has to be clear, eliminating the possibility of misunderstanding.

Step 2: Plan and Prioritize

Once you have the idea or ideas for the project and you have gathered early feedback, the time to prioritize and plan your project effectively starts.

  1. Incorporate feedback: 

Take into account the feedback received from early testing, discussions, or stakeholders. Every thought is important, and sometimes it’s better to spend extra time getting feedback than rush into action and then realize that something was wrong from the beginning.

Analyze all the feedback you managed to get carefully, considering the success metrics and objectives of your project. Use this information to prioritize what features, tasks, or components should be included in the project.

  1. Establish priorities and build a roadmap: 

Now it’s time to prioritize your tasks to allocate resources and focus on the most critical aspects of the project. You may use the Time Matrix to ensure nothing distracts you and the team from the important tasks.

Determine the order in which the identified elements should be addressed. Consider their importance, impact, and feasibility. 

Create a roadmap that outlines the sequence of activities and their interrelationships. This will provide a visual representation of the project’s timeline and enable effective planning and coordination.

  1. Share and update: 

Share the project plan and roadmap with the relevant stakeholders and team members. Ensure everyone has access to the necessary information to stay informed and contribute effectively. 

Regularly update the project’s plan and dashboard to reflect any changes, progress, or new insights.

Using the xTiles Project Management Plan Template allows you to make changes quickly and update everyone on them.

Step 3: Execute and Stay on Track

After you’re done with planning your project, you can start executing it. This stage is incredibly important as it is where all the key decisions are made. However, tracking your progress, analyzing it, discussing it with the team, and reviewing intermediate results will help you go through this stage smoothly.

It’s necessary to execute the tasks outlined in the plan while constantly maintaining a focus on the project’s objectives, and that’s where a project management plan template will seamlessly help.

Here are the steps you need to follow in order to successfully deliver the product:

  1. Initiate execution: 

With your plan in place, begin implementing the project. Assign roles and responsibilities to team members, ensuring clear accountability. You can do it right in your xTiles Project Management Plan, and the assignees will get notifications about their tasks.

  1. Maintain consistency: 

To ensure successful delivery, it’s crucial to stay on track throughout the project. Regularly monitor progress, track milestones, and review performance against the established plan. Identify and address any deviations or obstacles promptly to maintain consistency and momentum.

  1. Decision-making structure: 

Establish a clear decision-making structure within the project team. Define who will have the authority to streamline the decision-making process and ensure that decisions align with the project’s scope and goals.

  1. Project oversight: 

Maintain open lines of communication and regular check-ins to monitor the overall progress and health of the project. This includes reviewing key metrics, addressing potential risks or issues, and making adjustments as needed.

Remember that good and refreshing ideas may emerge at any stage of the project. 

Keep stakeholders informed and engaged to ensure their continued support throughout the project.

Step 4: Deliver Your Business Strategy Update

Congratulations! It’s time to ship your project and share the progress and outcomes with relevant stakeholders. Follow these steps to effectively deliver your business strategy update:

  1. Prepare for reporting: 

Gather all the necessary data, metrics, and insights to report on the progress and outcomes of your project. If you were consistent with making changes, this part is almost done and may need only a few finishing touches. 

Ensure that you have a clear understanding of the key achievements, results, and impact that you want to communicate.

  1. Craft the update: 

Create a concise and engaging update that highlights the important milestones, accomplishments, and key insights from the project. Use visuals, such as charts or graphs, to present the data effectively and make it easier for stakeholders to understand.

  1. Update statuses: 

Change the status of tasks, milestones, or project components to “DONE” or a similar indication of completion. This step not only provides closure but also helps in tracking and organizing future projects.

Step 5: Improve Your Project Plan

When the project is finished, you need to reflect on the experience to learn from. That’s how you ensure growth in the team and improve your own ability to execute projects.

  1. Evaluate lessons learned: 

Reflect on what went well, what could have been better, and the lessons learned throughout the project with your team. Encourage everyone to share their experience and insights freely to prevent similar issues in the future.

Discuss the challenges you encountered during the project and identify the best practices that helped overcome them. 

  1. Capture lessons: 

Document the valuable lessons learned from the project. Record them in a centralized location where everyone can easily access them. Include details about the challenges faced, the solutions implemented, and the outcomes achieved. This documentation serves as a valuable resource for future reference and learning.

  1. Share with peers: 

Share the lessons learned with your peers and colleagues. This can be done through presentations, reports, or team meetings. By sharing your experiences and insights, you contribute to a culture of knowledge sharing and help others avoid similar pitfalls or leverage successful strategies.

Project plan motion design

Project Overview

Project Overview Template

He who owns the information owns the world. In project management, who owns the information leads successful projects, establishes a healthy work environment inside a team, and delivers products on time.

The project overview is a tool to monitor how your project is going, its key metrics, milestones, challenges it faces, etc. It is a starting point for effective decision-making for a manager.

A project overview template is a shortcut to easy and successful tracking projects, especially if there are a couple of them being developed simultaneously. Being a pre-designed framework, the template allows managers, team members, and stakeholders to keep track of up-to-date data about projects current status.

The xTiles Project Overview Template is a ready-to-use template for a wide variety of cases and projects with various customization options, the ability to share with anyone on the internet, and quick access from mobile devices while on the run.

Additionally, we offer you a project overview example and a brief yet comprehensive guide on how to create your own statement.

What is a project overview?

A project overview statement serves as a concise and informative document that outlines the key elements of a project. It includes a brief but comprehensive description of the project, its purpose, objectives, and anticipated outcomes. 

That document’s main purpose is to ensure that everyone involved has a shared understanding of the project’s fundamentals before detailed planning can be started and nothing gets missed.

Similar to a Project Charter or Project Brief, the project overview statement plays a crucial role in garnering support and paving the way for the project’s progression into the execution phase. 

Produced during the initiation stage, it serves as a high-level summary of the project’s scope and aims to align all involved parties. It helps teams and managers easily encompass and showcase the following key elements of a project:

Project purpose: Clearly articulates the underlying reason and motivation for undertaking the project.

  1. Project purpose

It clearly articulates the underlying reason and motivation for undertaking the project.

  1. Business need

It identifies the specific business problem or opportunity that the project aims to address or leverage.

  1. Objectives

It clearly defines goals and desired outcomes that the project seeks to achieve within a specified timeframe.

  1. Budget and resources required

Outlines the estimated financial resources required for the successful implementation of the project. Also, identifies the necessary personnel, equipment, materials, or other resources essential for project success.

  1. Risks and issues

It highlights potential risks, challenges, and known issues that the team might face while implementing the project.

  1. Expected results

It provides an overview of the anticipated deliverables, outcomes, or benefits that will be realized upon successful project completion.

It is advisable to keep the project management overview limited to a single page or a couple of slides. This brevity encourages clarity and precision, allowing the document to convey essential information concisely. By adhering to this page restriction, the overview statement remains an accessible and easily digestible reference for stakeholders.

Project overview benefits

Many people wonder why a project overview is essential when it’s easier and faster to communicate the needed information verbally. However, documenting projects from the initial idea to their completion is important for people involved, managers who establish workflow, and stakeholders who need to see what is going on.

Apart from regulatory compliance, a project overview offers numerous benefits to all parties involved:

  1. A project overview helps to maintain focus

It keeps the team, manager, and stakeholders focused on what is truly important, saving them from excessive details or losing sight of the project’s objectives.

  1. It enables risk management

It allows managers to identify and estimate potential risks and plan strategies to address them effectively.

  1. It helps to prevent mistakes

By outlining high-level tasks and their interdependencies, the overview helps prevent errors and misunderstandings.

  1. It establishes expectations

It sets the tone for the entire project, establishing clear expectations for your team.

  1. It facilitates communication

It eases the communication between everyone involved and especially those who are not directly involved in the project’s day-to-day operations.

  1. It promotes alignment

By providing a clear direction and outlining desired outcomes, the project overview ensures that everyone involved understands and works towards the same goals.

Project overview template

A project overview template is a pre-designed structure or format that provides a framework for creating project overview statements. Consider it a starting point for easy and efficient organization and presentation of your project key information.

It offers numerous benefits to those who have previous experience in writing project overviews and those who have never done anything like this before.

  1. A ready-to-go project overview template ensures the consistency of your document. By offering a standardized format, the template makes it easier to understand and compare different sections or pages.
  2. It saves time and effort, eliminating the need to create an overview statement from scratch every time. It allows project managers to focus on what is important, the content and details, rather than the document’s layout.
  3. A template ensures that no important point is overlooked. That’s why it’s important to use only well-designed and well-structured templates or those that enable easy editing and customization.
  4. It also helps to maintain clarity and consistency throughout the whole document, improving readability and comprehension. The template guides project managers in organizing their thoughts and ensures that the project overview statement is structured in a coherent and easy-to-follow manner.
  5. It helps project managers communicate effectively with stakeholders, as they provide a structured format that conveys information concisely and accurately. 
  6. Using templates built on industry best practices or proven project management methodologies, project managers  can ensure that their overview statements adhere to established standards, improving the quality and effectiveness of communication and decision-making.
  7. It is flexible and easy to customize. Users can choose between using a standardized structure or customizing the template according to their project specifications.

How to write a project overview effectively using the xTiles Project Overview Template?

A project manager must create a compelling project overview statement that captures the project’s essence and secures necessary approvals at the initial stage. That’s how misunderstandings and ambiguities at later stages can be at least minimized.

Clarity and conciseness are key for any project overview. When writing yours, avoid excessive fluff and prioritize conveying essential project details efficiently. The skill to tell everything about your project with a one-page document comes with time and practice. However, a project overview template will help you start and save time.

Here are the tips to help you write a successful overview:

  1. Keep your project overview concise

Since you have limited space, you need to focus on using it effectively. You need to summarize the project’s key aspects efficiently, considering every detail you want to add twice. 

It’s crucial to omit using excessive details or information overload. Otherwise, your potential readers might be overwhelmed, and the key points of your project might stay unnoticed among all the details you decided to provide. 

It’s often helpful to start working on the overview on your own. Draft it yourself before involving the team. Collaborative input is crucial, but starting with an initial draft helps expedite the process and prevents prolonged iterations.

When working on the overview, strive to articulate every single detail using the language of your clients or users to create resonance.

Tailor your language and terminology to resonate with your intended audience. Use business-oriented terms unless your senior leadership team expects technical jargon.

  1. Highlight the problem or need you want to resolve by developing your product/project

Emphasize the problem or opportunity the project aims to address. This should be prominently stated at the beginning because it’s the core reason you and your team are undertaking the project in the first place.

If applicable, include a reference to the project timeline, especially if there is a fixed deadline tied to solving the problem or fulfilling the need. 

If you struggle to articulate the problem, you may consult with the relevant stakeholders or your teammates to ensure everything is represented accurately.

  1. Project description

Tell a bit about what sets your project apart and how it intends to address the identified problem or need. Highlight the specific goals you aim to achieve through the project. However, resist the temptation to make a long list of what makes your project so special. A few of the most important or intriguing (something your competitors can’t boast of) points will be enough.

  1. Include project goals

Dedicate a section to outline the project goals. Keep this section brief, consisting of a couple of bullet points, just like you did with the project’s description.

Consider including project deliverables as objectives, ensuring they are measurable and specific. Yes, precision is the best friend when writing a project overview statement.

  1. Provide ideas

Finally, offer ideas to develop the project. There might be dozens of ideas your team produced during the brainstorming sessions. However, include only those relevant to your current project stage and have potential. Also, remember that your team has to have the resources to implement them. 

You may also discuss assumptions, risks, challenges, constraints, known issues, or any other factors influencing the project’s progression from this point.

  1. Set tasks

Provide a list of tasks to showcase your plan. Remember that when tasks are feasible, they prove your sustainability and reliability. And tasks that can’t be accomplished with the current resources might play a cruel joke on your team even though they seem very attractive and convincing.

Also, you may define the success criteria for the project. How will you determine project success? 

Align the success criteria with project requirements, ensuring that meeting the requirements signifies achieving the goals and meeting the criteria. Make the success criteria measurable for easy tracking and project closure.

  1. Review and iterate

Ensure that all the above sections still fit within the space of one page. Avoid reducing the font size. If space permits, add a list of project milestones and key dates without delving into a comprehensive project schedule.

Show the document to your team before seeking approval from stakeholders. Your teammates might add some improvements or see mistakes you overlooked.

  1. Obtain approval

Once the document is complete, use it to seek approval from the project sponsor and other key stakeholders with decision-making authority. Their endorsement is crucial to proceed with the project.

However, be ready that you might not get the approval the first time, especially if writing a project overview was a new experience.

Project Hub

Project Dashboard

Project Canvas

Project Canvas Template

The project canvas is a valuable tool that enables teams to collaboratively define and convey the vision and strategy behind a project they are embarking on. This document also facilitates effective communication with clients, stakeholders, and everyone involved.

A project canvas consolidates various aspects of a project to become a specialized knowledge base, offering quick answers when uncertainties arise. It is to streamline the team’s efforts by providing structure, gathering information, and highlighting key points. 

With a project canvas template, the time-consuming task of structuring and collecting information is significantly reduced. The template allows you to focus solely on inputting your data.

xTiles presents a readily available and free Project Canvas Template that can be easily shared with colleagues and anyone who needs to access it. Our template is designed to be flexible and adaptable to meet the specific needs of different projects, products, and teams.

A project canvas template: when to use it?

Typically, teams or individual creators use a project canvas template in the early stages of product development to help people involved, clients, and stakeholders to be on the same page and facilitate discussion around the project.

However, it can be beneficial to use the project canvas at various stages throughout the product development journey, from initial idea to launch and beyond. The xTiles Project Canvas Template was built upon the idea that the impulse to start may be stronger than a desire to make documentation.

The project canvas template serves multiple purposes:

  1. Idea generation: 

When the bulb near your head has appeared, but you’re unsure about the direction or desired outcomes, the project canvas template helps you turn your thoughts into something that can be described with words or visual content or by combining these two, and then it helps effectively communicate your vision to others.

  1. Planning: 

Once your idea is refined and well-defined, the planning stage begins, or at it least it should go next. This involves making numerous decisions and engaging in discussions, sometimes productive and sometimes useless, yet all of this is necessary to come up with a plan that will make your idea work. 

The project canvas template provides a working plan that keeps the team aligned and motivated to deliver their best work.

  1. Alignment around a shared vision:

In product development, there are various stakeholders with different motivations, and there is a team of different people with various visions. However, it is crucial for everyone involved to be united around a shared vision. The canvas project management template ensures that everyone understands what they are working on and how they should be working to make the project successful.

  1. Task prioritization: 

Effective prioritization is the secret behind successful and timely product delivery. Even though everyone knows that it is highly important to establish the workflow upon prioritizing tasks, not everyone follows this rule, which sometimes has consequences. 

With the project canvas template, you can define the most important tasks, distinguish what is less important, and identify potential distractions that may seem important but divert focus from the product’s real goals and purpose.

  1. Communication: 

Sharing and discussing the project canvas with your team enhances understanding and collaboration. Sometimes, words alone may not suffice to express ideas or concepts. The online nature of templates allows for creativity in communication, such as using visuals, memes, or even songs to convey the desired vibe and information.

How can you create a Project Canvas?

Creating a project canvas before you and/or your team embark on your journey is much simpler than dealing with the consequences of starting a project without a clearly defined and discussed idea. Additionally, when it only begins, you have less data to deal with, which means that if you add here a pre-designed template, it won’t take you much time to accomplish a document that will guide everyone involved during the whole project and help newcomers to jump in quicker.

We have a short guide to help you create your own document so you can begin your project as soon as possible and without fear that you will have a lot to sort out later.

The xTiles Project Canvas Template is highly flexible and can be adapted to suit the specific needs and features of your project or your vision for its destiny. You have the freedom to add or remove sections, add visual content, or embeds to express your intent better.

To create a project canvas for your project using the xTiles template, follow these simple steps:

  1. Start with determining the name of your product: 

Decide on a name for your product that is memorable and possibly has a subtle connection to the problem it claims to resolve. The name plays an important role in creating a cohesive product.

Additionally, when something has a name, it feels more real and serious. This factor may be more important for a team and stakeholders at the early stages than for potential clients.

  1. Name everyone involved:

Create a list of all participants. That will help to understand who is responsible for the project’s development. If other teams have to interact with you regarding your project or a new team member needs a quick guide, they can find the information in your project canvas effortlessly.

  1. Then define the business goals: 

What do you and your team need to achieve to have the right to call your project successful? Identify the key goals of your project, such as revenue growth, market share, or customer retention. If you already have a product roadmap, this step won’t take much time.

You may even establish key metrics that will help you measure whether you have achieved your goals or not. It’s important to ensure that the metrics are realistic to maintain motivation.

  1. Identify the target audience/users: 

Determine who your product is intended for and who you aim to help or satisfy. Understanding the problem your product addresses is essential in defining your target customers. Ongoing research is necessary to stay updated with market trends and user behaviors.

Also, it’s important to be precise when determining your potential audience. Very wide, with no clear frames, conceptions might distract a team from delivering the needed product.

  1. Plan your next steps: 

Outline the actions you will take to start implementing the ideas and goals. Remember that this section should naturally grow from the “Goals” section in order to be useful for the idea.

  1. Define what results you want to get: 

Envision what your completed product will look like and what it will bring you in the long run. Review the data you have gathered and ensure that all points in your project canvas are aligned with each other to avoid confusion or ambiguity.

  1. Share your finished project canvas with everyone involved:

Once you have created the document, share it with all relevant stakeholders to gather feedback. It’s possible that after their review, you may need to refine or modify certain parts of the document. Once the document is validated, make sure to utilize it effectively and avoid letting it be forgotten or overlooked during the project development

Progress page

Productivity Planner

Productivity Planner Template

Is productivity something you can plan? Certainly! A productivity plan will help you schedule your work, tasks, meetings, and other activities and keep you motivated throughout a day, week, or month to keep moving forward and put ticks near every point of your plan.

Today, digital planners slowly but steadily win the fight,  and analog ones become rudiments. Productivity planner apps and online productivity planners don’t take up space in your bag, are always with you wherever you go, and are easy to edit and customize. They ensure that important commitments are not overlooked in a more convenient way and allow people to stay informed about their colleagues’ plans and schedules without messaging or conversation.

xTiles Productivity Planner Template will help you stay productive without draining you out. Having a flexible and easy-to-customize productivity planner ensures you can adapt to any changes and unexpected challenges as quickly as possible.

What are Productivity Planners?

Productivity planners are tools or systems designed to help individuals manage their productivity and stay organized while feeling comfortable. They provide a structured way to track schedules, tasks, projects, and goals, allowing users to prioritize and manage their time effectively. 

The productivity planner was invented by Gustav Grossmann in the 1930s. Grossmann claimed that following his instructions for using the planner could lead to increased productivity and a more “logical” lifestyle, and he wasn’t wrong, even though people still continue experimenting with planners and approaches.

Daily productivity planners became a huge thing in the 1980s when ring-binder files with calendars, contacts, task lists, and note pages gained popularity. Since then, the landscape has evolved, and numerous software tools and mobile applications now replicate the functionalities of traditional analog planners, keeping teams and projects synchronized.

In today’s fast-paced and uncertain times, productivity planners have gained significance as they offer a centralized location to consolidate various priorities and responsibilities. With the prevalence of remote work and dispersed teams, keeping track of project progress and meeting schedules can be challenging. Productivity planners provide a solution by enabling individuals and teams to stay organized, focused, and on track.

Why Should You Use a Productivity Planner?

Using a productivity planner, whether we speak about a digital one or an analog one, offers several benefits that may significantly improve your effectiveness and have an overall impact on your well-being. Some of them might not come overnight, which is perfectly okay because productivity planners are supposed to work in the long run.

Here are some compelling reasons to incorporate a productivity planner into your routine:

  1. Effective schedule management: 

A productivity planner allows you to manage your usual schedule more efficiently. It also allows you to adapt to changes quickly and with less resistance. It shortens the amount of time and effort you have to invest in managing it on your own, relying solely on your memory. You can organize and prioritize your appointments, tasks, and deadlines, ensuring you won’t forget any of them.

By having a clear overview of your commitments for the following week or month, you can optimize your time and use each day better. 

  1. Increased Productivity: 

A planner helps you become more productive in performing your usual tasks by providing structure and accountability. And when you manage your everyday tasks better, you get extra space for something you’ve been thinking or dreaming about for a long time. You can stay focused and motivated easier by setting clear goals, breaking them down into actionable tasks, and tracking your progress. 

  1. Sustained Motivation: 

Utilizing a planner helps you establish objectives and stay motivated to achieve them. By visualizing your goals and mapping out the necessary steps, you create a roadmap for success. Additionally, you can employ a rewards system where you treat yourself to something you desire once you reach a milestone or accomplish a significant task.

  1. Better Organization and Memory: 

A productivity planner serves as a central hub for all your important information. You can jot down reminders, capture fleeting thoughts, and record vital notes. This improves your organization and ensures that important details are not forgotten. With everything in one place, you can access information quickly and efficiently.

  1. Reduced Stress and Overwhelm: 

Planning helps alleviate stress and overwhelm. Many people feel pressed because they can’t clearly see what is waiting for them or what they need to do. And if you’re a person who’s too shy to ask for the second time, a thorough productivity plan may be your best support. 

A clear plan of action can mitigate the anxiety caused by uncertainty and chaos. When you know what needs to be done and have a roadmap to follow, you can approach your tasks with greater ease and confidence. When we speak about working on a team, a clear productivity plan allows people, especially newcomers, to be more independent within their new team.

How to Make a Productivity Planner?

Incorporating a productivity planner into your daily routine can unlock your full potential, achieve your goals, and lead a more fulfilling life. However, it’s important to remember that a productivity planner is a tool that works best when tailored to your specific needs and preferences. In other words, an incredible, best-in-the-world productivity plan that helped your colleague or friend to achieve their goals might turn out to be totally useless in your situation. 

That’s why it’s crucial to experiment with different planning techniques at the beginning to find what resonates with you and adapt your planner to suit your unique style.

The xTiles Productivity Plan Template offers a framework for planning your next five weeks. However, you can easily customize it depending on the needed period of time and your visual preferences by adding content and/or embeds. 

Here are a few important details to keep in mind if you want to create the best for your productivity plan:

Set Goals

Goal-setting helps to reflect upon your ideal life. They are the base to build your productivity planner on.

Make your goals or goal an integral part of your productivity planner, and let them guide you toward a more purposeful and productive life. They are waiting for you at the finish line of your productivity planner.

Setting and envisioning your goals is crucial for effective prioritization and achieving a sense of fulfillment. While we may desire to do everything all at once because there’s no time and we need the results yesterday, it’s essential to recognize the importance of prioritizing and dedicating time to the most significant aspects of our lives.

To set your goals successfully and efficiently for your productivity planner, consider including the following steps to guide you through the process of turning your goals into reality:

  1. Establish the importance: 

Clearly articulate why a particular goal is essential to you. Be honest with yourself in answering this question. Understanding the significance behind your goals provides the motivation and drive needed to pursue them with enthusiasm and determination.

  1. Visualize the endpoint: 

Think about what achieving your goal will look and feel like, what outcome it will bring you. Probably, like you’re on the top of the world. Many people believe that visualizing the victory makes our brain think that it has finished and there’s no need to do something anymore, while in reality, it motivates and helps us plan. 

Paint a vivid picture in your mind of the desired outcome. This visualization helps clarify your objective and serves as a constant reminder of what you’re working toward.

  1. Break it down: 

Define actionable and manageable steps that will lead you to accomplish your objective. Once again, be honest with yourself about your abilities and capacities at the moment. Otherwise, you might risk leading yourself to failure and despair because your plan doesn’t work, while it couldn’t work in the first place because it’s too far from the real picture.

Breaking down your goal into smaller, bite-sized tasks makes it more attainable and less overwhelming. Each step completed, even the tiniest one, brings you closer to your desired result.

  1. Identify resources and challenges: 

Determine the resources you’ll need along the way. Compare them with the resources you have and/or can get. By acknowledging potential roadblocks in advance, you can ensure a smoother journey toward your goal.

You may consider using the quadrant view, such as the Eisenhower quadrant or SMART technique, to help you determine and prioritize your goals. They allow you to categorize your goals based on their importance and urgency, enabling you to focus on the most critical tasks first.

Embrace Flexibility

A productivity planner must be flexible to function as you require and help you adapt to changes quickly and effortlessly. On some days, you may only need a weekly overview to be productive, while on others, you may have to manage a million things going on non-stop and at the same moment. In this case, a daily layout to write them all down will be an intelligent solution to rescue you from chaos. If you’re stuck in this situation, you require a weekly and daily layout each week, while the monthly layout serves as a backlog to help you not miss something.

No two days are the sameThe last few years have taught everyone that things may shift quickly and dramatically overnight. Therefore, you require a planner to adapt to your changing needs to maximize productivity and save you from making everything from scratch once you need to edit your schedule.

You can find different categories of planners according to your needs in the xTiles Templates Gallery. It has daily, weekly, and monthly planners that have different features. You may combine a daily planner with a weekly planner to boost your performance, achieve creativity and reduce your stress level. Or you may combine them within one xTiles Productivity Planner Template.

Don’t Overwhelm Yourself

Tracking your time for a week is undeniably the easiest and most effective way to enhance your productivity. Without a clear understanding of how you spend your time, it’s challenging to accurately estimate task durations (which are often longer than anticipated).

Once you have tracked your time, the next step is time blocking, a powerful technique for planning and managing your time effectively. Time blocking involves dividing your day into specific blocks of time and allocating tasks or activities to each block. To begin, determine the optimal duration for your time blocks based on your ability to stay focused.

Once you have established the duration, decide what you will accomplish during each block. By tracking your time, you gain a realistic perspective on what can be achieved within each time block. This approach helps you maintain motivation and focus without becoming overwhelmed. You may highlight your blocks with different colors so it will be easier to recognize them. 

Remember, tracking your time provides invaluable insights into your productivity and allows you to make more informed decisions about allocating your time effectively. When combined with time blocking, it becomes a powerful strategy for optimizing your productivity and achieving your goals.

This site is registered on wpml.org as a development site. Switch to a production site key to remove this banner.